

I like to work on small projects at home, so this year I picked up a Raspberry Pi 3 Model B, a great model for home hobbyists like me. With built-in wireless on the Raspberry Pi 3 Model B, I can connect the Pi to my home network without a cable. This makes it really easy to put the Raspberry Pi to use right where it is needed.
At our house, my wife and I both have laptops, but we have just one printer: a slightly used HP Color LaserJet. Because our printer doesn't have a wireless card and can't connect to wireless networks, we usually leave the LaserJet connected to my laptop, since I do most of the printing. While that arrangement works most of the time, sometimes my wife would like to print something without having to go through me.
I realized we really needed a solution to connect the printer to the wireless network so both of us could print to it whenever we wanted. I could buy a wireless print server to connect the USB printer to the wireless network, but I decided instead to use my Raspberry Pi to build a print server to make the LaserJet available to anyone in our house.
Basic setup
Setting up the Raspberry Pi is fairly straightforward. I downloaded the Raspbian image and wrote that to my microSD card. Then, I booted the Raspberry Pi with an HDMI display, a USB keyboard, and a USB mouse. With that, I was ready to go!
The Raspbian system automatically boots into a graphical desktop environment where I performed most of the basic setup: setting the keyboard language, connecting to my wireless network, setting the password for the regular user account (pi), and setting the password for the system administrator account (root).
I don't plan to use the Raspberry Pi as a desktop system. I only want to use it remotely from my regular Linux computer. So, I also used Raspbian's graphical administration tool to set the Raspberry Pi to boot into console mode, but not to automatically login as the pi user.
Once I rebooted the Raspberry Pi, I needed to make a few other system tweaks so I could use the Pi as a "server" on my network. I set the Dynamic Host Configuration Protocol (DHCP) client to use a static IP address; by default, the DHCP client might pick any available network address, which would make it tricky to know how to connect to the Raspberry Pi over the network. My home network uses a private class A network, so my router's IP address is 10.0.0.1 and all my IP addresses are 10.0.0.x. In my case, IP addresses in the lower range are safe, so I set up a static IP address on the wireless network at 10.0.0.11 by adding these lines to the /etc/dhcpcd.conf file:
interface wlan0
static ip_address=10.0.0.11/24
static routers=10.0.0.1
static domain_name_servers=8.8.8.8 8.8.4.4
Before I rebooted again, I made sure that the secure shell daemon (SSHD) was running (you can set what services start at boot-up in Preferences). This allowed me to use a secure shell (SSH) client from my regular Linux system to connect to the Raspberry Pi over the network.
Print setup
Now that my Raspberry Pi was on the network, I did the rest of the setup remotely, using SSH, from my regular Linux desktop machine. Make sure your printer is connected to the Raspberry Pi before taking the following steps.
Setting up printing is fairly easy. The modern print server is called CUPS, which stands for the Common Unix Printing System. Any recent Unix system should be able to print through a CUPS print server. To set up CUPS on Raspberry Pi, you just need to enter a few commands to install the CUPS software, allow printing by other systems, and restart the print server with the new configuration:
$ sudo apt-get install cups
$ sudo cupsctl --remote-any
$ sudo /etc/init.d/cups restart
Setting up a printer in CUPS is also straightforward and can be done through a web browser. CUPS listens on port 631, so just use your favorite web browser and surf to:
https://10.0.0.11:631/Your web browser may complain that it doesn't recognize the web server's https certificate; just accept it, and login as the system administrator. You should see the standard CUPS panel:
opensource.com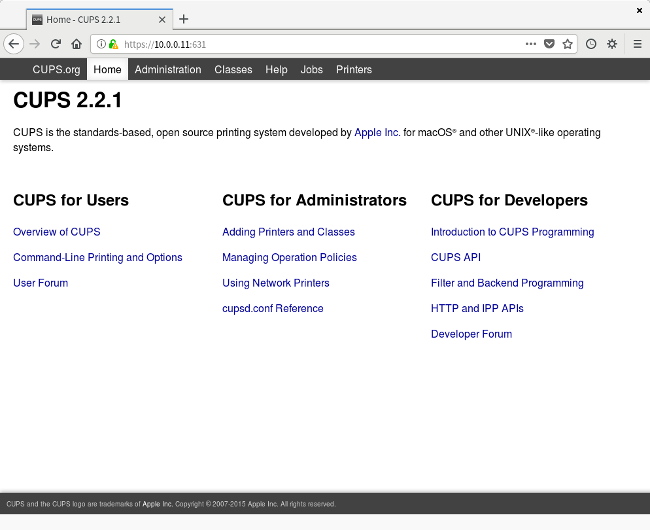
From there, navigate to the Administration tab, and select Add Printer.
opensource.com
If your printer is already connected via USB, you should be able to easily select the printer's make and model. Don't forget to tick the Share This Printer box so others can use it, too. And now your printer should be set up in CUPS:
opensource.com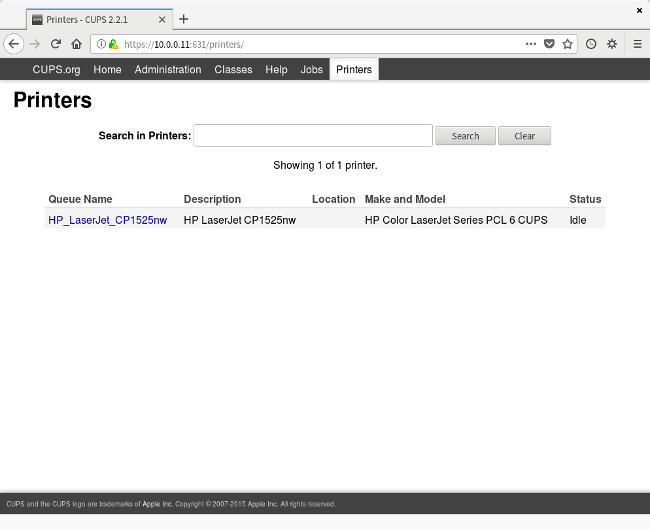
Client setup
Setting up a network printer from the Linux desktop should be quite simple. My desktop is GNOME, and you can add the network printer right from the GNOME Settings application. Just navigate to Devices and Printers and unlock the panel. Click on the Add button to add the printer.
On my system, GNOME Settings automatically discovered the network printer and added it. If that doesn't happen for you, you may need to add the IP address for your Raspberry Pi to manually add the printer.
opensource.com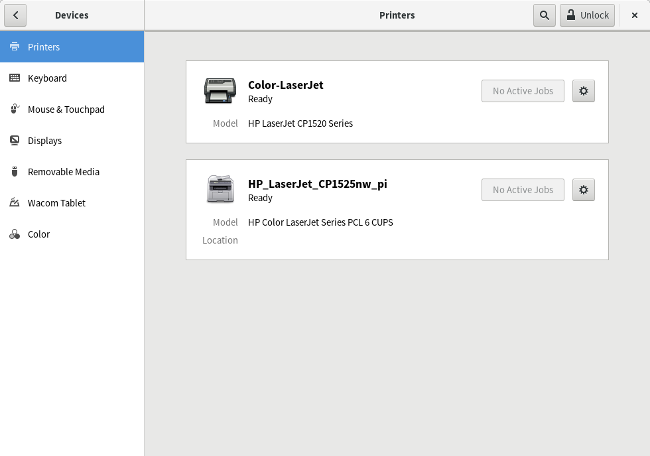
And that's it! We are now able to print to the Color LaserJet over the wireless network from wherever we are in the house. I no longer need to be physically connected to the printer, and everyone in the family can print on their own.


2 Comments