Elasticsearch is an open source, full-text search engine developed in Java. Users upload datasets as JSON files. Then, Elasticsearch stores the original document before adding a searchable reference to the document in the cluster’s index.
Less than nine years after its creation, Elasticsearch is the most popular enterprise search engine. Elastic released its latest update—version 7.2.0 —on June 25, 2019.
Kibana is an open source data visualizer for Elasticsearch. This tool helps users create visualizations on top of content indexed in an Elasticsearch cluster.
Sunbursts, geospatial data maps, relationship analyses, and dashboards with live data are just a few options. And thanks to Elasticsearch’s machine learning prowess, you can learn which properties might influence your data (like servers or IP addresses) and find abnormal patterns.
At DevFest DC last month, Dr. Summer Rankin—lead data scientist at Booz Allen Hamilton—uploaded a dataset of content from TED Talks to Elasticsearch, then used Kibana to quickly build a dashboard. Intrigued, I went to an Elasticsearch meetup days later.
Since this course was for newbies, we started at Square One: Installing Elastic and Kibana on our laptops. Without both packages installed, we couldn’t create our own visualizations from the dataset of Shakespeare texts we were using as a dummy JSON file.
Next, I will share step-by-step instructions for downloading, installing, and running Elasticsearch Version 7.1.1 on MacOS. This was the latest version when I attended the Elasticsearch meetup in mid-June 2019.
Downloading Elasticsearch for MacOS
- Go to https://www.elastic.co/downloads/elasticsearch, which takes you to the webpage below:
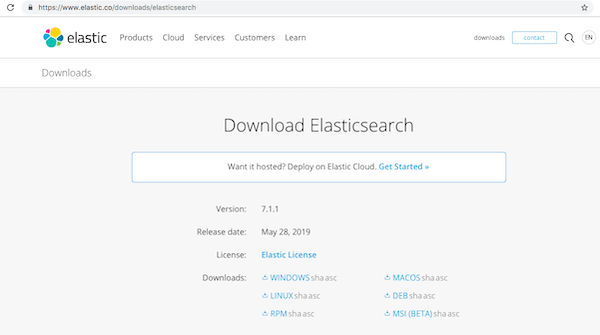
- In the Downloads section, click MacOS, which downloads the Elasticsearch TAR file (for example, elasticsearch-7.1.1-darwin-x86_64.tar) into your Downloads folder.
- Double-click this file to unpack it into its own folder (for example, elasticsearch-7.1.1), which contains all of the files that were in the TAR.
Tip: If you want Elasticsearch to live in another folder, now is the time to move this folder.
Running Elasticsearch from the MacOS command line
You can run Elasticsearch only using the command line if you prefer. Just follow this process:
- Open a Terminal window.
- In the terminal window, enter your Elasticsearch folder. For example (if you moved the program, change Downloads to the correct path):
$ cd ~Downloads/elasticsearch-1.1.0
- Change to the Elasticsearch bin subfolder, and start the program. For example:
$ cd bin $ ./elasticsearch
Here’s some of the output that my command line terminal displayed when I launched Elasticsearch 1.1.0:
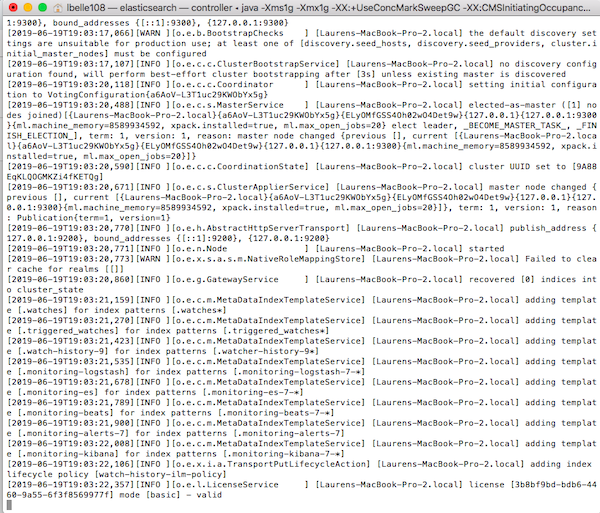
NOTE: Elasticsearch runs in the foreground by default, which can cause your computer to slow down. Press Ctrl-C to stop Elasticsearch from running.
Running Elasticsearch using the GUI
If you prefer your point-and-click environment, you can run Elasticsearch like so:
- Open a new Finder window.
- Select Downloads in the left Finder sidebar (or, if you moved Elasticsearch to another folder, navigate to there).
- Open the folder called (for the sake of this example) elasticsearch-7.1.1. A selection of eight subfolders appears.
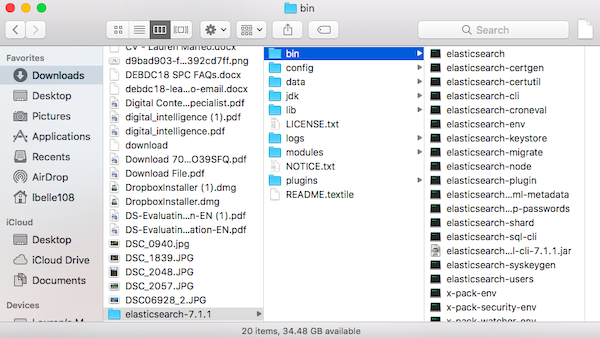
- Open the bin subfolder. As the screenshot above shows, this subfolder yields 20 assets.
- Click the first option, which is elasticsearch.
Note that you may get a security warning, as shown below:
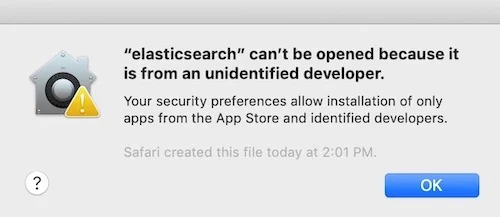
opensource.com
In order to open the program in this case:
- Click OK in the warning dialog box.
- Open System Preferences.
- Click Security & Privacy, which opens the window shown below:
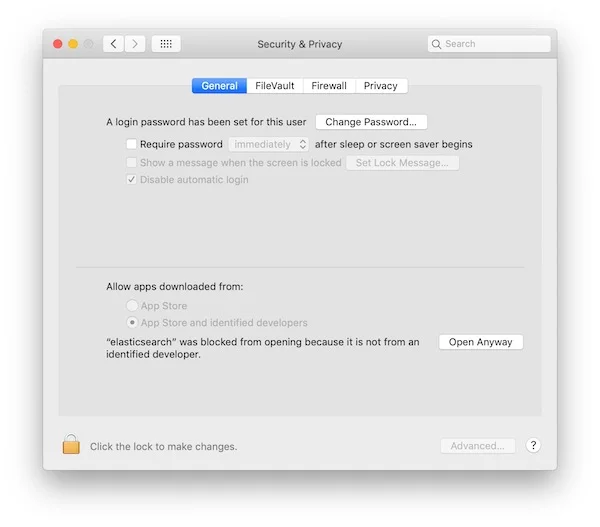
- Click Open Anyway, which opens the confirmation dialog box shown below:
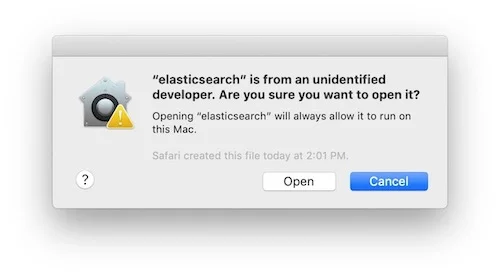
- Click Open. A terminal window opens and launches Elasticsearch.
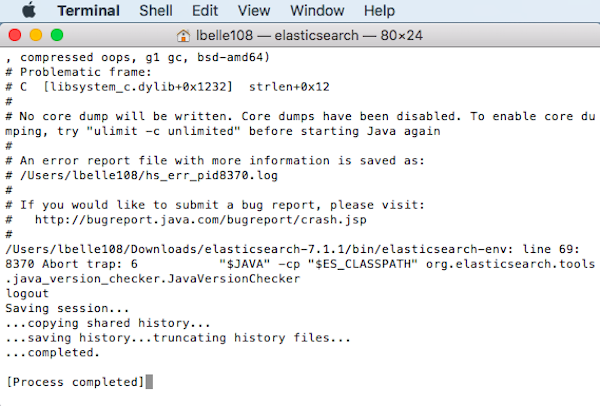
The launch process can take a while, so let it run. Eventually, it will finish, and you will see output similar to this at the end:
Learning more
Once you’ve installed Elasticsearch, it’s time to start exploring!
The tool’s Elasticsearch: Getting Started guide directs you based on your goals. Its introductory video walks through steps to launch a hosted cluster on Elasticsearch Service, perform basic search queries, play with data through create, read, update, and delete (CRUD) REST APIs, and more.
This guide also offers links to documentation, dev console commands, training subscriptions, and a free trial of Elasticsearch Service. This trial lets you deploy Elastic and Kibana on AWS and GCP to support your Elastic clusters in the cloud.
In the follow-up to this article, we’ll walk through the steps you’ll take to install Kibana on MacOS. This process will take your Elasticsearch queries to the next level via diverse data visualizations. Stay tuned!


1 Comment