I used WordPress for the first few years of my blog, but I really wanted to publish it entirely using GNU Emacs. I tried Org2Blog, but something was still missing and it felt unsatisfying. I tried to create a website to publish Emacs configs, which I named Haqiba (an unusual name, I know), first using Django and then Jekyll. Jekyll is cool and provides more control over content and publishing, but I still couldn't blog directly from Emacs, and Org mode was still missing. Although I tried adding Org mode support to Jekyll with jekyll-org, the framework seemed alien.
I finally found the solution I was looking for when I started using org-publish. I had stumbled upon org-publish earlier in my search, but at first, I thought it was too complex for blogging. But I gave it a try and have been happy ever since.
A lot of websites, including the ones on this list, use org-publish. For example, Bernt Hansen's Org mode—Organize your life in plain text not only uses org-publish to publish content but also offers a lot of information to give you a deeper understanding about Org mode.
Advantages of org-publish
Among its features, org-publish offers:
- Good control of configurations, CSS, media, and publishing
- Org mode formatting support
- Static file generation
- Easy deployment using GitLab and GitHub CI/CD
- Easy hosting via Apache/Nginx/file-server if you prefer copying files to a remote server instead of using GitLab Pages or GitHub Pages
- Version control
- Everything in GNU Emacs. Yay!
Basic setup
The Org-publish tutorial provides a basic template to get you started. I encourage you to go through the tutorial, as the basic setup in this tutorial is just enough to give you a brief understanding of org-publish. Start by configuring a variable called org-publish-project-alist in a publish.el file inside your myblog/ project directory. Place the following content in publish.el:
(require 'ox-publish)

(setq org-publish-project-alist
      '(("posts"
         :base-directory "posts/"
         :base-extension "org"
         :publishing-directory "public/"
         :recursive t
         :publishing-function org-html-publish-to-html
         :auto-sitemap t)
        ("all" :components ("posts"))))
The first line is an import statement. The variable org-publish-project-alist has a list of publishing projects to control publishing behavior. The first element, posts, is where all of the configurations specific to blog posts are done. For example, the property :base-directory configures the directory where all the posts (in Org format) are saved. Similarly, :publishing-directory configures the directory to save generated HTML files from Org files. Setting the :recursive property to t will recursively generate HTML from all the Org files within posts/ and its subdirectories. The :auto-sitemap property generates sitemap.html with your list of posts (you will tweak this below). Finally, :publishing-function org-html-publish-to-html converts all of the org files to HTML. While you can also define your own functions, for the purposes of this demo, use the built-in function provided by ox-publish.
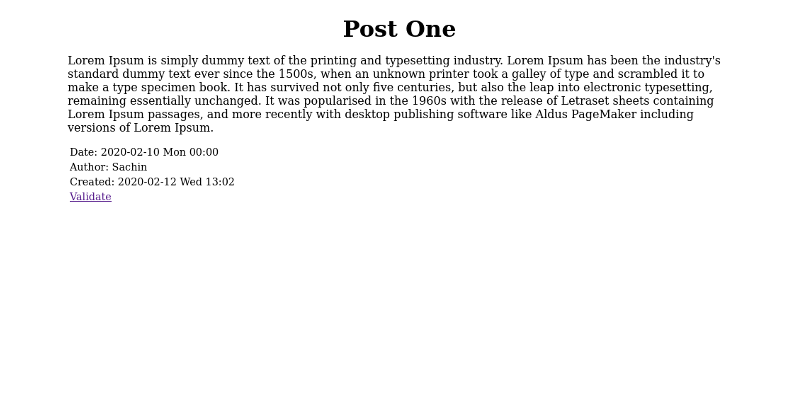
You need a few posts for testing, so create a file named posts/post_one.org and include some basic headers with some content. Use C-c C-e # default and C-c C-e # html to include default and HTML templates, respectively.
Your file should look something like this:
#+title: Post One
#+date: <2020-02-12 Wed>
#+author: John Doe
#+email: john.doe@example.com

Lorem Ipsum is simply dummy text of the printing and typesetting industry.
The setup is almost done. You can use M-x org-publish-all to generate the HTML and use make to handle publishing. Following is the content of the Makefile:
# Makefile for myblog

.PHONY: all publish publish_no_init

all: publish

publish: publish.el
	@echo "Publishing... with current Emacs configurations."
	emacs --batch --load publish.el --funcall org-publish-all

publish_no_init: publish.el
	@echo "Publishing... with --no-init."
	emacs --batch --no-init --load publish.el --funcall org-publish-all

clean:
	@echo "Cleaning up.."
	@rm -rvf *.elc
	@rm -rvf public
	@rm -rvf ~/.org-timestamps/*
Here is the current layout of the project:
myblog
├── Makefile
├── posts
│   └── post_one.org
└── publish.el
Executing make will generate sitemap.html and post_one.html in the public/ directory:
myblog
├── Makefile
├── posts
│   ├── post_one.org
│   └── sitemap.org
├── public
│   ├── post_one.html
│   └── sitemap.html
└── publish.el

Add CSS to your post
You can enhance the publish.el file to include elements like CSS or images. To try this out, add a section or project for CSS. The modified publish.el should look like this:
(require 'ox-publish)

(setq org-publish-project-alist
      '(("posts"
          :base-directory "posts/"
          :base-extension "org"
          :publishing-directory "public/"
          :recursive t
          :publishing-function org-html-publish-to-html
          :auto-sitemap t)
         ("css"
          :base-directory "css/"
          :base-extension "css"
          :publishing-directory "public/css"
          :publishing-function org-publish-attachment
          :recursive t)
         ("all" :components ("posts" "css"))))
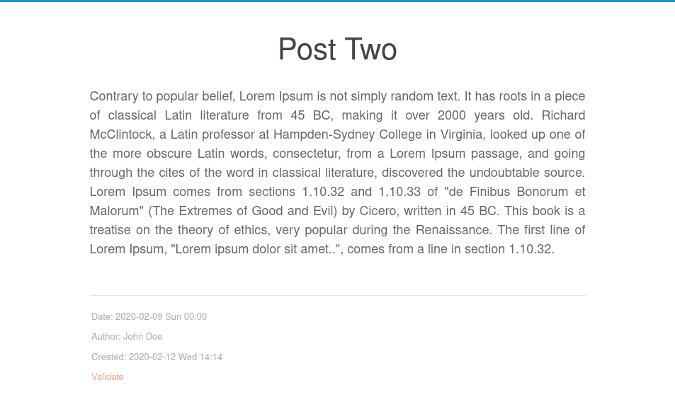
Create a new directory named css/ and copy the code from site.css into it. Now, create a second post to test the CSS.
#+title: Post Two
#+date: <2020-02-12 Wed>
#+author: John Doe
#+email: john.doe@example.com
#+HTML_HEAD: <link rel="stylesheet" type="text/css" href="https://opensource.com/../css/site.css" />

Lorem Ipsum is simply dummy text of the printing and typesetting industry.
In this example, the CSS is included using the #+HTML_HEAD: option. The org-publish tutorial recommends using the #+STYLE: option to include the stylesheet, but this did not work for me. Instead, I used #+HTML_HEAD:, as CSS support in the Org mode manual suggests.
Here is the layout that displays the css/ directory:
myblog
├── css
│   └── site.css
├── Makefile
├── posts
│   ├── post_one.org
│   └── post_two.org
└── publish.el
Having to include #+HTML_HEAD: in every post will soon become tedious. There are also multiple stylesheets in a website. To solve this issue, use the #+SETUPFILE: option:
#+title: Post Two
#+date: <2020-02-12 Wed>
#+author: John Doe
#+email: john.doe@example.com
#+SETUPFILE: ../org-template/style.org

Lorem Ipsum is simply dummy text of the printing and typesetting industry.
The org-template/style.org file includes the path to the stylesheet:
#+HTML_HEAD: <link rel="stylesheet" type="text/css" href="https://opensource.com/../css/site.css" />Following is the final layout:
myblog
├── css
│   └── site.css
├── Makefile
├── org-template
│   └── style.org
├── posts
│   ├── post_one.org
│   └── post_two.org
└── publish.el

Tweak the sitemap
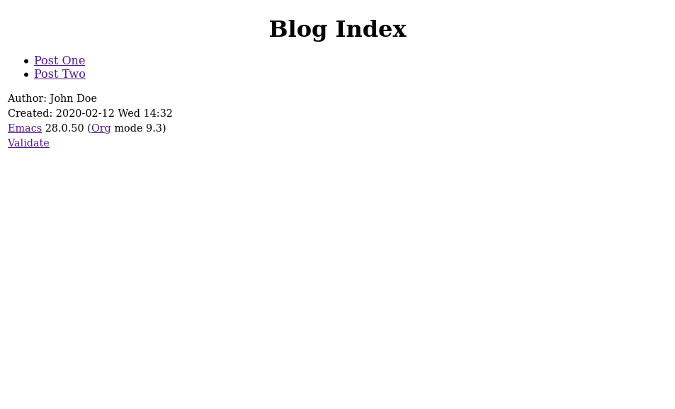
The final configuration will generate an index.html file instead of a sitemap.html file. Rename the title and configure the author and email across the website. Below is the finished publish.el file:
(require 'ox-publish)

(setq org-publish-project-alist
      '(("posts"
         :base-directory "posts/"
         :base-extension "org"
         :publishing-directory "public/"
         :recursive t
         :publishing-function org-html-publish-to-html
         :auto-sitemap t
         :sitemap-title "Blog Index"
         :sitemap-filename "index.org"
         :sitemap-style list
         :author "John Doe"
         :email "john.doe@example.com"
         :with-creator t)
        ("css"
         :base-directory "css/"
         :base-extension "css"
         :publishing-directory "public/css"
         :publishing-function org-publish-attachment
         :recursive t)
	 ("all" :components ("posts" "css"))))

If you are having difficulty setting up the project, you can view the entire project on my GitLab page.
Use an existing org-publish setup
It can become tedious to create blogs with org-publish from scratch. To make it easier, you can use my repository as a base template to publish your own blogs using org-publish.
To use it, clone the blog_template branch:
git clone https://gitlab.com/psachin/psachin.gitlab.io -b blog_template --single-branch myblogUse make to export Org pages to HTML. The public/ directory will have all the files required for hosting:
cd myblog
make
There is a sample blog post in posts/template.org for reference. You can use the .gitlab-ci.yaml file to publish the content of public/ as a GitLab Page.


Bonus tip 1
After executing the make command, the public/ directory will have all the files necessary for hosting a static site. All you have to do is to configure the webserver to serve this directory, or you can render the blog locally using Python's built-in http.server module.
With Python 3.6, use:
cd myblog/public
python -m http.server
If you have Python 3.7, you can serve public/ using:
cd myblog
python -m http.server --directory=public
Open http://localhost:8000/ in your web browser to view your website.
Bonus tip 2
This is my favorite tip. If an idea for a new blog post pops into my mind when I don't have time to work on it, I quickly create a draft using an Org capture template. I use the template definition below to open a buffer window by typing C-c c p. When I'm finished, I type C-c C-c to save the draft.
Copy this Elisp snippet into your existing Emacs configuration file (but make to sure the change the file path):
(defun create-blog-post ()
	"Create an org file in ~/source/myblog/posts."
	(interactive)
	(let ((name (read-string "Filename: ")))
	(expand-file-name (format "%s.org" name) "~/source/myblog/posts/")))

(setq org-capture-templates
	'(("p" "Post" plain
		(file create-blog-post)
		(file "~/.emacs.d/org-templates/post.orgcaptmpl"))))
Here are the contents of ~/.emacs.d/org-templates/post.orgcaptmpl:
#+title: %^{Name}
#+date: <%<%Y-%m-%d>>
#+keywords: draft
#+setupfile: ../org-templates/post.org

%?

#+INCLUDE: "../disquss.inc"
For a more thorough explanation of the Org capture template, you can watch my video demonstration.
Have you used Org mode to publish a website or blog, or do you plan to? Let us know your experience in the comments.


Comments are closed.