I'm always looking for new projects to create with my 3D printer. When I recently saw a new design for a computer numeric code (CNC) milling machine that mostly uses 3D printed parts, I was intrigued. When I saw that the machine works with open source software and the controller is an Arduino running open source software, I knew I had to make one.
CNC milling machines are precision cutting tools used in creating dies, engravings, and models. Unlike other milling tools, CNC machines can move on three axes: the Z axis moves vertically, the X axis moves horizontally, and the Y axis moves backward and forward.
DIY your CNC
While many of this CNC machine's components are 3D printed, several parts must be ordered to make it work. Its creator, Nikodem Bartnik, has a list of parts on the project's Thingiverse page along with links to download the 3D printed parts' STL files.
I ordered the necessary parts and started the wait. They shipped from overseas, so some of them took about a month to arrive. In the meantime, I 3D-printed the other parts.
The CNC machine is built on an Arduino controller running the open source GRBL motion-control software. The GRBL controller receives CNC G-code (a text-based list of instructions for the CNC mill) and translates it into motion by driving the stepper motors. The machine has one stepper for the Z axis (up and down), one stepper for the X axis (left and right), and two steppers for the Y axis (backward and forward). The GRBL website has documentation for loading GRBL onto the Arduino board.
I won't go into details on the CNC hardware assembly, as Nikodem has a series of videos that explain it in detail. Instead, I'll focus on the open source software that can be used to create designs for and run the CNC machine. Along with Fedora as my base operating system, the other pieces of open source software I used are GRBL, Inkscape, jscut, and CNCjs.
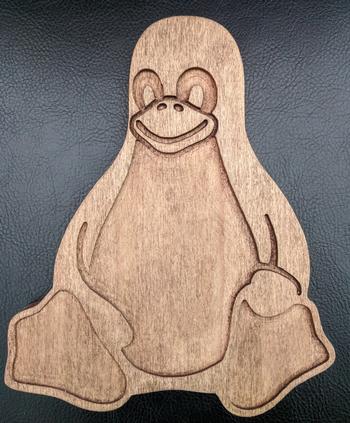
For this tutorial, I'll explain how to create a CNC-milled, wooden version of Larry Ewing's Linux Tux logo.
Make your files
The first step toward making a wooden Tux is downloading a black-and-white version of the logo in PNG format from Wikimedia Commons.

So the Tux logo can work on the CNC machine, convert the Tux PNG file to an SVG file with Inkscape by dragging and dropping the PNG file into the Inkscape window. Then use Inkscape's Trace Bitmap option to convert the image to SVG paths. This creates duplicate copies of the image—one is paths, the other is a bitmap—delete the bitmap copy. Use the Break Apart option and remove the Fill property for the outline of Tux and Tux's mouth; you'll have an SVG image that looks like the inverse of the original image.
SVG file created in Inkscape. The black sections will be milled out by the CNC machine.
Next, convert the SVG file to CNC G-code, which is a list of instructions that tell the CNC machine how to create the desired design. I used the open source jscut software, which is a web-based computer-aided manufacturing (CAM) program. You can download the software and run it on your local machine or use the web-based version at jscut.org, which is what I did.
Open the SVG file on jscut.org using the Open SVG drop-down menu. Next, click on one or more parts of the SVG image, then click Create Operation. Choose the type of operation (engrave, outside, pocket, etc.) and the depth of the cut, and click Generate. The different types of operations define where the cut is made; you can see the effects of different operations by going to the Simulate GCODE tab, which shows a preview of what the cut will look like. For Tux, I created several operations for various parts of the design.
Generating the Tux CNC G-code with jscut.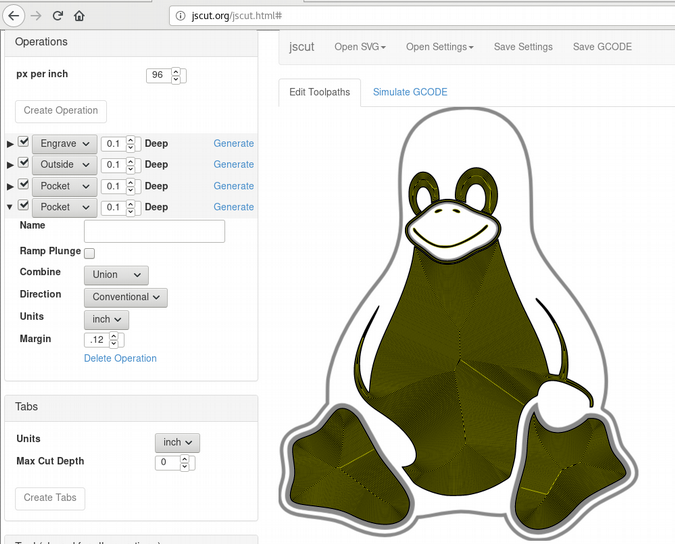
Set the properties of your cutting bit under the Tool section; these include specifying the diameter of the bit and how fast the cut should be made. One limitation of jscut is you can't specify different bit sizes for different operations. To create Tux, I needed to use two different bits: a smaller bit to engrave details like the eyes, nose, and mouth, and a larger bit to cut Tux's outline all the way through the wood board. I used jscut twice to generate two different G-code files: one to make the engravings with the smaller bit and another to cut out Tux's outline with the larger bit.
After you create the two G-code files, the next task is to get CNC controller software. I used the open source CNCjs. CNCjs is web-based, easy to use, and supports interfacing with GRBL controllers. After it's installed, access CNCjs in a web browser and connect it to your Arduino GRBL controller.
Click Upload G-Code and specify the file you created with jscut. First, I loaded the G-code file that makes the engravings on top of Tux.
Get ready to cut
You're almost ready to start cutting! Since you will be cutting all the way through the wood, it's smart to use a "waste board"—a board that sits on top of that CNC machine that you don't mind cutting into. This is because when the machine cuts Tux out, it will go all the way through and into the board under it. The waste board can be replaced as needed.
Waste board showing previous cuts.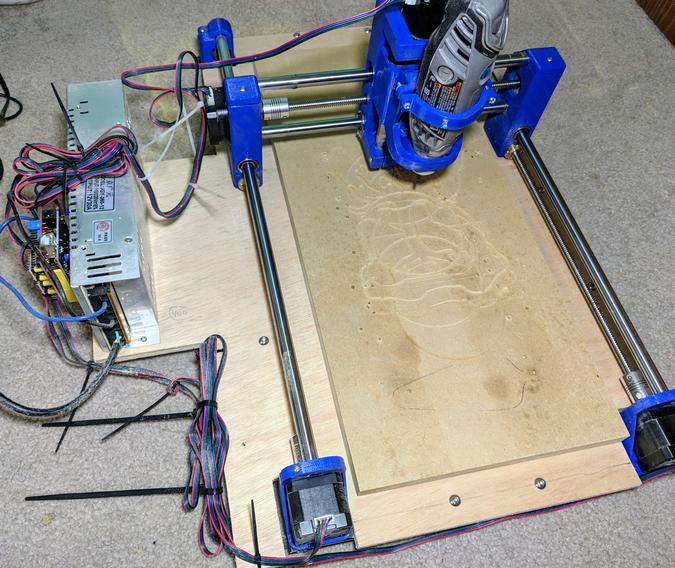
Securely attach the waste board to your CNC machine to prevent any movement, then attach the piece of wood you will use for Tux. There are many ways to attach the wood—I use heavy-duty double-sided carpet tape.
The final step before you cut is to align the bit on the spindle to the piece of wood you are cutting. Use CNCjs's Axes buttons to physically move the spindle so that the X, Y, and Z coordinates of the bit are aligned with the top-left corner of your wood. The Z axis should be just above the wood; you should be able to slide a piece of paper between the wood and the bit but feel the bit dragging on the paper as it slides.
Once everything is lined up, set the work position offsets for the X, Y, and Z axes to zero by clicking the Set button for each.
Setting the work position at zero for the X, Y, and Z axes.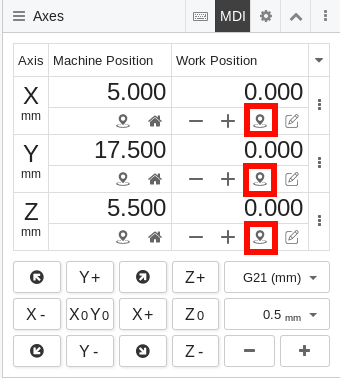
Press the Z+ button in CNCjs to raise the bit a little so the spindle doesn't make a mark in the wood when it's turned on.
To start cutting, put on your safety glasses, hearing protection, and a dust mask. Next, turn on the spindle, and click the Play button in CNCjs.
Closely monitor the machine during cutting and have a plan to quickly disconnect the power to the CNC machine and spindle if needed. Be ready with a vacuum cleaner as well, because it will create a lot of sawdust.
After the first G-code file completes the engravings on Tux, turn off the spindle and press the X0Y0 button in CNCjs to return the spindle to the home X and Y axis work position. Then change to the larger bit, upload the G-code file that will cut out Tux's outline, and follow the same process to run it.
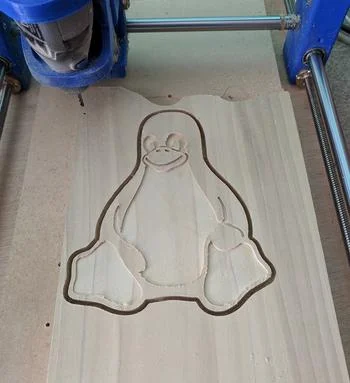
Sand Tux to clean things up and apply some wood finish to protect it. Here's my outcome: a wooden Tux made with 100% open source software.






3 Comments