

Python has earned a reputation as a wonderful beginner programming language. But where does one begin?
One of my favorite ways to get people interested in programming is by writing games.
PursuedPyBear (ppb) is a game programming library optimized for teaching, and I recently used it to teach my children more about my favorite programming language.
The Jupyter project is a browser-based Python console, initially designed for data scientists to play with data.
I have a Jupyter Notebook designed to teach you how to make a simple interactive game, which you can download from here. In order to open the file, you will need to install the latest Jupyter project, JupyterLab.
Prerequisites:
- Running a recent version of Python (instructions for Linux, Mac, and Windows)
- Running a recent version of Git (instructions here)
We will briefly configure a virtual environment to create a separate space for the needed libraries. (You can learn more about how virtual environments work here.)
$ git clone https://github.com/moshez/penguin-bit-by-bit.git
$ cd penguin-bit-by-bit
$ python -m venv venv
$ source ./venv/bin/activate
$ pip install -r requirements.txt
$ jupyter lab .
The last command should open JupyterLab in your default browser at the address http://localhost:8888/lab. Choose the dynamic_penguin.ipynb file in the left-hand column, and we can get started!

The event loop that will run the game
Jupyter runs an event loop internally, which is a process that manages the running of further asynchronous operations. The event loop used in Jupyter is asyncio, and PursuedPyBear runs its own event loop.
We can integrate the two using another library, Twisted, like glue. This sounds complicated, but thankfully, the complexity is hidden behind libraries, which will do all the hard work for us.
The following cell in Jupyter takes care of the first half—integrating Twisted with the asyncio event loop.
The__file__ = None is needed to integrate PursuedPyBear with Jupyter.
from twisted.internet import asyncioreactor
asyncioreactor.install()
__file__ = None
Next, we need a "setup" function. A setup function is a common term for the configuration of key game elements. However, our function will only put the game "scene" in a global variable. Think of it like us defining the table on which we will play our game.
The following cell in Jupyter Notebook will do the trick.
def setup(scene):
    global SCENE
    SCENE = scene
Now we need to integrate PursuedPyBear's event loop with Twisted. We use the txppb module for that:
import txppb
d = txppb.run(setup)
d.addBoth(print)
The print at the end helps us if the game crashes because of a bug—it will print out a traceback to the Jupyter output.
This will show an empty window, ready for the game elements.
![]()
This is where we start taking advantage of Jupyter—traditionally, the whole game needs to be written before we start playing. We buck convention, however, and start playing the game immediately!
Making the game interesting with interaction
It is not a very interesting game, though. It has nothing and just sits there. If we want something, we better add it.
In video game programming, the things moving on the screen are called "sprites." In PursuedPyBear, sprites are represented by classes. A sprite will automatically use an image named the same as the class. I got a little penguin image from Kenney, a collection of free and open source video game assets.
import ppb

class Penguin(ppb.Sprite):
    pass
Now let's put the penguin riiiiiight in the middle.
SCENE.add(Penguin(pos=(0,0)))
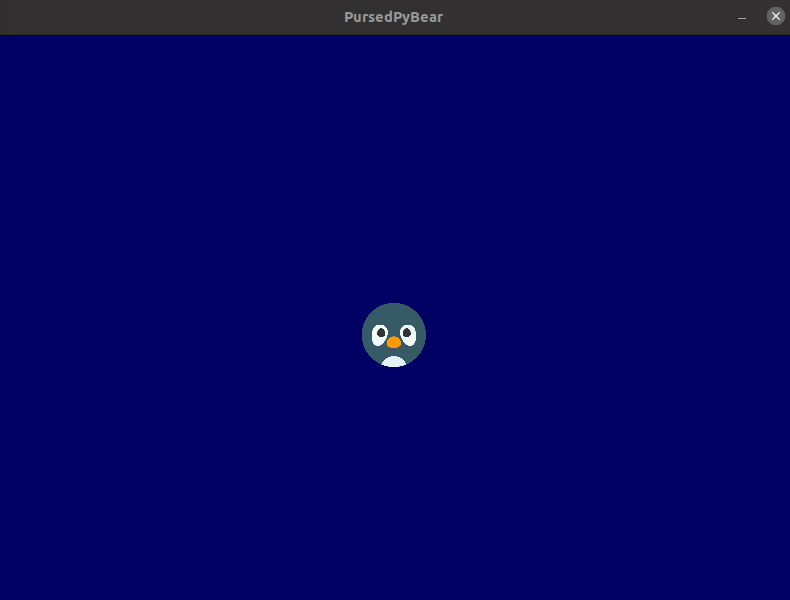
It carefully sits there in the middle. This is marginally more interesting than having nothing. That's good—this is exactly what we want. In incremental game development, every step should be only marginally more interesting.
Adding movement to our penguin game with ppb
But penguins are not meant to sit still! The penguin should move around. We will have the player control the penguin with the arrow keys. First, let's map the keys to vectors:
from ppb import keycodes

DIRECTIONS = {keycodes.Left: ppb.Vector(-1,0), keycodes.Right: ppb.Vector(1,0),
              keycodes.Up: ppb.Vector(0, 1), keycodes.Down: ppb.Vector(0, -1)}
Now we will use a utility library. The set_in_class function sets the method in the class. Python's ability to add functions to classes retroactively is really coming in handy!
from mzutil import set_in_class

Penguin.direction = ppb.Vector(0, 0)

@set_in_class(Penguin)
def on_update(self, update_event, signal):
    self.position += update_event.time_delta * self.direction
The code for set_in_class is not long, but it does use some non-trivial Python tricks. We will put the full utility library at the end of the article for review, and for the sake of flow, we will skip it for now.
Back to the penguin!
Oh, um, well.
The penguin is diligently moving…at zero speed, precisely nowhere. Let's manually set the direction to see what happens.
Penguin.direction = DIRECTIONS[keycodes.Up]/4

The direction is up, but a little slow. This gives enough time to set the penguin's direction back to zero manually. Let's do that now!
Penguin.direction = ppb.Vector(0, 0)
Adding interactivity to our penguin game
Phew, that was exciting—but not what we wanted. We want the penguin to respond to keypresses. Controlling it from the code is what gamers refer to as "cheating."
Let's set it to set the direction to the keypress, and back to zero when the key is released.
@set_in_class(Penguin)
def on_key_pressed(self, key_event, signal):
    self.direction = DIRECTIONS.get(key_event.key, ppb.Vector(0, 0))

@set_in_class(Penguin)
def on_key_released(self, key_event, signal):
    if key_event.key in DIRECTIONS:
        self.direction = ppb.Vector(0, 0)
The Penguin is a bit bored, isn't it? Maybe we should give it an orange ball to play with.
class OrangeBall(ppb.Sprite):
    pass
Again, I made sure to have an image called orangeball.png. Now let's put the ball on the left side of the screen.
SCENE.add(OrangeBall(pos=(-4, 0)))
Try as it might, the penguin cannot kick the ball. Let's have the ball move away from the penguin when it approaches.
First, let's define what it means to "kick" the ball. Kicking the ball means deciding where it is going to be in one second, and then setting its state to "moving."
At first, we will just move it by having the first update move it to the target position.
OrangeBall.is_moving = False

@set_in_class(OrangeBall)
def kick(self, direction):
    self.target_position = self.position + direction
    self.original_position = self.position
    self.time_passed = 0
    self.is_moving = True

@set_in_class(OrangeBall)
def on_update(self, update_event, signal):
    if self.is_moving:
        self.position = self.target_position
        self.is_moving = False
Now, let's kick it!
ball, = SCENE.get(kind=OrangeBall)
ball.kick(ppb.Vector(1, 1))
But this just teleports the ball; it immediately changes the position. In real life, the ball goes between the intermediate points. When it's moving, it will interpolate between where it is and where it needs to go.
Naively, we would use linear interpolation. But a cool video game trick is to use an "easing" function. Here, we use the common "smooth step."
from mzutil import smooth_step

@set_in_class(OrangeBall)
def maybe_move(self, update_event, signal):
    if not self.is_moving:
        return False
    self.time_passed += update_event.time_delta
    if self.time_passed >= 1:
        self.position = self.target_position
        self.is_moving = False
        return False
    t = smooth_step(self.time_passed)
    self.position = (1-t) * self.original_position + t * self.target_position
    return True

OrangeBall.on_update = OrangeBall.maybe_move
Now, let's try kicking it again.
ball, = SCENE.get(kind=OrangeBall)
ball.kick(ppb.Vector(1, -1))
But really, the penguin should be kicking the ball. When the ball sees that it is colliding with the penguin, it will kick itself in the opposite direction. If the penguin has gotten right on top of it, the ball will choose a random direction.
The update function now calls maybe_move and will only check collision if we are not moving right now.
from mzutil import collide
import random

OrangeBall.x_offset = OrangeBall.y_offset = 0.25

@set_in_class(OrangeBall)
def on_update(self, update_event,signal):
    if self.maybe_move(update_event, signal):
        return
    penguin, = update_event.scene.get(kind=Penguin)
    if not collide(penguin, self):
        return
    try:
        direction = (self.position - penguin.position).normalize()
    except ZeroDivisionError:
        direction = ppb.Vector(random.uniform(-1, 1), random.uniform(-1, 1)).normalize()
    self.kick(direction)
But just kicking a ball around is not that much fun. Let's add a target.
class Target(ppb.Sprite):
    pass
Let's put the target at the right of the screen.
SCENE.add(Target(pos=(4, 0)))
Rewarding our penguin
Now, we will want a reward for the penguin when it kicks the ball into the target. How about a fish?
class Fish(ppb.Sprite):
    pass
When the target gets the ball, it should remove it and create a new ball at the other end of the screen. Then, it will cause a fish to appear.
@set_in_class(Target)
def on_update(self, update_event, signal):
    for ball in update_event.scene.get(kind=OrangeBall):
        if not collide(ball, self):
            continue
        update_event.scene.remove(ball)
        update_event.scene.add(OrangeBall(pos=(-4, random.uniform(-3, 3))))
        update_event.scene.add(Fish(pos=(random.uniform(-4, -3),
                                         random.uniform(-3, 3))))
We want to have the penguin eat the fish. When the fish sees the penguin, it should vanish.
Fish.x_offset = 0.05
Fish.y_offset = 0.2
@set_in_class(Fish)
def on_update(self, update_event,signal):
    penguin, = update_event.scene.get(kind=Penguin)
    if collide(penguin, self):
        update_event.scene.remove(self)
It works!
Iterative game design is fun for penguins and people alike!
This has all the makings of a game: the player-controlled penguin kicks the ball into the target, gets a fish, eats the fish, and kicks a new ball. This would work as a "grinding level" part of a game, or we could add obstacles to make the penguin's life harder.
Whether you are an experienced programmer, or just getting started, programming video games is fun. PursuedPyBear with Jupyter brings all the joy of classic 2D games with the interactive programming capabilities of the classic environments like Logo and Smalltalk. Time to enjoy a little retro 80s!
Appendix
Here is the full source code of our utility library. It provides some interesting concepts to make the game board work. For more on how it does that, read about collision detection, setattr. and the __name__ attribute.
def set_in_class(klass):
    def retval(func):
        setattr(klass, func.__name__, func)
        return func
    return retval

def smooth_step(t):
    return t * t * (3 - 2 * t)

_WHICH_OFFSET = dict(
    top='y_offset',
    bottom='y_offset',
    left='x_offset',
    right='x_offset'
)

_WHICH_SIGN = dict(top=1, bottom=-1, left=-1, right=1)

def _effective_side(sprite, direction):
    return (getattr(sprite, direction) -
            _WHICH_SIGN[direction] *
           getattr(sprite, _WHICH_OFFSET[direction], 0))

def _extreme_side(sprite1, sprite2, direction):
    sign = -_WHICH_SIGN[direction]
    return sign * max(sign * _effective_side(sprite1, direction),
                      sign * _effective_side(sprite2, direction))

def collide(sprite1, sprite2):
    return (_extreme_side(sprite1, sprite2, 'bottom') <
            _extreme_side(sprite1, sprite2, 'top')
            and
            _extreme_side(sprite1, sprite2, 'left') <
            _extreme_side(sprite1, sprite2, 'right'))


11 Comments