With the growth of connectivity and remote jobs, accessing remote computing resources becomes more important every day. But the requirements for providing external access to devices and hardware make this task complex and risky. Aiming to reduce this friction, ShellHub is a cloud server that allows universal access to those devices, from any external network.
ShellHub is an open source solution, licensed under Apache 2.0, that covers all those needs and allows users to connect and manage multiple devices through a single account. It was developed to facilitate developers' and programmers' tasks, making remote access to Linux devices possible for any hardware architecture.
Looking more closely, the ShellHub solution uses the HTTP transport layer to encapsulate the SSH protocol. This transport layer choice allows for seamless use on most networks as it is commonly available and accepted by most companies' firewall rules and policies.
These examples use ShellHub version 0.3.2, released on Jun 10, 2020.
Using ShellHub
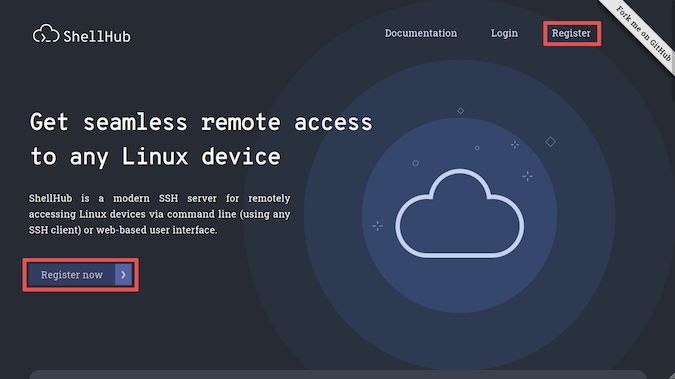
To access the platform, just go to shellhub.io and register yourself to create an account. Your registration data will help the development team to understand the user profile and provide more insight into how to improve the platform.
Figure 1: Registration form available in shellhub.io
ShellHub's design has an intuitive and clean interface that makes all information and functionality available in the fastest way. After you've registered, you will be on the dashboard, ready to register your first device.
Adding a device
To enable the connection of devices via ShellHub, you'll need to generate an identifier that will be used to authenticate your device when it connects to the server.
This identification must be configured inside the agent (ShellHub client) that will be saved in the device along with the image or it must be added as a Docker container.
By default, ShellHub uses Docker to run the agent, which is very convenient, as it provides frictionless addition of devices on the existing system, with Docker support being the only requirement. To add a device, you need to paste the command line, which is presented inside the ShellHub Cloud dialog (see Figure 2).

By default, the device uses its MAC address as its hostname. Internally, the device is identified by its key, which is generated during the device registration to authenticate it with the server.
Accessing devices
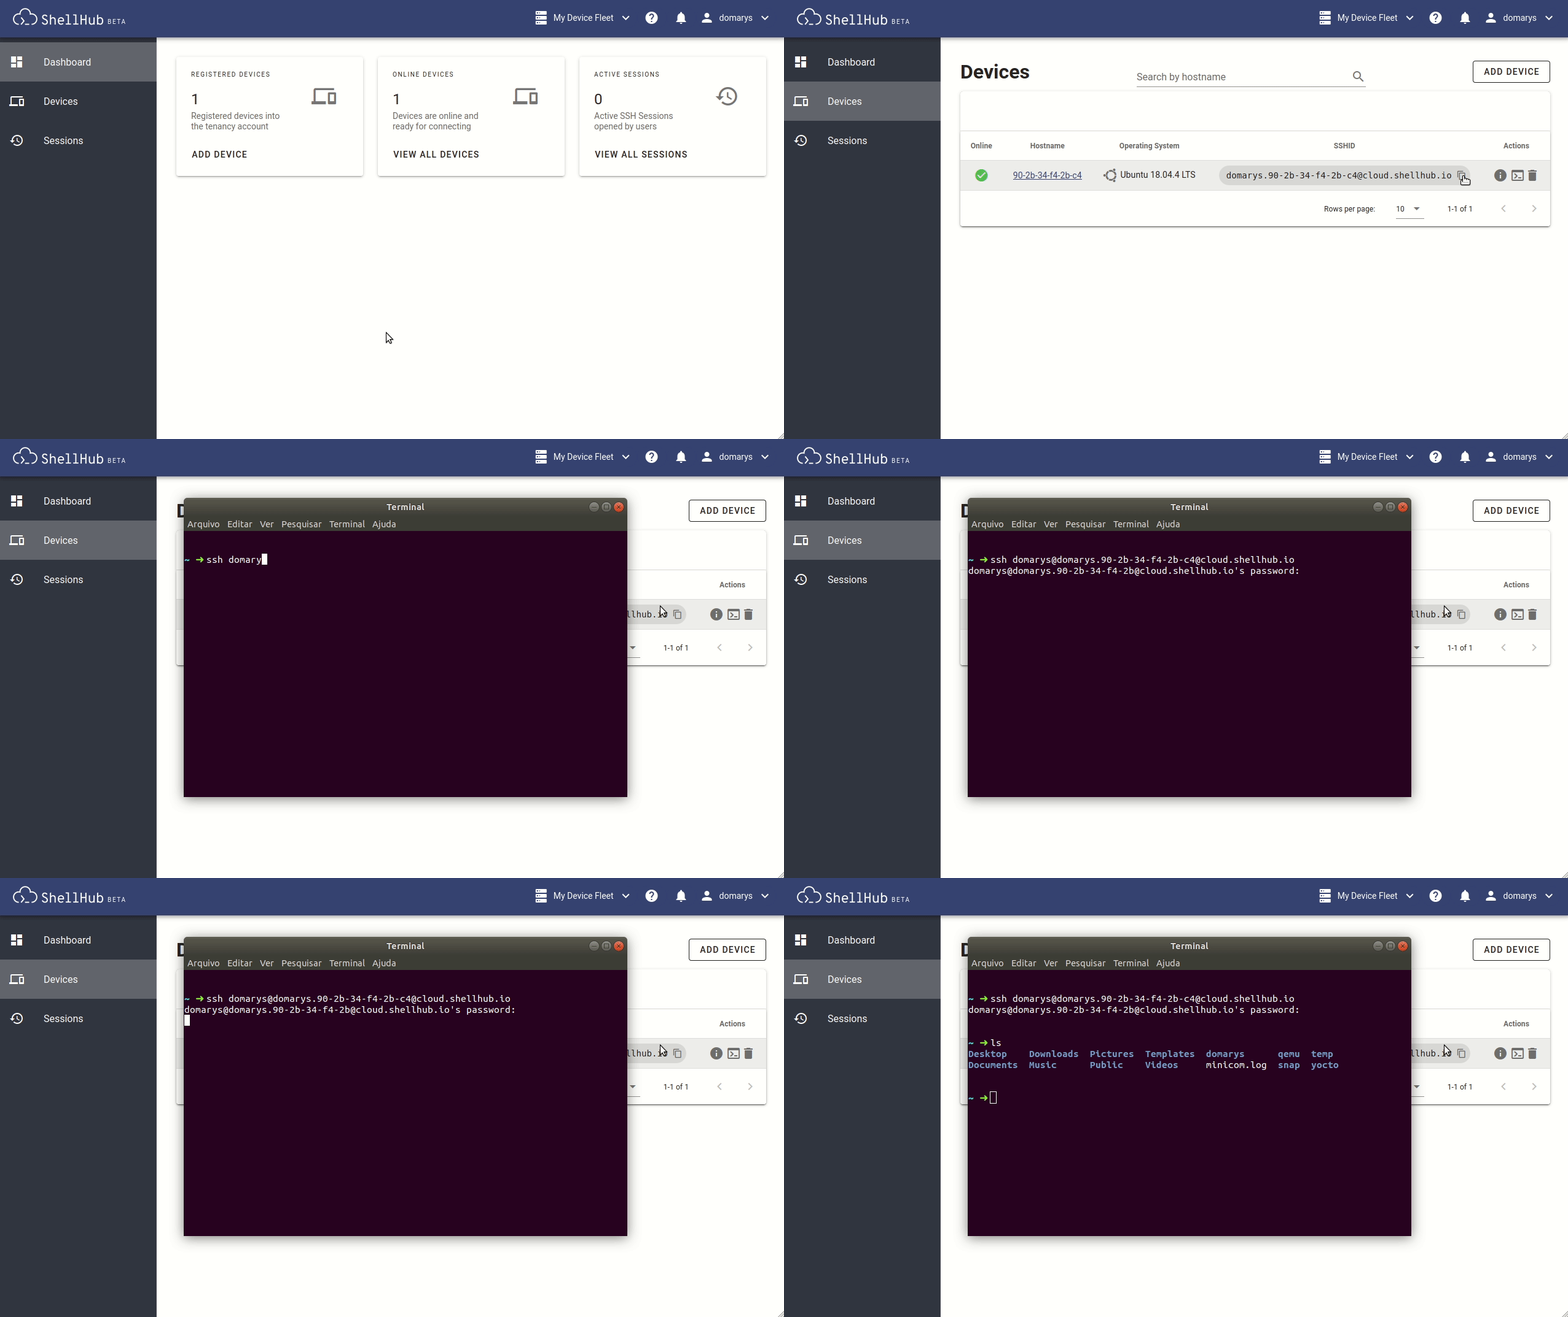
To access your devices, just go to View All Devices in the dashboard, or click on Devices on the left side menu; these will list all your registered devices.
The device state can be easily seen on the page. The online ones show a green icon next to them and can be connected by clicking on the terminal icon. You then enter the credentials and, finally, click the Connect button, see (Figure 3).

Another way to access your devices is from any SSH client like PuTTY, Termius, or even the Linux terminal. We can use the ShellHub Identification, called SSHID, as the destination address to connect (e.g., ssh username@SSHID). Figure 4 illustrates how we can connect to our machine using the Linux SSH client on the terminal.

Whenever you log in to the ShellHub Cloud platform, you'll have access to all your registered devices on the dashboard so you can access them from everywhere, anytime. ShellHub adds simplicity to the process of keeping communications secure with your remote machines through an open source platform and in a transparent way.
Join ShellHub Community on GitHub or feel free to send your suggestions or feedback to the developers' team through Gitter or by emailing contato@ossystems.com.br. We love to receive contributions from community members!


7 Comments