

Kdenlive features an advanced overlay system by default. In fact, it's almost—but not quite—nodal. Node compositing is found in dedicated compositing software like Blender and Natron. And that's by default, for free.
So what's the problem? Well, nothing. You're getting a really advanced and fairly flexible system in an NLE. However, since many of us come to Kdenlive from editing systems that give us pre-packaged effects and transitions, the Kdenlive system can be confusing at first. To make matters worse, since the interface looks more or less familiar, we assume it should act the same and we get frustrated when it does not.
As with most similar-but-different features between applications, one user's feature is another user's bug. On the one hand, you get a flexible and powerful compositing engine. On the other, you get a complex and sometimes too flexible compositing engine. If nothing else, learning how it works makes it a lot easier to explore the system through trial and error.
Compositing
In some video editing apps, all layers get composited against the base layer and it passes through, unaffected by and ineffectual upon every layer between itself and the base layer. Here is my attempt to illustrate what I mean:

In your old video editor, each layer gets composited against the base layer in turn. You can use a mask to escape that automatic composite path, but otherwise there is no way to alter how your overlays are composited. For more complex composites, you are obligated to go to an external application.
In Kdenlive, compositing is more like this:
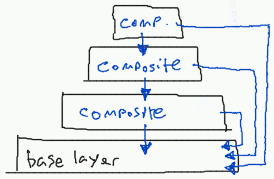
With Kdenlive's system, you can route compositing actions to the base layer or any other.
Examples
It is easiest to understand these concepts with some simple examples using some basic shapes combined with some fairly complex compositing actions. To save on processing power, I will use a small video size. This won't affect how compositing works, but will be faster to work with.
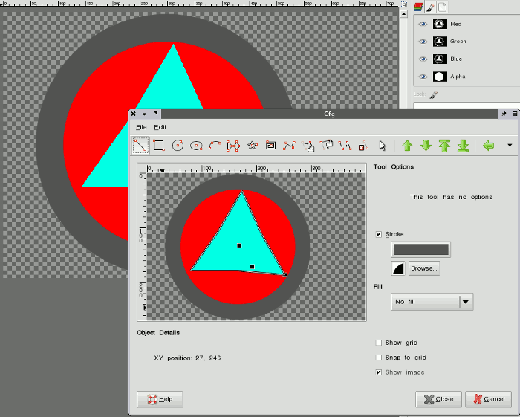
#1. Create two basic shapes in GIMP or Inkscape and save them out as PNG files so that their alpha (the parts of the image that are transparent) channel is preserved. Do not use JPG or any format that does not provide an alpha channel.
I use the autocrop function (found in the Layer menu) to trim off any empty canvas space from around the edges, so my graphic elements end up being about 300x300 and 200x200 in size, meant for a 720x486 video clip. This will be important later.
#2. Open Kdenlive and bring in a video clip. I am using some stock footage, but you can use anything you want so long as it's a realistic use-case for you. In other words, don't use bad cell phone footage in night vision mode unless that's really the kind of footage you usually edit. Make this exercise useful according to your use-case.
Color correction will not affect this example at all, but in the interest of making it a little more realistic, I'll apply some basic colour correction.
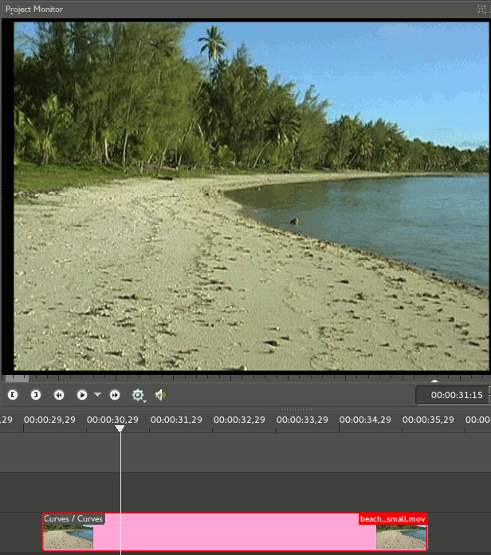
#3. Import your graphic elements and place one on the video track above the footage. Move the playhead over these clips in the timeline and look at the Project Monitor.
#4. The first problem you will notice is that there is no compositing at all. The alpha channel is seen as solid black, so all you see is your graphic element against a black background.
To fix this you need to activate the alpha channel or, in other words, enable compositing. In Kdenlive, the visibility of a clip in relation to another is controlled with Transitions (called "superimposing" in some other NLE apps). To be clear, a transition in Kdenlive is not just a fade placed on the last three seconds of a clip, but the compositing effect of a clip.
The compositing effect you want to use in order to activate the alpha channel in your graphic is Add transition > CairoAffineBlend. Do not use the plain Affine transition.
#5. To add this transition, move to the first frame of your graphic clip in the timeline. Refer to Settings > Configure shortcuts to find what keyboard shortcut to use). Right-click on the clip and select Add transition > CairoAffineBlend.
Stretch the transition clip in your timeline so that its duration is equal to your video clip.
Tip: You can set Kdenlive to provide an automatic transition to imported images in Settings > Configure Kdenlive > Misc > Transparent background for imported images. However, Kdenlive uses an Affine transition for this by default, so you will still usually want to change the blend type to CairoAffineBlend.
#6. Second, notice that the graphic layer has been resized to fit into the frame. In this case, since the graphic is smaller than the frame, it has been enlarged from 300x300 to 486x486.
To fix that, use Add effect > Crop and transform > Pan and zoom.
In the Pan and zoom effect panel, click Go to previous keyframe to move to the first frame of the clip. Then, use the Size parameter, or the width and height text fields, to resize the graphic.
Use the center point in the Project Monitor to reposition the graphic.
Tip: If you import lots of graphics on a regular basis, you can set the default behavior for scaling graphics in Kdenlive preferences. Obviously, the intent is to helpfully resize photographs to fit with the frame, but if you are doing motion graphics or lower thirds that can get annoying.
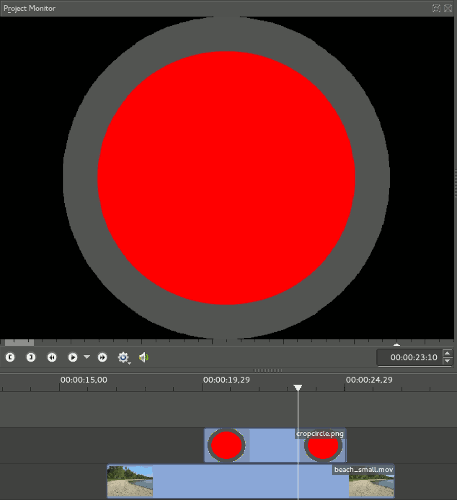
#7. Add the next graphic on the topmost video track. Once again, you will notice that the graphic is not composited and has been resized to fit the frame.
Fix this with another CairoBlendAffine, and resize and reposition it with Add effect > Crop and transform > Pan and zoom. For the purpose of this exercise, make sure the two graphics overlap.
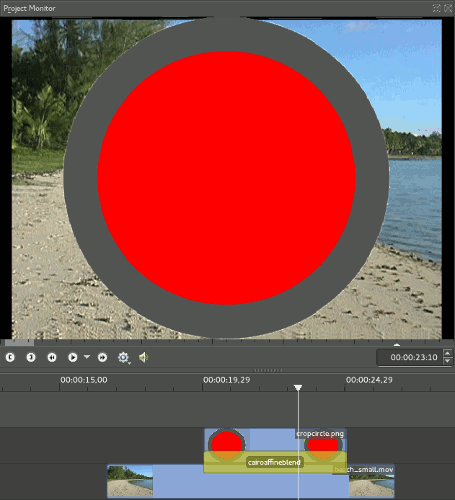
#8. You'll see the "problem" immediately. It will vary depending on what colors your are compositing, but whatever the results, you are seeing the combination of the top graphic plus or minus the middle graphic and the base video layer. This is very correct compositing, but not always what we expect given the expectations that other video apps have created in us.
Click on the transition clip in the timeline to bring up the transitions panel. Notice that the transition is currently set to Auto.
![]()
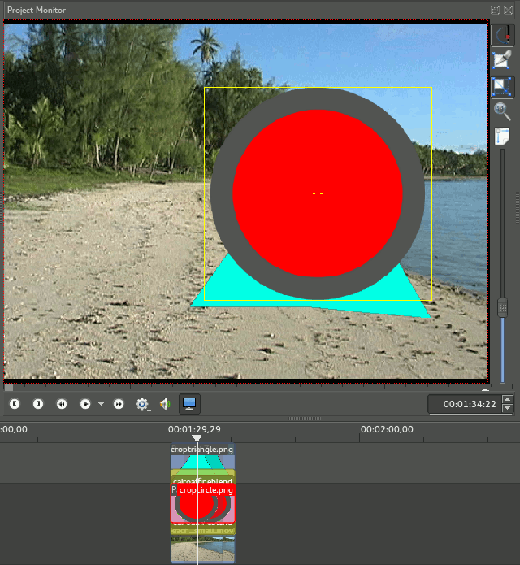
#9. To "fix" this correctly composited stack, you need to bypass the middle graphic and just composite the top layer against the base video layer. This acts more like the default layering-effect as seen in many popular graphic and video applications.
It is not precisely correct in terms of compositing, since you are giving absolute opacity to all non-alpha channels, but that is, quite often, what we expect.
To change the composite target, open the Transitions panel and change Auto to whatever track your base video layer is on.
![]()
#10. Move the playhead a frame or two to update the Project Monitor. The composite has changed to something more like the layers of an animation cell, with two graphics layered over one another and their alpha channels 100 percent transparent.
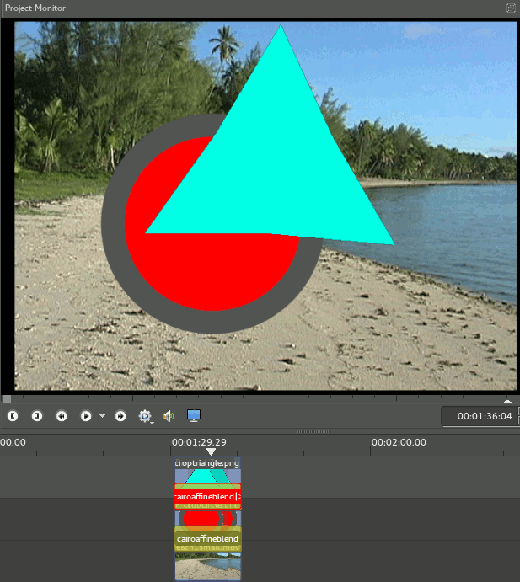
This kind of experimentation helps you learn how compositing in Kdenlive works, so do a few more tests to get a better idea of what Kdenlive is capable of and how its defaults work. Do that, and the next time you need to do some basic layering effects, your compositing efforts in Kdenlive will go much smoother!
Makers
This article is part of Seth Kenlon's Multimedia Makers column, where he shares tutorials and tips on creating multimedia with Linux and its vast creative toolkit. In partnership with slackermedia.info and gnuworldorder.info.


Comments are closed.