

As the 2015 CRASH Space Vice President and an alumna of the 2010 CRASH internship program, it's fair to say that I come from a long line of donation box experts.
CRASH Space is a 501(c)3 non-profit hackerspace in Los Angeles. Throughout the years, we've brought our members and our equipment to schools, outreach events, and tech conventions all across California. And at each event, we brought along a little donation jar for people to give to our cause. Despite the often very impressive array of tech available for show at our booth, the donation jar we brought was literally an old Cheezy-Poofs container with a little hole cut into the lid.
This year, I set out to create CRASH Space a donation box worthy of our hackerspace.
Ideation
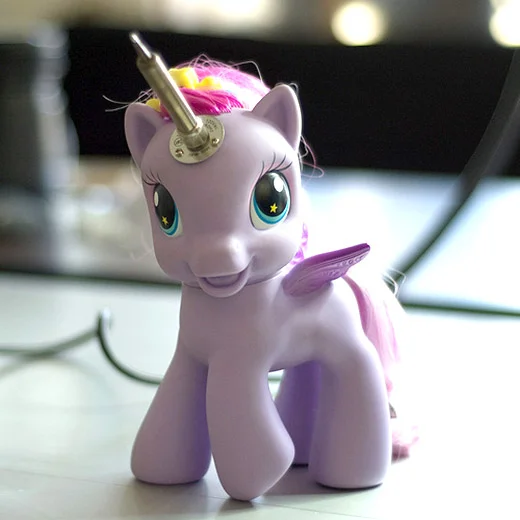
Being one of the more whimsical hackerspaces, CRASH Space's mascot is a soldering Unicorn named Sparkles. Over the years, Sparkles has become arguably the most famous member of our hackerspace. For this project, I followed in Sparkles' footsteps and gave the donation box a My Little Pony theme.
The top slot of the donation box has a distance sensor mounted right beneath it. Whenever someone donates a paper bill, it senses a change in distance and cues the donation box to react by:
- Scrolling the text "THANK YOU!" across an LED matrix
- Playing the My Little Pony theme song
- Turning on two fans to blow all of the dollar bills around in a little wind tunnel
Materials
I made the LED Matrix using:
- RGB LED strips (or a pre-built RGB LED matrix)
- Basic soldering tools (iron, solder, wire)
- Arduino (mine is a Nano)
- A distance sensor
And made the MP3 sound support using:
- Some protoboard
- Robertsonics mp3 trigger board (Info | User Guide)
- SPST relays (up to 15 -- one for each sound file you would like to play)
- Speaker + Amp
- 5V power adapter ("wall wort" -- I recommend collecting these off of old broken routers or other small unusable electronics. Very handy!)
For the fan:
- Two high-power fans
- A relatively high-voltage relay
- 12V power adapter
- Some flexible plastic to create a (wind) tunnel
For the box itself:
- A donation box, a container that can act as a donation box, or enough plastic or wood to build your own. (I found a beat up old acrylic donation box, so we're going to upcycle that one into something nice for this tutorial.)
- Paints, stickers, etc. for decorating the box
- A lock and key (if they do not already come on the box you have chosen)
Note: Full step-by-step instructions are available on TinWhiskers.net.
Create the Stencils
Next, I needed to think of a design that makes our project look totally awesome without subtracting from it's functionality.
My considerations:
- The front view of the inside of the box should not be obstructed, because we want to be able to watch the money fly around
- The sides of the box should be opaque, so it isn't so obvious from all angles that this box is full of totally stealable cash
- The LEDs in the front will look coolest if something is diffusing their light
With these considerations in mind, I decided to go with a cloudy sky look and put stickers of the ponies on top.
I grabbed a My-Little-Pony-style cloud off of the internet and converted the bitmap to a vector. I then broke up that vector into two pieces so I could use it as a stencil for both the cloud itself and a decorative outline of the cloud.
pretty clouds for the @crashspacela donation box https://t.co/wlFF6it8iu
— michelle@tinwhiskers (@electricatz) June 21, 2015
You can grab my laser-ready cloud stencil here.
Paint the Exterior
Before spraypainting, I coated the top and the front of the box with newspaper and painter's tape. I wanted these areas to stay transparent so visitors could watch the money fly around inside the box.
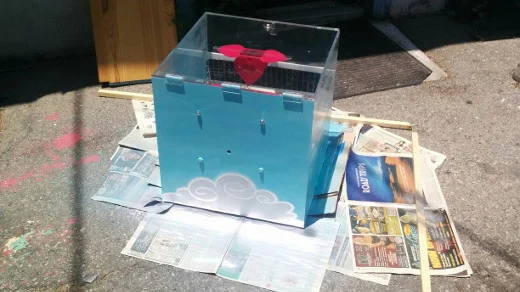
Next, I spray painted the back and sides of the box sky blue. After letting the blue paint dry, I taped the first stencil to the back of the box, surrounded it with more newspaper and painters tape, and sprayed on white paint for the cloud.
After letting the white paint dry, I put on the bottom of the stencil (held in place by donuts of painter's tape), and sprayed on the silver paint for the outline of the cloud.
Once that was done, I repeated these steps on the sides of the box. For the front, I didn't paint any blue sky, but made an extra big cloud on the bottom for the LEDs to hide behind. I think the white cloud will do well to diffuse the LEDs a bit and will look awesome because now all of our messages will scroll across a cloud! Rad.
Decorate!
I got some My Little Pony stickers off Amazon and stuck them all over the place:

Smartest design decision I've ever made, hands down. Here's a look at the finished product (you'll want to have your sound on for this one):
And there you have it! If you build a cool donation box of your own, or otherwise use this walkthrough for your own project, let me know in the comments! I'd love to see it.
All code, vector files, and circuit digrams for this project are open source and available on GitHub under the GPL-3.0.
Month
A collection of articles highlighting first-time Opensource.com contributors.


Comments are closed.