

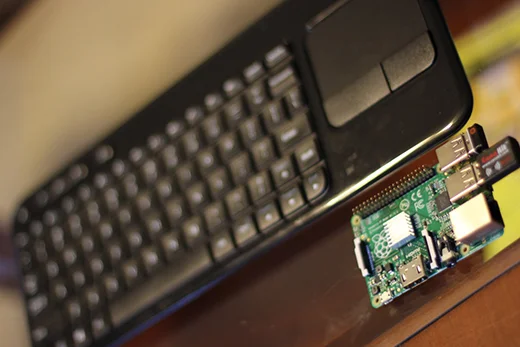
Last Thanksgiving, I took some time off from work and was looking for a fun project to work on during my downtime. I decided to check out Raspberry Pi. After a quick search on Amazon, I ordered the CanaKit Raspberry Pi B+ Ultimate Starter Kit.

The kit arrived the Friday before Thanksgiving, and I wasted no time getting to work. I didn't need another computer running Linux at home, so my interest in the Raspberry Pi focused on what its hardware could offer that my laptops couldn't.
When I unboxed the kit and saw all the LEDs and wires that came with it, the first thing that came to mind was Osborne Family Spectacle of Dancing Lights at Disney's Hollywood Studios. I had no idea if I'd be able to get the Pi to light up any of those LEDs, but if I could just understand how to make software interact with hardware at this level, my investment would be worth it.
First, being completely biased to anything Fedora or Red Hat-based, I decided to use NOOBS to install Pidora. But as cool as the Fedora spinoff was, I quickly realized it wasn't the Linux distribution I needed to make my Christmas light show.
I went with the Raspberry Pi's recommendation and installed Raspbian. It quickly proved itself to be the better distribution for the job for a few reasons:
- raspi_config allowed me to do quite a bit of configuration changes to the Raspberry Pi right off the bat.
- Raspbian's out-of-the-box needed about 50 percent less memory than Pidora, which is HUGE for a little piece of hardware that has 512 MB!
- It came with Mathematica, Scratch, Sonic Pi, and the Python libraries I needed to do some coding with the GPIO pins.
- The Raspberry Pi book (and foundation) recommend Raspbian, so I had two places to look for guidance and examples.
By Friday night, I had the Pi connected to my TV and Wi-Fi. With Raspbian installed, I ran an: apt-get update && apt-get upgrade to update the OS and was ready to dive in to all the extras that came with the kit.
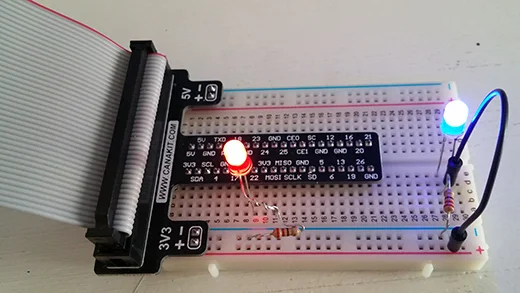
I had learned a little about electricity in high school and college, but never really had a chance to apply that knowledge anywhere else. Terms like "breadboard," "jumper wires," "resistors," "current," and "voltage" weren't foreign to me, but I had very little hands-on experience with them. So, what did I do? Googled them!
First, I used this video to learn about the breadboard, LEDs, and resistors. I then applied that concept to the CanaKit. Here's a video with a quick video I made of how I put it all together:
Now that I had the lights working, the next step was making the LEDs "listen to music" and blink accordingly?
With another Google search and I found an awesome open source project called: LightshowPi. I quickly realized that the idea of an Osborne Family Spectacle of Dancing Lights of my own wasn't such a silly idea after all. After joining the LightshowPi Google+ Community, I read up on a few tips and tricks for setting up my very own light show.
I went ahead and ordered the next part of the puzzle: a Sainsmart eight-channel 5V solid state relay (SSR) module board. It took a couple of weeks to arrive at my doorstep, but when it did I went to the store right away to buy the rest of the materials I needed for my light show.
Once I tested the connection with the board, it was time for me hook up the Christmas lights I was going to put on my Christmas tree. The final result was simply one of the most satisfyingly geeky things I have ever done. For most of December, I left my Raspberry Pi connected to my Christmas tree. With a simple SSH client on my phone, I could easily start/stop the show any time I wanted.
Here's the final result:
Below is a comprehensive set of steps you can take to make your own:
- Watch the breadboard tutorial.
- Watch my canakit tutorial.
- Once you are comfortable with that, look at the LightshowPi project. Learn how to use it. Here's an example of the LEDs being controlled by LightshowPi.
- Join LightshowPi's Google+ community, read up the projects and photos there.
- Once you've done all that and understand what's going, order the Sainsmart eight-channel 5V solid state relay module board. (mine took two weeks to arrive)
- Watch this video on how to connect your Raspberry Pi to the SSR board.
- Purchase six polarized extension cords at Target: five for the light string and one for the power source. I only used five of the eight channels on the SSR board.
- Following this step-by-step guide, cut the wires and daisy chain the power source into the relay, and that's it!
Note: Make sure you have something to cut the wires with, a small screwdriver to tighten the SSR board slots, electrical tape, and a jackknife.
Hardware
Connection
This article is part of the Open Hardware Connection column coordinated by Rikki Endsley. Share your stories about the growing open hardware community and the fantastic projects coming from makers and tinkers around the world by contacting us at open@opensource.com.


1 Comment