

GIMP, the GNU Image Manipulation Program, is first and foremost, as its name suggests, a photo manipulation program; however, sometimes the lines blur between photo manipulation and airbrushing, material emulation, graphic design, and even layout. In other words, GIMP isn't just for photos.
Artists use and abuse GIMP for all kinds of visual work, and one of the things that makes that possible is its extensibility. You can add to GIMP through plugins, scripts, and brushes. To make it even easier, GIMP happens to accept both GIMP brush files and Adobe Photoshop brush files, so the available selection of brushes is staggering.
GIMP's brush engine isn't as robust as something intended for material emulation, like MyPaint or Krita, but having nice brushes in your toolbox while working in GIMP can be really useful.
Here are seven brushes worth having around, and a few tips and tricks about how to manage them.
0. The brushes not to have
Before I get into the brushes you should have, I should mention something about the brushes that are bundled with GIMP by default. They're installed into the /usr/share/gimp/2.0/brushes directory, and they show up in the default brush menu.
Everyone has their own use case, but in my opinion, the default brushes take up more space in your brush menu than they are worth. One of the first things I do when setting up a new system is delete all the brushes from /usr/share/gimp/2.0/brushes. It's an immediate improvement, and it conserves real estate in a brush menu that will almost certainly be more useful to you if you populate it yourself.
1. GIMP Paint Studio
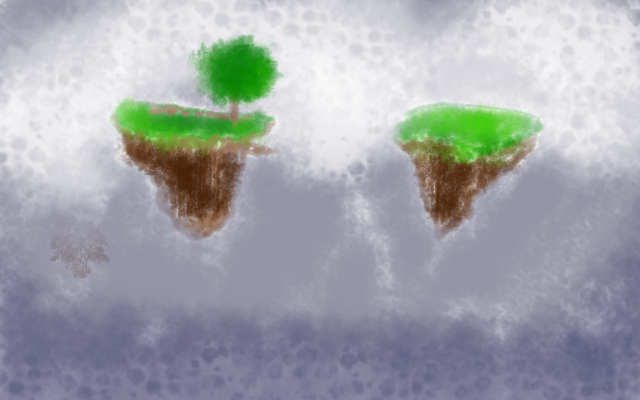
GIMP Paint Studio, also known as GPS, and also as the brush set that should come with GIMP by default, was a project to bring high-quality paint emulation to GIMP. It never was as good as a digital paint application, but through good brush design and very good brush engine settings, it came close.
Today the project appears dormant, but a better term is fulfilled. The GPS brush set is a great addition to GIMP, providing textures and brush strokes that weren't available previously.
Here's an idle sketch, with sincere apologies to Roger Dean.
opensource.com
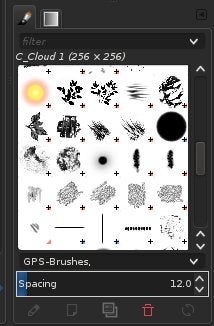
The brushes each come loaded with default presets such that, when you select a brush, all its presets are loaded. This is significant for many of the brushes, especially the ones that have complex size and pressure variation.
opensource.com
If you want to customize the way a brush behaves, you can use the Tool Options panel. This allows you to combine brushes with different presets, or to tweak the presets to your own needs.

opensource.com
The GPS set contains about 102 brushes, and even if you don't intend to paint or sketch in GIMP, it's a good general purpose brush kit to have for everything from retouching to stylization.
Download the full set as a tar.gz file from GitHub
2. LJFHutch's water brushes
If you're looking for photorealism, you'll be pleasantly surprised at the results you can get from a minute of painting with LJFHutch's water brushes.

opensource.com
The two brushes in this set are just little ripples, which you can apply as highlights on top of any color. Instant liquid.
It's a specific brush set, obviously, but very useful if you're doing painting or retouching.
Download the brushes from Deviant Art.
3. Cracks
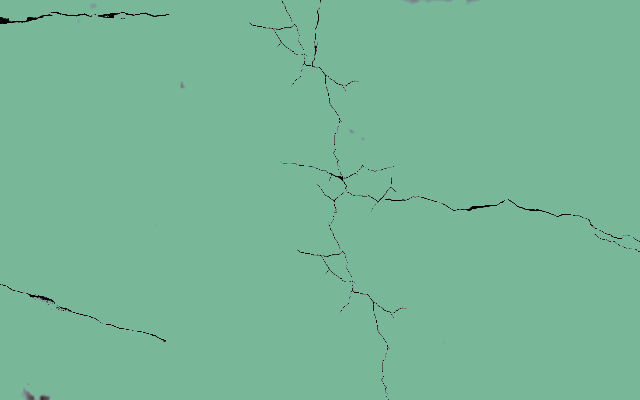
Everybody loves texture. Often you can download Creative Commons photos of textures from various sites, but sometimes you need to generate texture.
There's nothing like quite as good at distressing a graphical element as cracks.
opensource.com
It's a simple and obvious process, but it looks great. There are several crack brush sets out there, but the one used in my example above is by FrostBo.
4. Watercolor splatters
GIMP can use Adobe Photoshop brush files, so there's no need to limit your searches to just GIMP brush files.
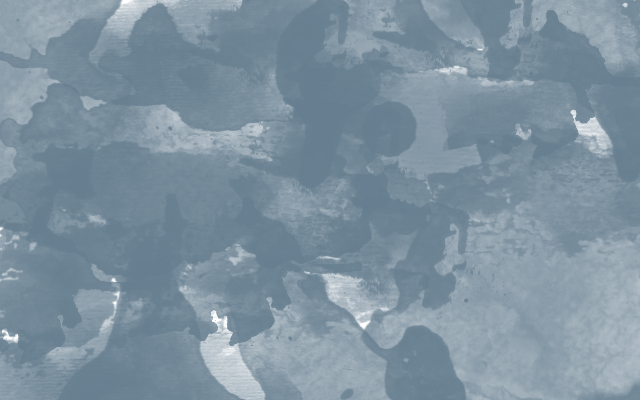
For texture and painting, watercolor splatters from Photoshop Tutorials provide nice results. This kind of brush is less a brush than it is a stamp. You're not expected to "paint" with strokes, you're just meant to choose a color, then stamp the splatters across the page.
opensource.com
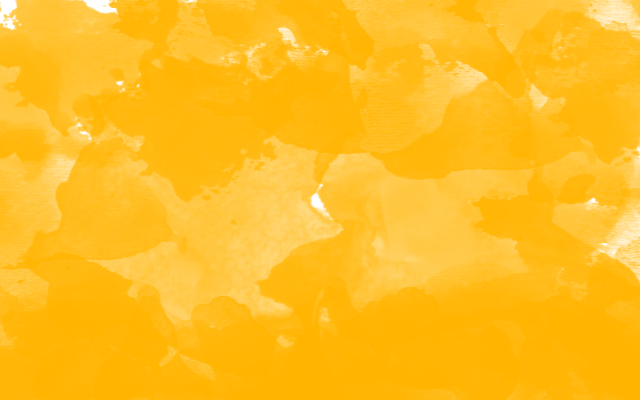
opensource.com
It's a great starting point for further painting, the base layer of stationary, or just general texture. You probably won't want to leave the brush set installed all the time, but on as-needed basis, it's useful to have available.
Download water color splatters, and many other brushes, from Photoshop Tutorials.
5. Comic bubbles
Depending on your line of work, preset shapes are either hugely important or something you never think about. If you do graphics for a living, the chance that you'll need a comic speech bubble at some point in your career is fairly high. They're iconic graphic elements, and GIMP isn't exactly the greatest tool for line-drawn shapes.
A good brush set of geometric shapes and comic bubbles makes all the difference.
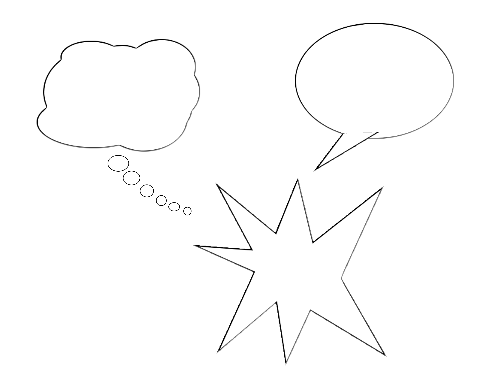
opensource.com
Download comic bubbles from Deviant Art.
6. Playing cards
I admit this isn't terribly useful, but it's a great example of a creative brush. The playing card brush set is a Creative Commons success story, too: it's a GIMP brush set by Chrisdesign using assets made by Fedora art team member Nicubunu and posted to openclipart.org.
So what does it do? It produces a full set of cards as you paint.
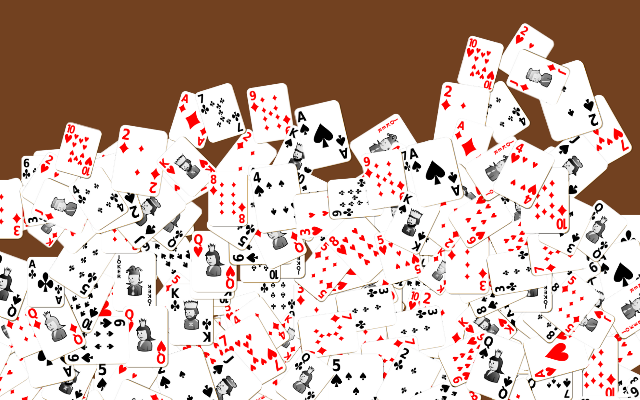
opensource.com
You can download it from Chrisdesign.
7. Arrow
"I want to take a screenshot and put an arrow on it."
If you work in an open source shop, this is one of the most common phrases you hear from new users. The answer from another new user is usually a convoluted combination of importing a screenshot into Inkscape or LibreOffice Draw, but, once and for all, the issue can be solved with one simple GIMP brush.
From Slackermedia comes the humble, yet infinitely useful, Tango Arrow brush.
It's an arrow. It can be resized, given a color, and applied to all the screenshots you're making for your tutorials or technical documents or location photographs.
Directing the arrow is easy:
- 0 degrees points left
- 90 degrees points up
- -90 points down
- 180 degrees points right
I've used it for years in nearly every tutorial I've written. It's one of those brushes that ought to be included in GIMP by default. It's just that useful.
opensource.com
Download the Tango Arrow brush from Slackermedia.
You won't regret it.
More brushes
Combined, this list of seven brushes provides you with over 153 brush tips, and even more if you count preset customization. It's a list taken largely from my use, so get out there and look around to see what's available to make your life easier. Many complaints about GIMP can be resolved by a little personalization of a user's environment, and it might surprise you how much a difference a good brush set makes.


4 Comments