

If you're wary of committing your data to cloud services controlled by a corporation but love the convenience of remote storage and easy web-based access, you're not alone. The cloud is popular because of what it can do. But the cloud doesn't have to be closed. Luckily, the open source Nextcloud project provides a personal and private cloud application suite.
It's easy to install and import data—including contacts, calendars, and photos. The real trick is getting your data from cloud providers like iCloud. In this article, I demonstrate the steps you need to take to migrate your digital life to Nextcloud.
Migrate your data to Nextcloud
As with Android devices, first you must transfer existing data from Apple's iCloud to Nextcloud. Then you can set up two new accounts for your Apple devices to fully automatically synchronize address books and appointments. Apple supports CalDAV for calendars and CardDAV for contacts, so you don't even need to install an extra app.
To export your address book, you can either open the Contacts app on your iPhone/iPad or log into iCloud in your web browser:
-
Select all address book entries you want to transfer to Nextcloud and choose File > Export > Export vCard to save a .
vcffile on your local disk. -
Import the .
vcffile into Nextcloud. To do this, select the Contacts app, click Settings at the bottom left and select the Import contacts button. In the following dialogue window, click Select local file, and open the previously saved vCard.
To set up a CardDAV account on your iPhone or iPad, go to Settings > Contacts > Accounts > Add Account:
-
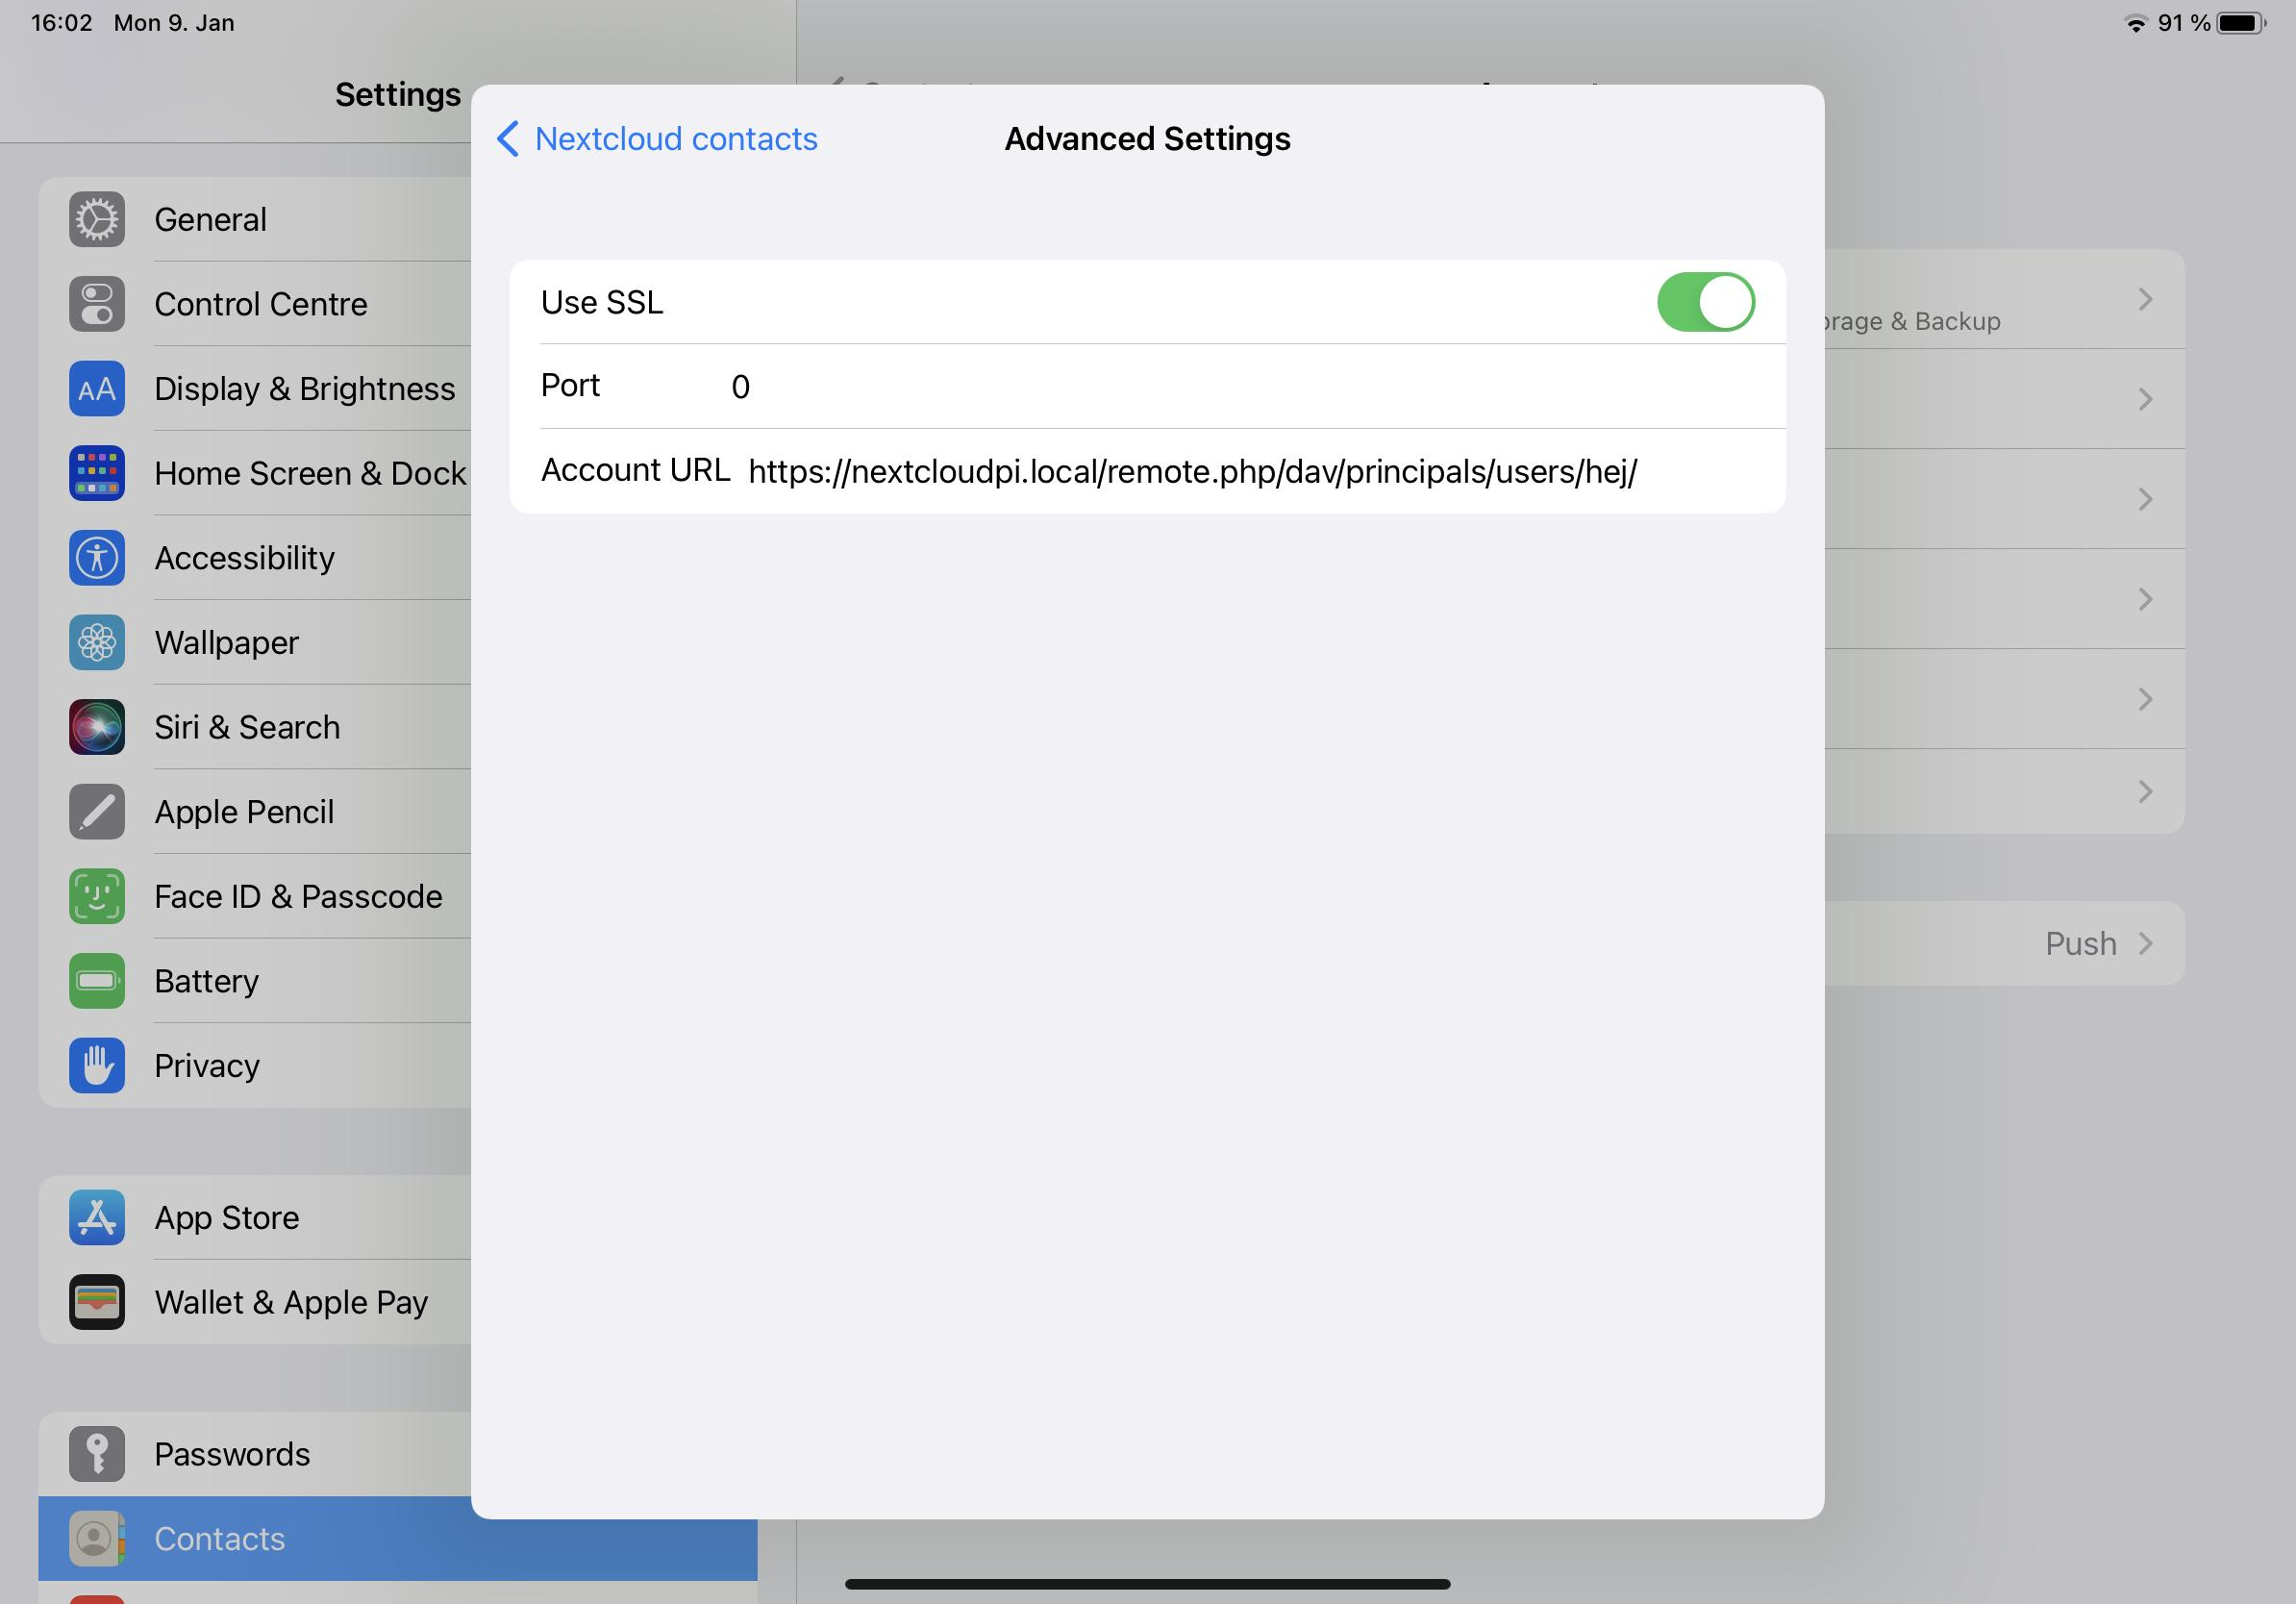
Select Other and then Add CardDAV account. In the Server field, enter the URL of Nextcloud (for example, https://nextcloudpi.local). Below this is space for the username and password of the Nextcloud account. Open the Advanced Settings for the new account.
-
Ensure the Use SSL option is enabled. The account URL is usually set correctly. It contains, amongst other things, the host name of your Nextcloud and your user name.
To create a new account on macOS for synchronizing address books, open the Contacts app and select Add Account from the Contacts menu. Activate the checkbox Other Contacts Account and click on Continue. You can accept the CardDAV entry. In the Account Type drop-down menu, select Manual entry.
(Heike Jurzik, CC BY-SA 4.0)
Enter your Nextcloud user name, password, and server address. The current macOS version requires you to specify port 443 (for SSL) in the server address. For example, if the address of your Nextcloud is https://nextcloudpi.local and the username is hej, then enter the following in the field:
https://nextcloudpi.local:443/remote.php/dav/principals/users/hej
Syncing your calendars
Exporting your calendars works similarly. Through the Calendar app, you can do this with iCloud in the browser, on your smartphone/tablet, or the macOS desktop.
First, set the calendar to public. This doesn't mean that everyone can access your calendar. It's only used to generate a link for the calendar subscription. Copy the URL to the clipboard. It's not yet possible to import the calendar directly into Nextcloud because you don't need a link for this, but an .ics file (iCalendar). Here is how to generate such a file from the link:
-
Copy the link to the clipboard
-
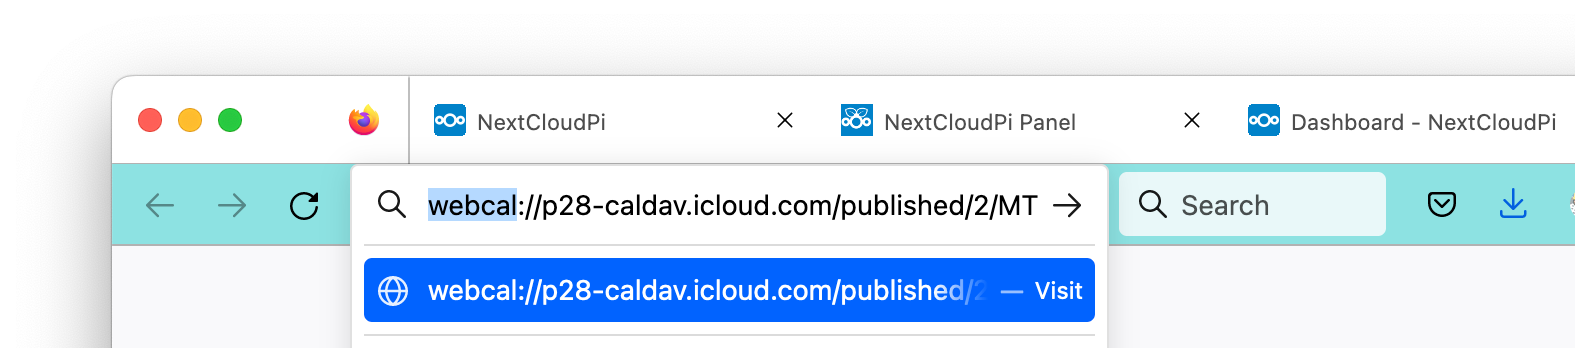
Paste the link into the address bar of a web browser
-
Change the beginning of the URL and replace
webcalwithhttp -
Press Enter and save the
.icsfile on your disk
(Heike Jurzik, CC BY-SA 4.0)
You can now import the .ics file. To do this, open the Calendar app in Nextcloud, click Calendar settings at the bottom left and then Import calendar. Select the .ics file you saved in the file manager.
Repeat this process for all iCloud calendars. After that, it's time to replace the old iCloud synchronization service.
Synchronizing events
To synchronize new events with Nextcloud, set up a new account on your client devices (smartphone, tablet, desktop):
-
iPhone/iPad: Settings / Calendar / Accounts / Add Account, select Other and then choose Add CalDAV Account. In the Server field, enter your local Nextcloud URL, which is
https://nextcloudpi.local. You can see a space for the username and password of the Nextcloud account. -
macOS: Open the Calendar app and select Add Account from the Calendar menu. Activate the checkbox Other CalDAV Account and click Continue. From the Account Type drop-down menu, select Manual entry. Enter your Nextcloud username and password as well as the Nextcloud server address. Don't forget to specify the port 443 (for SSL) in the server address; otherwise the account setup will fail.
Tip: If you want to synchronize other files like documents, photos, videos, and so on, in addition to your contacts and calendars, you can install the Nextcloud app offered in the App Store.
This article has been adapted from Heike Jurzik's book, Nextcloud on the Raspberry Pi.


Comments are closed.