As a longtime user of Chromebooks, I know how useful and convenient those devices can be. They're light, the hardware is solid, and Chromebooks are excellent devices to carry while traveling or working on the go.
The main drawback of Chromebooks, though, is how tightly they're tied to Google's services. Over the last little while, I've been steadily de-Googlizing my life. One of the last big obstacles to doing that has been my Chromebook.
You can see my problem. On one hand, I had a device that I didn't want to part with. On the other hand, I wanted to decouple myself from the corporate behemoth behind that device. What was a poor Chromebook user to do? Install Linux, of course!
After doing quite a bit of research and quizzing a few people whose opinion on these matters I respect, I turned to GalliumOS. Here's a look at how to use GalliumOS to "penguinize" a Chromebook.
Preparing to install
You can't just jump in and install GalliumOS on a Chromebook without preparation. The following is an overview of the steps you need to follow. I've linked to the detailed instructions on the GalliumOS website.
First, download the GalliumOS installation image. There are different images for different models of Chromebook, so you'll need to choose the right one for your device.
Once you have the installation image, create a bootable USB drive with the image. You can find instructions for creating a bootable USB drive on the GalliumOS website.
Next, create a recovery image for your Chromebook. The recovery image is a backup of ChromeOS (the Chromebook's operating system). You'll need the recovery image if something goes wrong or if you decide that you want to go back to using ChromeOS.
If you have any files on your Chromebook, move them elsewhere. The next pre-installation step resets Chromebook to its factory defaults and you'll lose everything. Back up those files now before it's too late.
After that, boot your Chromebook into developer mode. Booting into developer mode both enables you to install another operating system on the device. It takes several minutes to boot into developer mode, so be patient.
Once you're in developer mode, you'll need to enable what's called "legacy boot mode," and this lets you install GalliumOS. To do that, crack open a terminal window by pressing CTRL+ALT+T. In the terminal, type shell and then type sudo crossystem dev_boot_legacy=1.
Installing GalliumOS
Now you're ready to install GalliumOS. Shut down your Chromebook, plug in the USB drive containing the bootable installation image, and restart.
Once it starts up, GalliumOS looks and acts like any other Linux distribution. You can test drive it using the USB drive to make sure everything works properly. When you're ready to install, double click the Install GalliumOS icon on the desktop.
Like most Linux distributions, GalliumOS uses a graphical installer that walks you through the process. It's simple and painless and requires very little interaction from you.
Installing GalliumOS on my Acer C720 Chromebook took about 10 minutes. It could take less or more time depending on which model of Chromebook you own.
Using GalliumOS
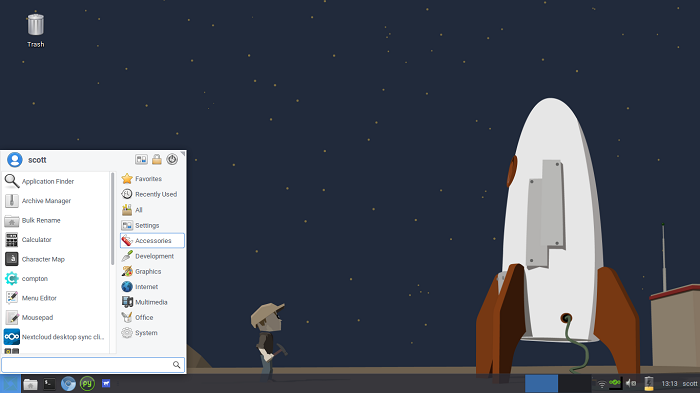
GalliumOS is based on Xubuntu, which uses a lightweight desktop environment called Xfce. I've used Xubuntu extensively over the years, so Xfce is nothing new to me. If you've never used Xfce, don't worry. It looks very familiar.

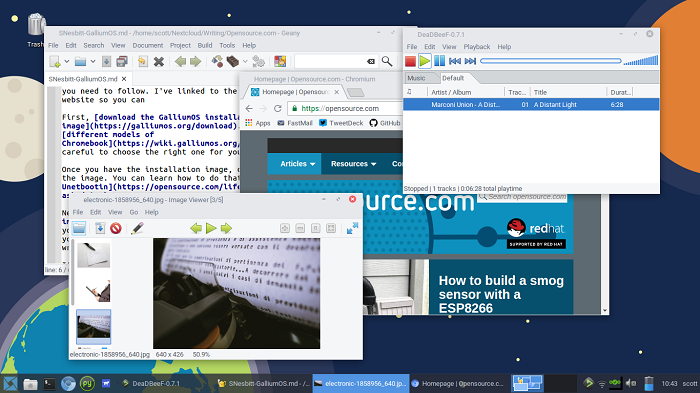
Out of the box, GalliumOS comes with a very basic set of software, including a simple text editor, an image viewer, the Chromium web browser, and the DeaDBeeF music player. Obviously, this software (and the other stock software) isn't enough to do much serious work.
If you need more software (and you probably will), you can install it using the Synaptic Package Manager, or you can download and install Debian packages or AppImage-based apps.
I installed various pieces of software that I use to do my work, including:
- Geany, along with a few plugins (for heavy-duty text editing)
- Pandoc (for converting between markup languages)
- PyRoom (for times when I need to write without distractions)
- TiddlyWiki and TiddlyDesktop (for organizing information)
- Nextcloud desktop client (for syncing files with my other laptop)

Using GalliumOS on a Chromebook reminds me of working with the netbooks I used from 2007 to 2010. The operating system is light and focused, so it's quite fast. On top of that, I'm getting between five and a half to six hours of battery life.
It's been two months since I installed GalliumOS on my Chromebook and it hasn't let me down. While I doubt I could use it for processor-intensive tasks like editing video, my Chromebook mated with GalliumOS does a great job of letting me get on with the bulk of my work.


21 Comments