

When I talk to people about Git, almost everyone has a strong reaction to the git rebase command. This command has caused many people to change directory, remove the repository, and just re-clone to start over. I think this comes from misconceptions about how branching actually works, a pretty terrible default interface, and some merge conflicts mucking things up.
Git squash
If you've ever made a lot of commits locally and wish there was a way to smash them all down into a single commit, you're in luck. Git calls this concept "squashing commits." I discovered the concept while working on documentation. It took me over a dozen commits to finally get a bit of markdown just right. The repo maintainer didn't want to see all my attempts cluttering up the project's history, so I was told to "just git squash your commits."
Squashing sounded like a solid plan. There was just one issue. I didn't know how to do it. As someone new to Git, I did what anyone would do. I consulted the manual for squash and immediately hit a snag:
$ man git-squash
> No manual entry for git-squash
It turns out I wasn't being told to run a Git command called squash, I was being asked to run an entirely separate command that would, in the end, combine all my commits into one. This is a common scenario: someone who has been using a tool for a while uses jargon or refers to a concept, which to them is absolutely clear, but isn't obvious to someone new to the tech.
Conceptually it would look like this:
Photos by Dan Burton on Unsplash
I'm laying it out this way to encourage you that you are definitely not the first or last person that would be confused by Git or someone talking about Git. It's OK to ask for clarification and for help finding the right documentation. What that docs maintainer actually meant was, "use Git rebase to squash the commits into one."
Git rebase
The git rebase command removes a chain of commits away from its first parent and places it at the end of another chain of commits, combining both chains of commits into one long chain, instead of two parallel chains. I realize that's a dense statement.
If you think back to how Git commits are chained together, you can see that any branch aside from your initial main branch has a parent commit that serves as the "base" of that chain. Rebasing is the act of making the last commit in another chain the new "base" commit for a specified branch.
You might already be more familiar with Git merge. Take a look at how the git-scm.com site explains the difference:
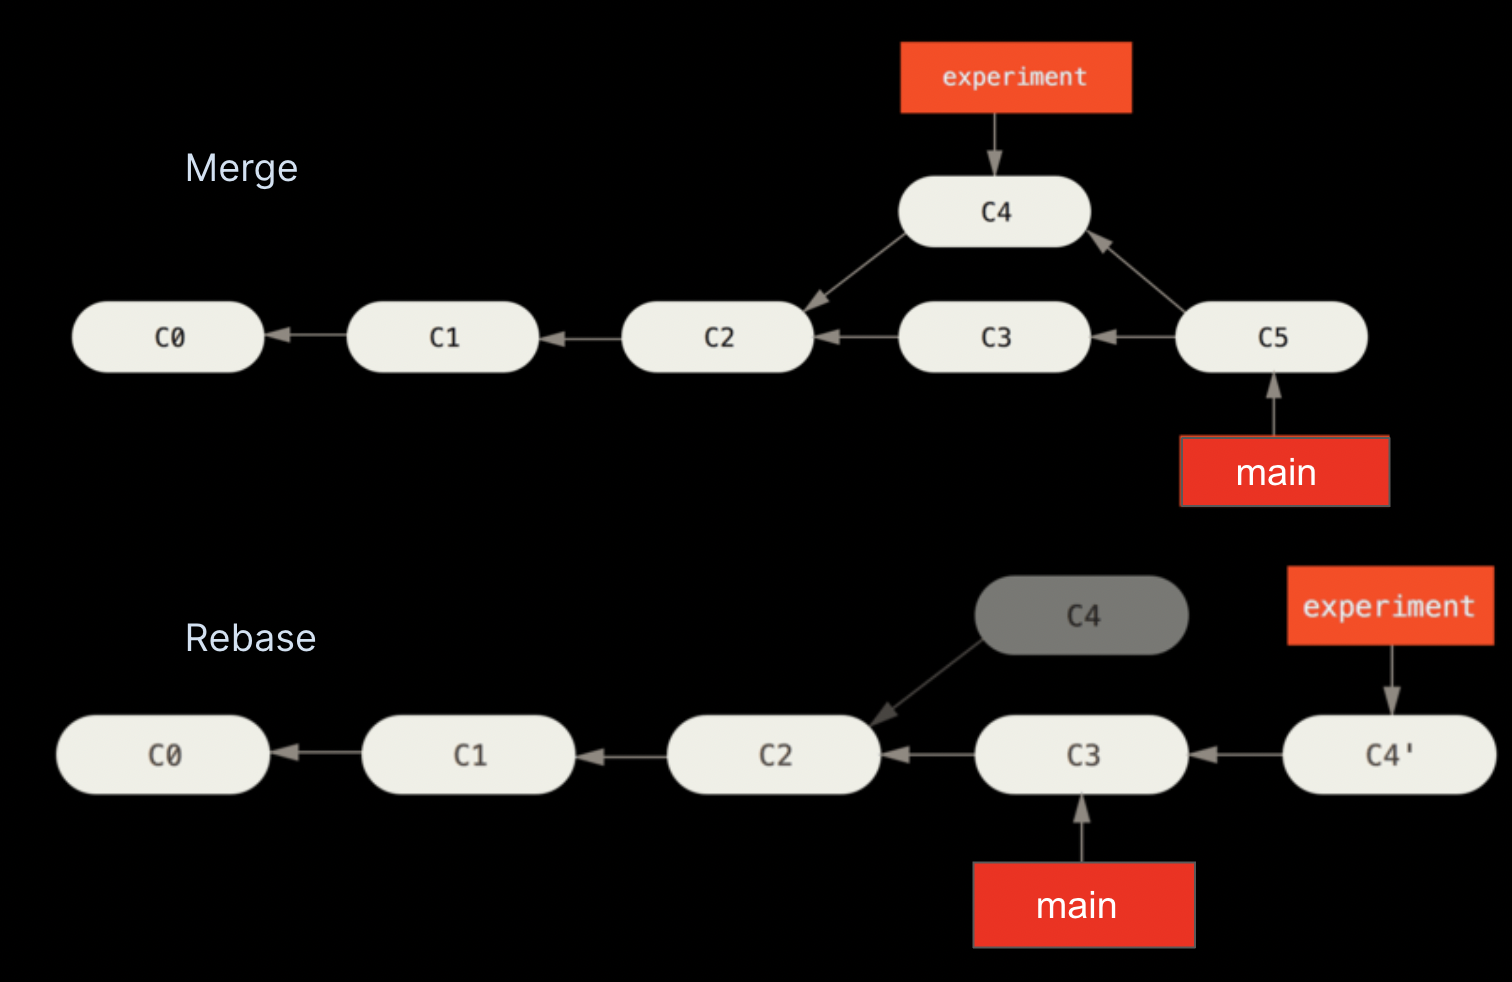
(Git-scm.com, CC BY-SA 3.0)
In this example merge, Git preserves the chain of commits shown in the image as C4, which has a parent of C2, when combining the changes in C3 to make a whole new commit, C5. The branch pointer for "experiment" still exists and still points at C4.
The rebase in this example shows a similar situation of C4 first existing as a separate branch with a parent of C2. But then, instead of merging with the code of C3, it makes C3 the new parent of C4, resulting in a new commit called C4. Notably, the branch pointer "main" has not moved yet. To make Git move the pointer to the end of the chain, currently pointed at by "experiment", you also need to perform a merge.
Rebase is not a replacement for merge. It's a tool for making cleaner histories to be used in conjunction with merge.
Interactive rebase is your best friend!
One of the scariest parts of performing a rebase from the command line is the horrifying interface. Running the command git rebase <target-refr> either works or blows up. There's not a lot of feedback or way to ensure it is doing what you precisely want. Fortunately, the rebase command and many other Git commands have an interactive mode, which you can invoke with the parameter -i' or –interactive`.
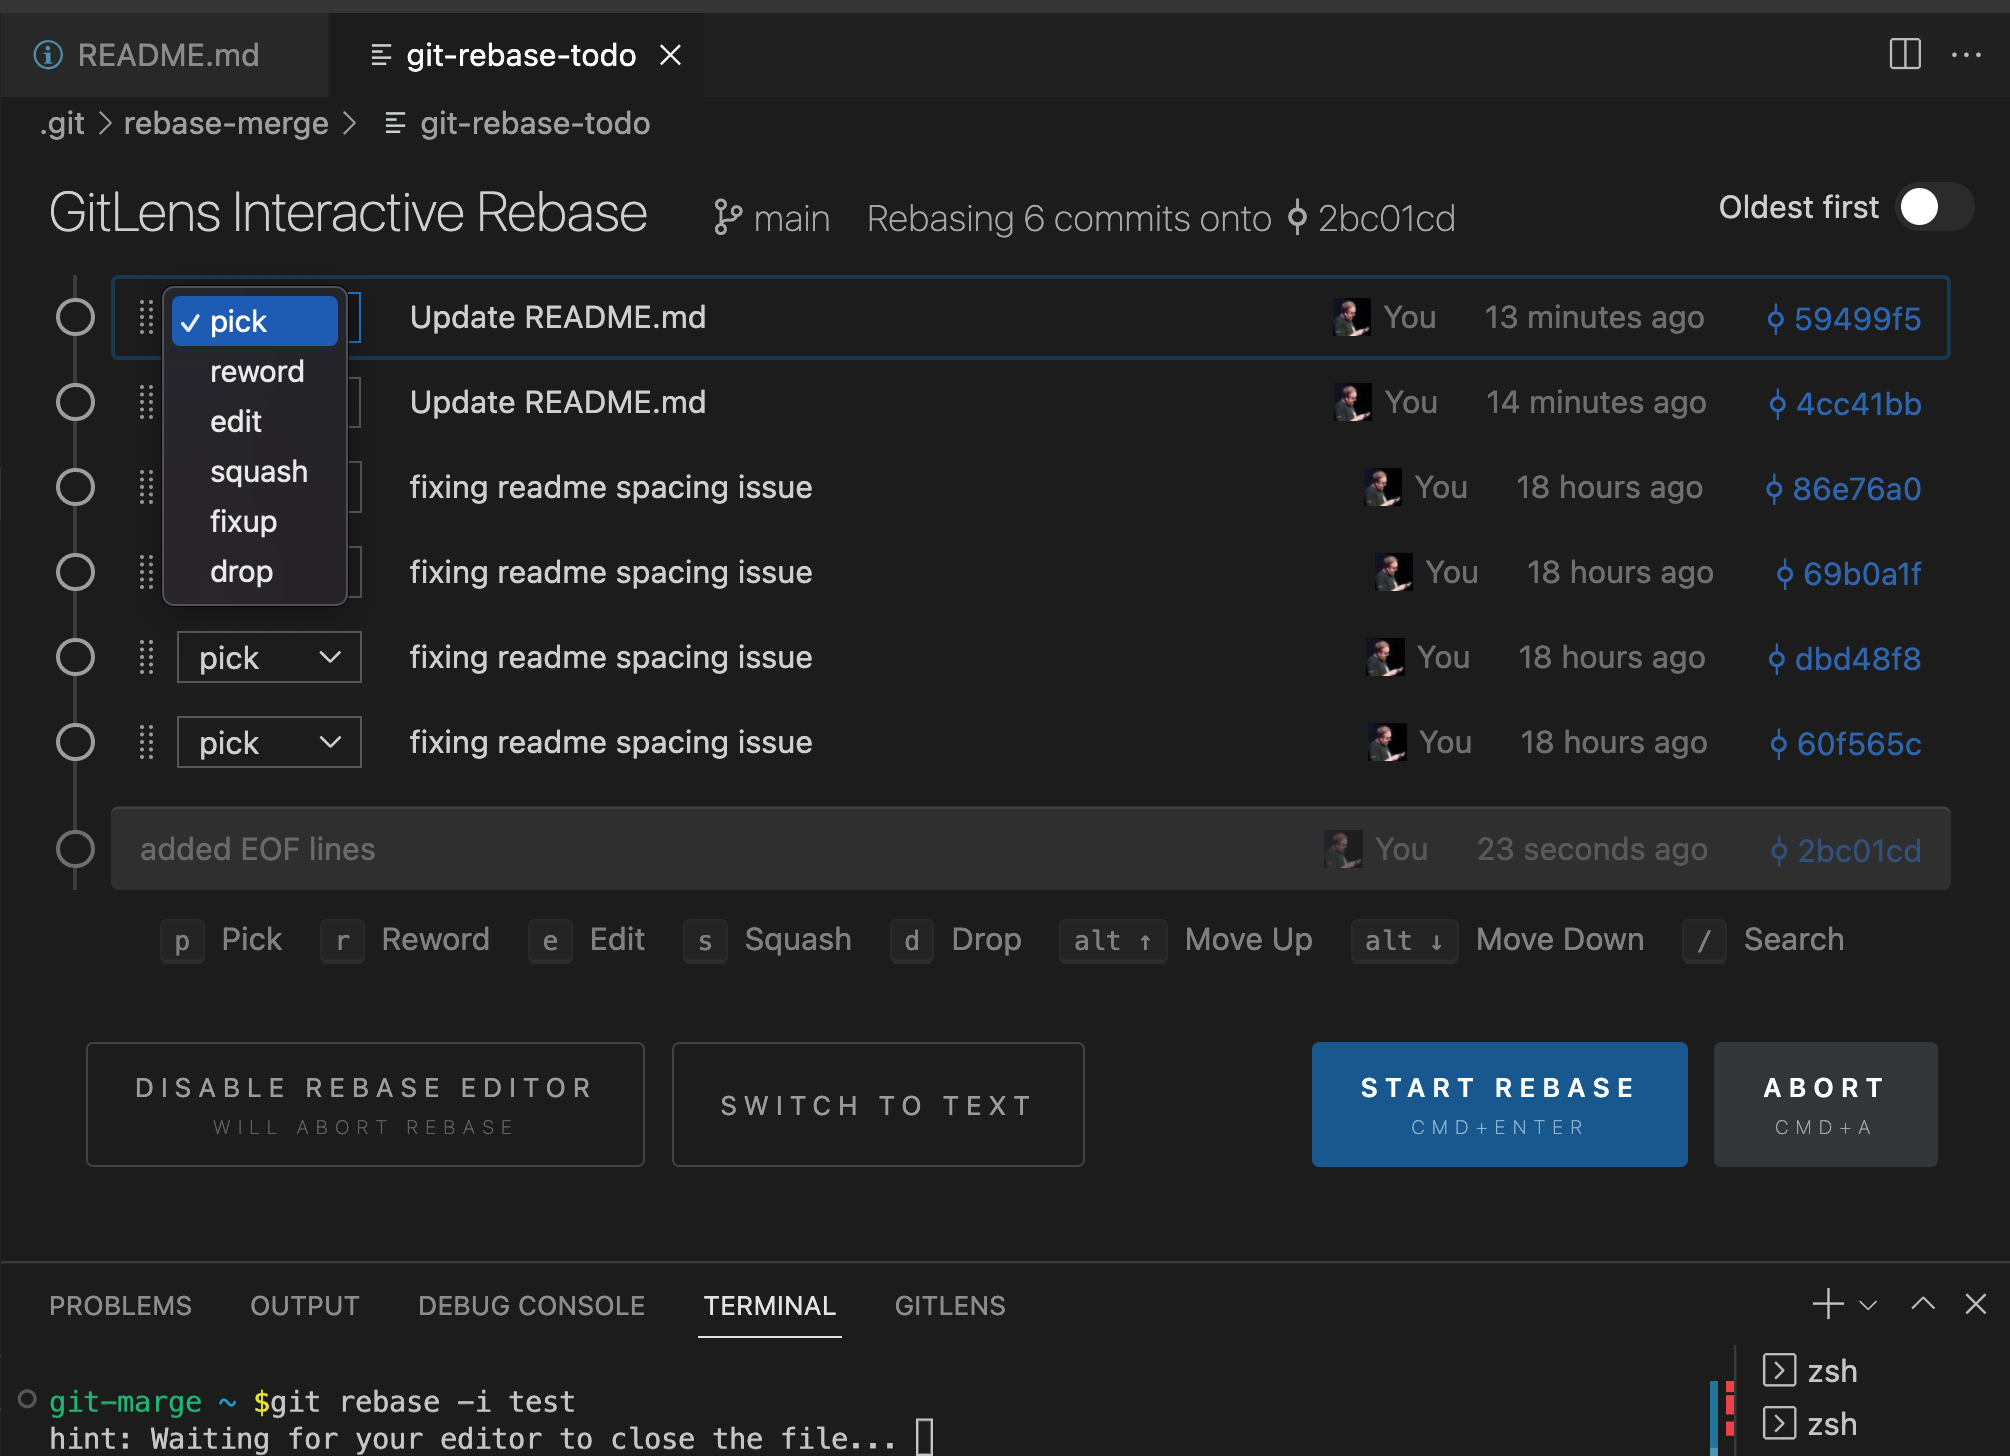
(Dwayne McDaniel, CC BY-SA 4.0)
When invoking interactive mode, rebase transforms from a terrifying black box into a menu of options that let you do several things to the chain of commits you are rebasing. For every commit, you can choose to:
-
Pick: Include it as is
-
Reword: Rewrite the commit message
-
Edit: Make further changes to the files in the commit before the rebase finishes
-
Squash: Smash multiple commits into one commit, keeping all commit messages
-
Fixup: Smash multiple commits into one commit, but just keep the last commit message
-
Drop: Discard this commit
I personally like the way that the open source GitLens extension for VS Code lays out the options with dropdown picklists, but Git lets you assign these options using any editor. For text-only tools like Emacs or Vim, you need to type out the selection rather than pick from a menu, but the end result is still the same.
When to rebase
Knowing when to rebase is as important as knowing how to rebase. In truth, if you don't care about your repos histories being a bit messy, then you might never perform a rebase. But if you do want to make cleaner histories and have fewer commits cluttering up your graph view, then there is one clear rule of thumb to always keep in mind:
"Do not rebase commits that exist outside your repository and that people may have based work on."
If you follow that guideline, you'll be fine.
Simply put, if you make a local branch to do your work, feel free to rebase it all you want. But as soon as that branch is pushed, do not rebase it. It is really up to you.
Hopefully you found this helpful in understanding how the git rebase command works and can use it with more confidence. As with any Git command, practice is the only real way to learn and understand what is going on. I encourage you to brave and experiment with interactive rebase!
Git cherry-pick
Most developers have committed work only to realize they have been working on the wrong branch. Ideally, they could just pick up that one commit and move it over to the right branch. That is exactly what git cherry-pick does.
Cherry-picking is the art of rebasing single commits. This was so common of a pattern that they gave it its own command.
(Crossroadsphotototeam, CC BY-SA 2.0)
To perform a cherry pick, you simply tell Git the ID of the commit you want to move to "here", where HEAD is pointing:
$ git cherry-pick <target-ref>Should something go wrong, it's straightforward to recover, thanks to the error messages that Git provides:
$ git cherry-pick -i 2bc01cd
Auto-merging README.md
CONFLICT (content): Merge conflict in README.md
error: could not apply 2bc01cd… added EOF lines
hint: After resolving the conflicts, mark them with
hint: "git add/rm ", then run
hint: "git cherry-pick --continue".
hint: You can instead skip this commit with "git cherry-pick --skip".
hint: To abort and get back to the state before "git cherry-pick",
hint: run "git cherry-pick --abort".
$ git cherry-pick --abort
Git more power
The git rebase command is a powerful part of the Git utility. It's probably best to practice using it with a test repo before you have to use it under stress, but once you're familiar with its concepts and workflow, you can help provide a clear history of a repository's development.


Comments are closed.