

Pipy is an open source, cloud-native, network stream processor. It is modular by design and can create a high-performance network proxy. It's written in C++ and is built on top of the Asio asynchronous I/O library. Pipy is ideal for a variety of use cases ranging from edge routers, load balancers, proxy solutions, API gateways, static HTTP servers, service mesh sidecars, and more.
Pipy also comes with built-in JavaScript support through PipyJS. PipyJS is highly customizable and predictable in performance, with no garbage collection overhead. Currently, PipyJS is part of the Pipy code base, but it has no dependency on it and in the future it may be moved to a standalone package.
Pipy quick start guide
You can run the production version of Pipy using Podman or Docker with one of the tutorial scripts provided on the official Pipy Git repository. The Pipy container image can be configured with a few environment variables:
-
PIPY_CONFIG_FILE=</path/to/config-file>sets the location of the Pipy configuration file. -
PIPY_SPAWN=nsets the number of Pipy instances you want to start, wherenis the number of instances. This is a zero-based index, so 0 represents 1 instance. For example, usePIPY_SPAWN=3for 4 instances.
Start the Pipy server with this example script:
$ docker run --rm -e PIPY_CONFIG_FILE=\
https://raw.githubusercontent.com/flomesh-io/pipy/main/tutorial/01-hello \
-e PIPY_SPAWN=1 -p 8080:8080 flomesh/pipy-pjs:latest
You may notice that instead of a local file, this code provides a link to a remote Pipy script through the environment variable PIPY_CONFIG_FILE. Pipy is smart enough to handle that.
For your reference, here are the contents of the file tutorial/01-hello/hello.js:
pipy()
.listen(8080)
.serveHTTP(
new Message('Hi, there!\n')
)
This simple script defines one Port pipeline, which listens on port 8080 and returns "Hi, there!" for each HTTP request received on the listening port.
As you've exposed local port 8080 with the docker run command, you can proceed with a test on the same port:
$ curl https://localhost:8080
Executing the above command displays Hi, there! on the console.
For learning, development, or debugging purposes it's recommended to proceed with the local installation (either build Pipy from sources or download a release for your OS) of Pipy, as it comes with an admin web console along with documentation and tutorials.
Once installed locally, running pipy without any arguments starts the admin console on port 6060, but it can be configured to listen on the different port with the --admin-port option.

(Ali Naqvi, CC BY-SA 40)
To build Pipy from source, or to install a precompiled binary for your operating system, refer to README.md on the Pipy Git repository.
Running Pipy in a terminal
To start a Pipy proxy, run Pipy with a PipyJS script file, for example, the script in tutorial/01-hello/hello.js if you need a simple echo server that responds with the same message body received with every incoming request:
$ pipy tutorial/01-hello/hello.js
Alternatively, while developing and debugging, one can start Pipy with a builtin web UI:
$ pipy tutorial/01-hello/hello.js --admin-port=6060To see all command-line options, use the --help flag:
$ pipy --help
Pipy is a stream processor
Pipy operates on network streams using an event-driven pipeline where it consumes the input stream, performs user-provided transformations, and outputs the stream. A pipy data stream takes raw data and abstracts it into an event. An event can belong to one of four categories:
- Data: Network streams are composed of data bytes and come in chunks. Pipy abstracts out chunks into a Data event.
-
MessageStart, MessageEnd, StreamEnd: These three non-data events work as markers, giving the raw byte streams high-level semantics for business logic to rely on.
Pipy Design
The internal workings of Pipy are similar to Unix Pipelines but unlike Unix pipelines, which deal with discreet bytes, Pipy deals with streams of events.
Pipy processes incoming streams through a chain of filters, where each filter deals with general concerns like request logging, authentication, SSL offloading, request forwarding, and so on. Each filter reads from its input and writes to its output, with the output of one filter connected to the input of the next.
Pipelines
A chain of filters is called a pipeline and Pipy categorizes pipelines in 3 different categories according to their input sources.
-
Port pipeline: Reads in Data events from a network port, processes them, and then writes the result back to the same port. This is the most commonly used request and response model. For instance, when Pipy works like an HTTP server, the input to a Port pipeline is an HTTP request from the clients, and the output from the pipeline would be an HTTP response sent back to clients.
-
Timer pipeline: Gets a pair of MessageStart and MessageEnd events as its input periodically. Useful when Cron job-like functionality is required.
-
Sub-pipeline: Works in conjunction with a join filter, such as link, which takes in events from its predecessor pipeline, feeds them into a sub-pipeline for processing, reads back the output from the sub-pipeline, and then pumps it down to the next filter.
The best way to look at sub-pipelines and join filters is to think of them as callees and callers of a subroutine in procedural programming. The input to the joint filter is the subroutine's parameters, the output from the joint filter is its return value.
A root pipeline, such as Port or Timer, cannot be called from join filters.
To get a list of builtin filters and their parameters:
$  pipy --list-filters
$  pipy --help-filters
Context
Another important notion in Pipy is that of contexts. A context is a set of variables attached to a pipeline. Every pipeline gets access to the same set of variables across a Pipy instance. In other words, contexts have the same shape. When you start a Pipy instance, the first thing you do is define the shape of the context by defining variable(s) and their initial values.
Every root pipeline clones the initial context you define at the start. When a sub-pipeline starts, it either shares or clones its parent's context, depending on which joint filter you use. For instance, a link filter shares its parent's context while a demux filter clones it.
To the scripts embedded in a pipeline, these context variables are their global variables, which means that these variables are always accessible to scripts from anywhere if they live in the same script file.
This might seem odd to a seasoned programmer because global variables usually mean they are globally unique. You have only one set of these variables, whereas in Pipy we can have many sets of them (contexts) depending on how many root pipelines are open for incoming network connections and how many sub-pipelines clone their parents' contexts.
Writing a Network Proxy
Suppose you're running separate instances of different services and you want to add a proxy to forward traffic to the relevant services based on the request URL path. This would give you the benefit of exposing a single URL and scaling your services in the back end without users having to remember a distinct service URL. In normal situations, your services would be running on different nodes and each service could have multiple instances running. In this example, assume you're running the services below, and want to distribute traffic to them based on the URI.
-
service-hi at
/hi/*(127.0.0.1:8080, 127.0.0.1:8082) -
service-echo at
/echo(127.0.0.1:8081) -
service-tell-ip at
/ip_/_*(127.0.0.1:8082)
Pipy scripts are written in JavaScript, and you can use any text editor of your choice to edit them. Alternatively, if you have installed Pipy locally, you can use Pipy admin Web UI, which comes with syntax highlighting, auto-completion, hints, as well as the ability to run scripts, all from the same console.
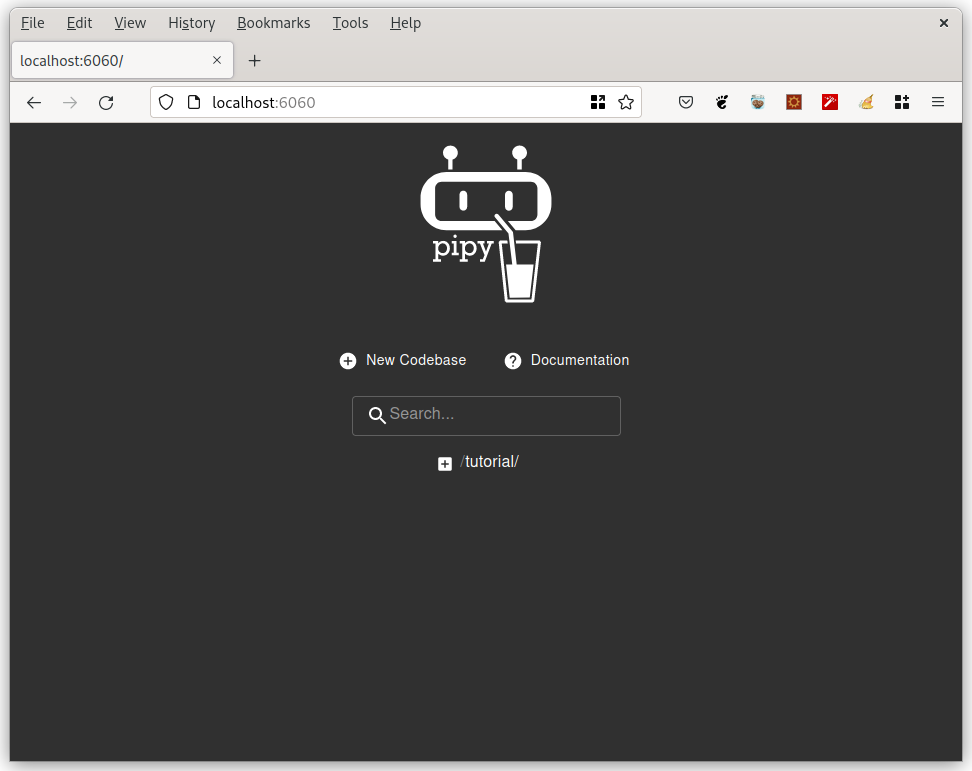
Start a Pipy instance, without any arguments, so the Pipy admin console launches on port 6060. Now open your favorite web browser and navigate to [https://localhost:6060](https://localhost:6060/ to see the built-in Pipy Administration Web UI.
(Ali Naqvi, CC BY-SA 40)
Create a Pipy program
A good design practice is that code and configurations are separated. Pipy supports such modular design through its Plugins, which you can think of as JavaScript modules. That said, you store your configuration data in the config folder, and your coding logic in separate files under the plugins folder. The main proxy server script is stored in the root folder, the main proxy script (proxy.js) will include and combine the functionality defined in separate modules. In the end, your final folder structure is:
├── config
│ ├── balancer.json
│ ├── proxy.json
│ └── router.json
├── plugins
│ ├── balancer.js
│ ├── default.js
│ └── router.js
└── proxy.js
1.Click New Codebase, enter /proxy for the Codebase name in the dialog and then click Create.
-
Click the + button to add a new file. Enter
/config/proxy.jsonfor its filename and then click Create. This is the configuration file used to configure your proxy. -
You now see
proxy.jsonlisted under the config folder in the left pane. Click on the file to open it and add the configuration shown below and make sure you save your file by clicking the disk icon on the top panel.
{ "listen": 8000, "plugins": [ "plugins/router.js", "plugins/balancer.js", "plugins/default.js" ] } -
Repeat steps 2 and 3 to create another file, /config/router.json, to store route information. Enter this configuration data:
{ "routes": { "/hi/*": "service-hi", "/echo": "service-echo", "/ip/*": "service-tell-ip" } } -
Repeat steps 2 and 3 to create another file, /config/balancer.json to store your service-to-target map. Enter the following data:
{ "services": { "service-hi" : ["127.0.0.1:8080", "127.0.0.1:8082"], "service-echo" : ["127.0.0.1:8081"], "service-tell-ip" : ["127.0.0.1:8082"] } } -
Now it's time to write your very first Pipy script, which will be used as a default fallback when your server receives a request for which you don't have any target (an endpoint) configured. Create the file
/plugins/default.js. The name here is just a convention and Pipy doesn't rely on names, so you can choose any name you like. The script will contain the code shown below, which returns the HTTP Status code 404 with a message of No handler found:
pipy()
.pipeline('request')
.replaceMessage(
new Message({ status: 404 }, 'No handler found'))
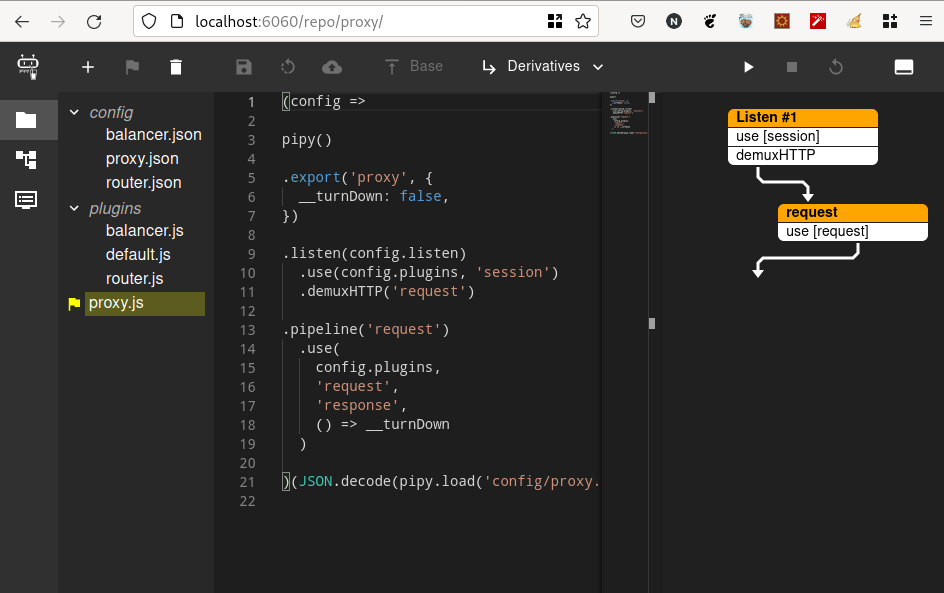
7.Create the file /plugins/router.js, which stores your routing logic:
(config =>
pipy({
_router: new algo.URLRouter(config.routes), })
.export('router', {
__serviceID: '', })
.pipeline('request')
.handleMessageStart(
msg => (
__serviceID = _router.find(
msg.head.headers.host,
msg.head.path, )
) )
)(JSON.decode(pipy.load('config/router.json')))-
Create the file
/plugins/balancer.js, which stores your load balancing logic as a side-note. Pipy comes with multiple Load Balancing algorithms, but for simplicity, you're using the Round Robin algorithm here.(config => pipy({ _services: ( Object.fromEntries( Object.entries(config.services).map( ([k, v]) => [ k, new algo.RoundRobinLoadBalancer(v) ] ) ) ), _balancer: null, _balancerCache: null, _target: '', }) .import({ __turnDown: 'proxy', __serviceID: 'router', }) .pipeline('session') .handleStreamStart( () => ( _balancerCache = new algo.Cache( // k is a balancer, v is a target (k ) => k.select(), (k,v) => k.deselect(v), ) ) ) .handleStreamEnd( () => ( _balancerCache.clear() ) ) .pipeline('request') .handleMessageStart( () => ( _balancer = _services[__serviceID], _balancer && (_target = _balancerCache.get(_balancer)), _target && (__turnDown = true) ) ) .link( 'forward', () => Boolean(_target), '' ) .pipeline('forward') .muxHTTP( 'connection', () => _target ) .pipeline('connection') .connect( () => _target ) )(JSON.decode(pipy.load('config/balancer.json'))) -
Now write the entry point, or the proxy server script, to use the above plugins. Creating a new code base (step 1) creates a default
main.jsfile as an entry point. You can use that as your main entry point, or if you prefer to go with a different name, feel free to deletemain.jsand create a new file with the name of your choice. For this example, delete it and create a new file named/proxy.js. Make sure you click the top flag icon to make it the main entry point, to ensure script execution is started when you hit the run button (the arrow icon on the right).(config => pipy() .export('proxy', { __turnDown: false, }) .listen(config.listen) .use(config.plugins, 'session') .demuxHTTP('request') .pipeline('request') .use( config.plugins, 'request', 'response', () => __turnDown ) )(JSON.decode(pipy.load('config/proxy.json')))
So far, your workspace looks like this:
(Ali Naqvi, CC BY-SA 40)
To run your script, click the play icon button (4th from right). Pipy runs your proxy script, and you see output similar to this:

(Ali Naqvi, CC BY-SA 40)
This shows that your proxy server is listening on port 8000 (which you configured in your /config/proxy.json). Use curl to run a test:
$ curl -i [https://localhost:8000](https://localhost:8000)
HTTP/1.1 404 Not Found
content-length: 10
connection: keep-alive
No handler found
That response makes sense because you haven't configured any target for root. Try one of your configured routes, such as /hi:
$ curl -i [https://localhost:8000/hi](https://localhost:8000/hi)
HTTP/1.1 502 Connection Refused
content-length: 0
connection: keep-alive
You get 502 Connection Refused because you have no service running on your configured target port.
You can update /config/balancer.json with details like the host and port of your already running services to make it fit for your use case, or you can just write a script in Pipy to listen on your configured ports, and return simple messages.
Save this code to a file on your local computer named mock-proxy.js, and remember the location where you stored it:
pipy()

.listen(8080)
  .serveHTTP(
    new Message('Hi, there!\n')
  )

.listen(8081)
  .serveHTTP(
    msg => new Message(msg.body)
  )

.listen(8082)
  .serveHTTP(
    msg => new Message(
      `You are requesting ${msg.head.path} from ${__inbound.remoteAddress}\n`
    )
  )
Open a new terminal window and run this script with Pipy (change /path/to to the location where you stored this script file):
$ pipy /path/to/mock-proxy.js
2022-01-11 18:56:31 [INF] [config]
2022-01-11 18:56:31 [INF] [config] Module /mock-proxy.js
2022-01-11 18:56:31 [INF] [config] ================
2022-01-11 18:56:31 [INF] [config]
2022-01-11 18:56:31 [INF] [config] [Listen on :::8080]
2022-01-11 18:56:31 [INF] [config] ----->|
2022-01-11 18:56:31 [INF] [config] |
2022-01-11 18:56:31 [INF] [config] serveHTTP
2022-01-11 18:56:31 [INF] [config] |
2022-01-11 18:56:31 [INF] [config] <-----|
2022-01-11 18:56:31 [INF] [config]
2022-01-11 18:56:31 [INF] [config] [Listen on :::8081]
2022-01-11 18:56:31 [INF] [config] ----->|
2022-01-11 18:56:31 [INF] [config] |
2022-01-11 18:56:31 [INF] [config] serveHTTP
2022-01-11 18:56:31 [INF] [config] |
2022-01-11 18:56:31 [INF] [config] <-----|
2022-01-11 18:56:31 [INF] [config]
2022-01-11 18:56:31 [INF] [config] [Listen on :::8082]
2022-01-11 18:56:31 [INF] [config] ----->|
2022-01-11 18:56:31 [INF] [config] |
2022-01-11 18:56:31 [INF] [config] serveHTTP
2022-01-11 18:56:31 [INF] [config] |
2022-01-11 18:56:31 [INF] [config] <-----|
2022-01-11 18:56:31 [INF] [config]
2022-01-11 18:56:31 [INF] [listener] Listening on port 8080 at ::
2022-01-11 18:56:31 [INF] [listener] Listening on port 8081 at ::
2022-01-11 18:56:31 [INF] [listener] Listening on port 8082 at ::
You now have your mock services listening on ports 8080, 8081, and 8082. Do a test again on your proxy server to see the correct response returned from your mock service.
Summary
You've used a number of Pipy features, including variable declaration, importing and exporting variables, plugins, Pipelines, sub-pipelines, filter chaining, Pipy filters like handleMessageStart, handleStreamStart, and link, and Pipy classes like JSON, algo.URLRouter, algo.RoundRobinLoadBalancer, algo.Cache, and others. For more information, read the excellent Pipy documentation, and through Pipy's admin web UI, and follow the step-by-step tutorials that come with it.
Conclusion
Pipy from Flomesh is an open source, extremely fast, and lightweight network traffic processor. You can use it in a variety of use cases ranging from edge routers, load balancing and proxying (forward and reverse), API gateways, static HTTP servers, service mesh sidecars, and many other applications. Pipy is in active development and is maintained by full-time committers and contributors.


Comments are closed.