

A GitLab Runner is an application that works with GitLab CI/CD to run jobs in a pipeline on GitLab's infrastructure. They're often used to automatically compile applications after code has been committed or to run tests on a code base. You can think of them as cloud-based Git hooks.
The main public GitLab instance provides many easily accessible shared runners ready for use in your CI pipeline. You can find a list of shared runners in your repository's Settings -> CI/CD -> Runners on GitLab.
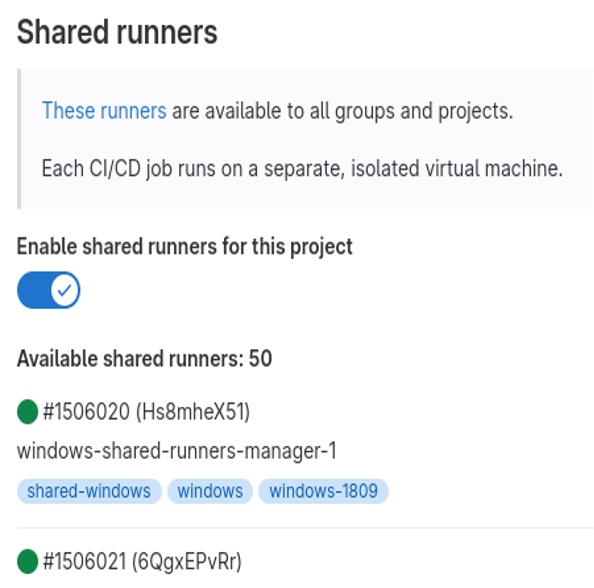
(Lokesh Mandvekar, CC BY-SA 4.0)
There are many reasons you may not want to depend on shared runners and instead stand up your own runners. For example, control over the infrastructure where the runners operate for additional security and/or privacy, flexible runner configuration, or limited CI minutes allotted to your GitLab user account.
GitLab runners depend on an executor tool to run CI jobs. Many options are available for executors: Docker, Kubernetes, VirtualBox, and so on.
So, what about Podman as an executor?
Since v4.2.0, Podman has native support for GitLab runners. Here's a quick look at two approaches for using Podman as an executor for GitLab runners.
Docker executor
You can use Podman as a drop-in replacement for Docker in your GitLab Runner. Here's how:
This example used a CentOS Stream 9 environment in February 2023 using Podman v4.4.0. It should work just as well on any RHEL/CentOS Stream/Fedora environment with a new enough Podman. Check out the GitLab documentation for prerequisites.
First, install Podman:
$ sudo dnf -y install podmanInstall the gitlab-runner package next:
# Add the GitLab runner repository
$ curl -L "https://packages.gitlab.com/install/repositories/runner/gitlab-runner/script.rpm.sh" | sudo bash

# Install the gitlab-runner package
$ sudo dnf -y install gitlab-runner
Finally, allow the user to execute tasks after logout:
$ sudo loginctl enable-linger gitlab-runnerConfigure and register the runner
Use the following steps to configure the Docker executor.
Installing the gitlab-runner package creates a gitlab-runner user account, but you need root access to manipulate the user account. gitlab-runner can be run in user-mode but requires some manual intervention for build processing. In this example, I run it in system-mode with sudo. This is what it looks like:
$ sudo gitlab-runner register
Runtime platform                                    arch=amd64 os=linux pid=7978 revision=d540b510 version=15.9.1
Running in system-mode.

Enter the GitLab instance URL (for example, https://gitlab.com/):
https://gitlab.com
Enter the registration token:
xxxxxxxxxxxxxxxxx
Enter a description for the runner:
[lmandvek-c9s-gitlab-runner]:
Enter tags for the runner (comma-separated):

Enter optional maintenance note for the runner:

WARNING: Support for registration tokens and runner parameters in the 'register' command has been deprecated in GitLab Runner 15.6 and will be replaced with support for authentication tokens. For more information, see https://gitlab.com/gitlab-org/gitlab/-/issues/380872
Registering runner... succeeded                     runner=GR13489419oEPYcJ8
Enter an executor: custom, docker, ssh, docker-ssh+machine, docker-ssh, parallels, shell, virtualbox, docker+machine, instance, kubernetes:
docker
Enter the default Docker image (for example, ruby:2.7):
registry.gitlab.com/rhcontainerbot/pkg-builder
Runner registered successfully. Feel free to start it, but if it's running already the config should be automatically reloaded!

Configuration (with the authentication token) was saved in "/etc/gitlab-runner/config.toml"
You will need some additional configuration to use Podman. Configure the runner to create a network for each job. See the GitLab documentation for more information.
First, enable the Podman system service along with Env change in /etc/gitlab-runner/config.toml:
[[runners]]
    environment = ["FF_NETWORK_PER_BUILD=1"]
    [runners.docker]
        host = "unix:///run/user/1001/podman/podman.sock"
Restart the runner to implement the change:
$ sudo gitlab-runner restartVerify the new runner is visible in your GitLab project's Settings -> CI/CD -> Runners:

(Lokesh Mandvekar, CC BY-SA 4.0)
Next, verify your CI pipelines are using the runner. Your CI task logs will mention the name of the runner being used along with any additional configuration information, such as feature flags and container image used with the runner executor.

(Lokesh Mandvekar, CC BY-SA 4.0)
Podman-in-Podman (pipglr)
Chris Evich has created pipglr, a Podman-in-Podman setup to stand up your own rootless GitLab Runners using rootless Podman. This approach does not require any changes to your .gitlab-ci.yaml configuration, so you can continue using your existing setup as is.
The following is a quick setup guide to help you get this running.
Configuration steps
The container image is built automatically from the pipglr Containerfile, so set the image to that repo:
$ IMAGE="registry.gitlab.com/qontainers/pipglr:latest"Next, create a Podman secret using your GitLab registration token:
$ echo '<actual registration token>' | podman secret create REGISTRATION_TOKEN -Create a blank config.toml that will later contain all your runner settings. You must do this step for the following podman container register runlabel $IMAGE step to succeed:
$ touch ./config.toml # important: file must exist, even if empty.Register your runner. You can repeat this step to register multiple runners. This is useful if you'd like to run several CI tasks in parallel with possibly different sets of tags or configuration options.
$ podman container runlabel register $IMAGEEdit the config.toml using your editor of choice. Editing is optional but often necessary to change the container image used for the actual CI task. By default, the image is set to: registry.fedoraproject.org/fedora:latest
$ $EDITOR ./config.toml # if desiredFinally, configure access to volumes. Several users are utilized inside the container volumes, so you must specifically configure them to permit access. Runlabels again to the rescue:
$ podman container runlabel setupstorage $IMAGE

$ podman container runlabel setupcache $IMAGE
Test the Runner
It's time to check the configurations. Begin by launching the GitLab Runner container:
$ podman container runlabel run $IMAGEAllow the runner user to run services after logout:
$ sudo loginctl enable-linger $(id -u)Verify your new runner is visible in your GitLab project's Settings -> CI/CD -> Runners:

(Lokesh Mandvekar, CC BY-SA 4.0)
Finally, verify your CI pipelines are using your runner:

(Lokesh Mandvekar, CC BY-SA 4.0)
Wrap up
There are multiple ways to spin up GitLab runners using Podman, two of which I have outlined here. Try them out, and let me know which works best for you. In case of any problems with the docker executor approach, please log in to file an issue with Podman upstream or with GitLab support. In case of trouble with the pipglr method, please file an issue on pipglr upstream.
Happy GitLab Running with Podman 🙂


1 Comment