

There are various reasons to stream live video transmissions from webcams. The Raspberry Pi platform is perfect for such applications. It requires little power for continuous applications such as live-streaming servers. Communication with a Raspicam camera module, USB cam, or other network video signals is possible. The system is an RTMP, HLS, and SRT server. This article shows how to set up the Raspberry Pi as a streaming server to use HLS streaming. You need a video source to use it as a streaming server.
Even without a Raspberry Pi, you can do the steps described here. In addition, there are further installation instructions for Windows, Linux, and macOS available.
Setup
The application is datarhei Restreamer, a graphical user interface for the datarhei Core. The datarhei Core runs the well-known media framework FFmpeg under the hood. The easiest way to start with datarhei Restreamer is to install the official Docker container. The download and installation of the program via Docker Hub are automatic with the pull command. Restreamer starts immediately after the installation. If you don't have a Raspberry Pi, use one of the other Docker containers on the datarhei Restreamer GitHub page (e.g., AMD64 or GPU Cuda support).
datarhei Restreamer and datarhei Core are both open source software under the Apache License 2.0.
Here's the command for an installation on a Raspberry Pi 3 and above with GPU support:
docker run -d --restart=always --name restreamer \
   -v /opt/restreamer/config:/core/config -v /opt/restreamer/data:/core/data \
   --privileged \
   -p 8080:8080 -p 8181:8181 \
   -p 1935:1935 -p 1936:1936 \
   -p 6000:6000/udp \
   datarhei/restreamer:rpi-latest
Regardless of which command you use, you only need the --privileged option to access local devices, like a USB camera.
After installation, connect the Raspberry Pi to the local network. Then open the web-based GUI in a browser by navigating to https://device-ip:8181/ui.
You should see the following screen:
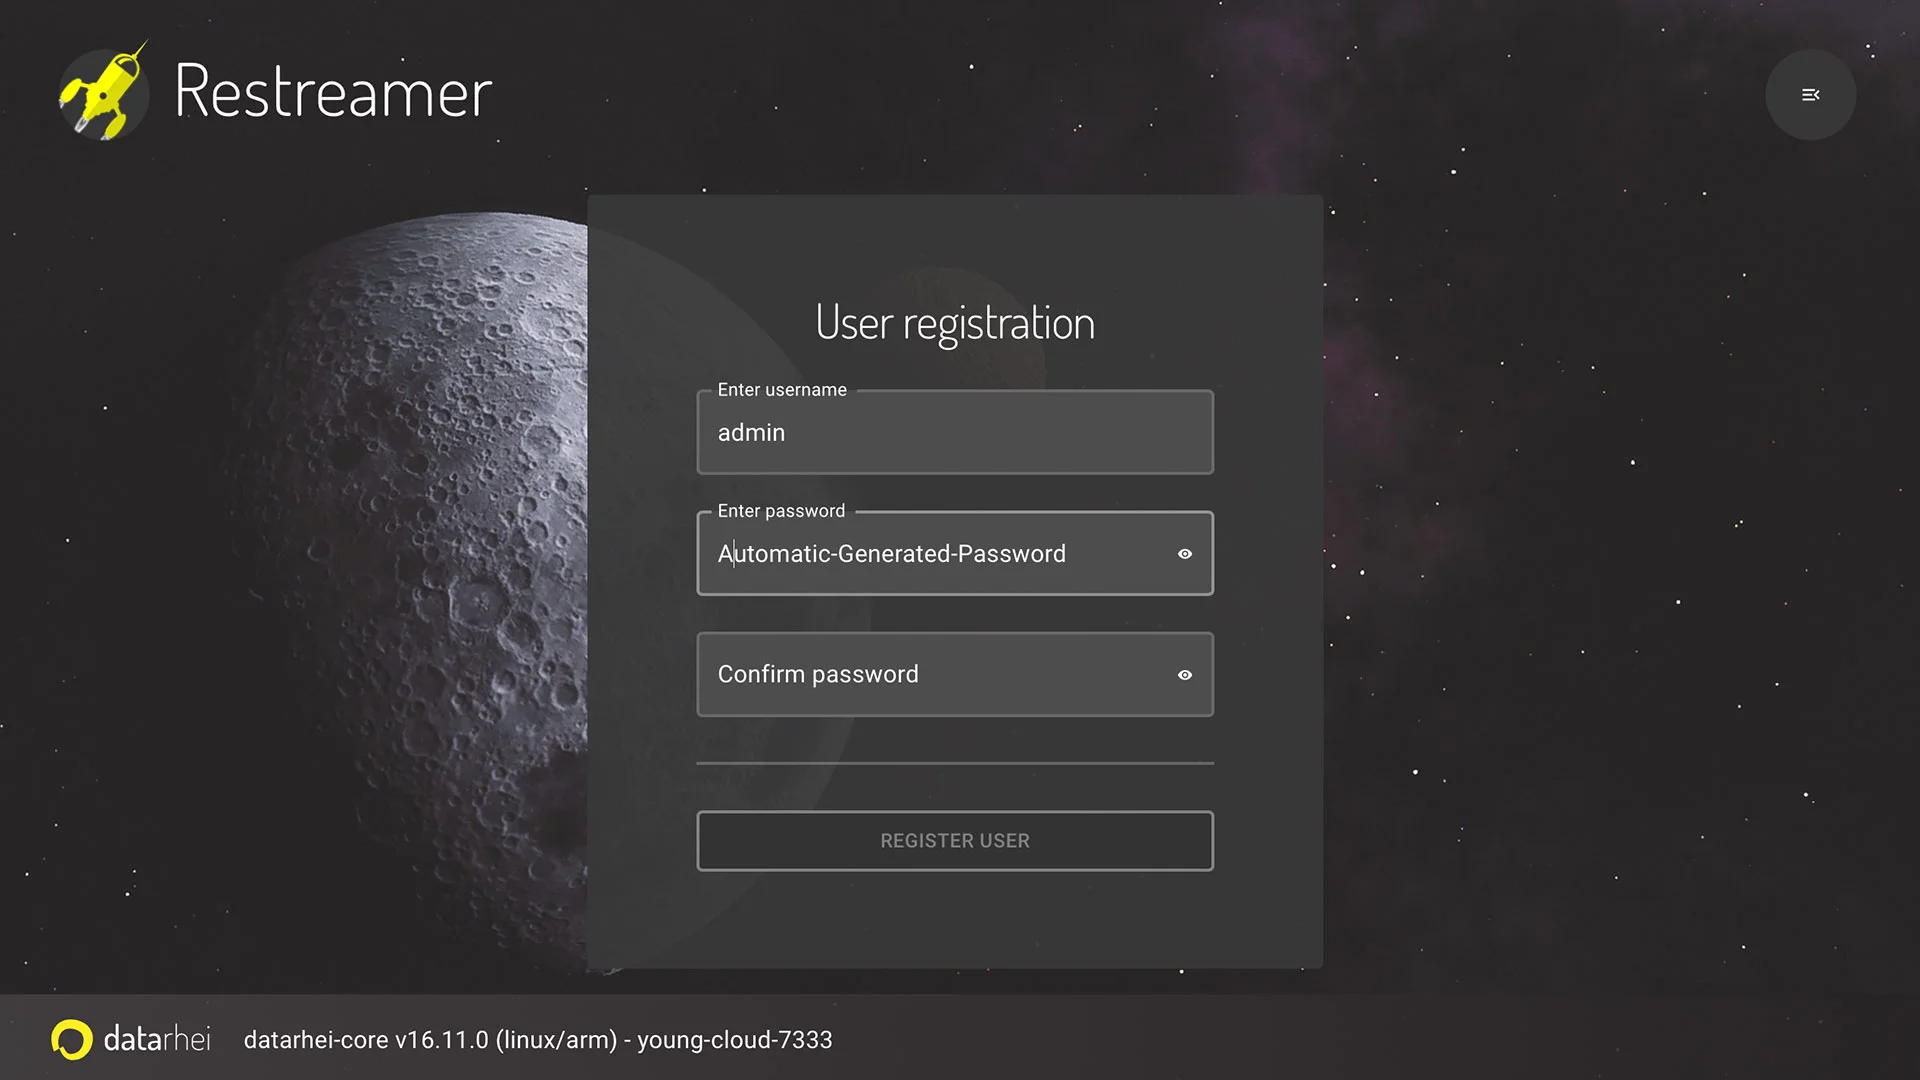
(Sven Erbeck, CC BY-SA 4.0)
Assign the password, and the system is ready for the first login. A wizard is starting to configure the first video source.
Hint: The above Docker command permanently stores the configuration data with the login name and password in the /opt/restreamer/config folder.
Implementation
The application consists of three logical parts: Video input, system dashboard, and video output. The video input and output run independently of each other.
Video input
The wizard will help you to create a video source right from the start. This can be a USB video source, the Raspberry Pi camera, or a network source like an IP cam or an m3u8 file from a network. HLS, RTMP, and real-time SRT protocol are ready to use. The wizard helps to configure the video resolution and sound correctly. In the last step, you can assign different licenses from Creative Commons. It is worth taking a look at the video signal settings. You will find several options, like transcoding or rotating the video for vertical video platforms.
Dashboard
After successfully creating the video signal, you will land in the dashboard.
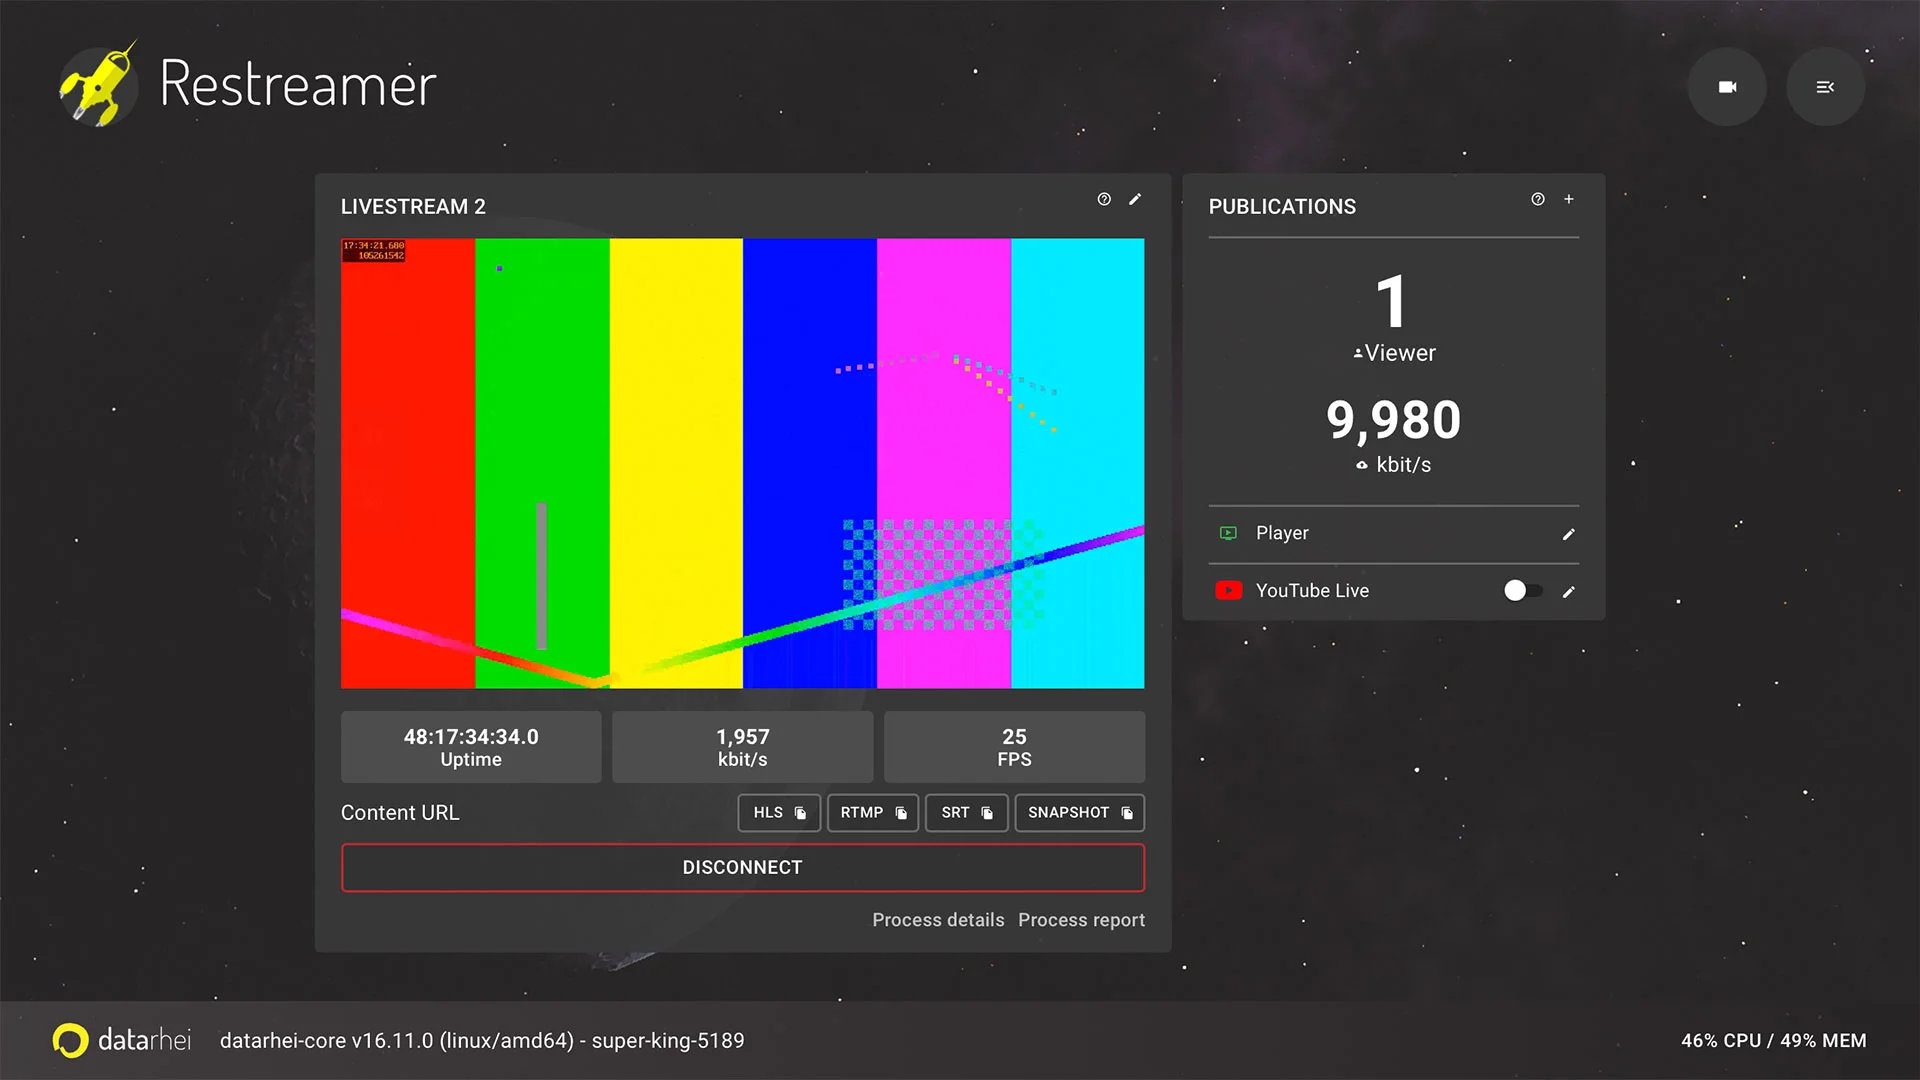
(Sven Erbeck, CC BY-SA 4.0)
It is the central starting point for all other settings. To see the program's full functionality, you can switch to expert mode in system preferences.
The dashboard contains the following:
- Video signal settings.
- Active content URL for RTMP, SRT, HLS server, and snapshot.
- All active Publication Services for restreaming.
- Start the wizard to create additional video sources.
- The system menu.
- Live-Statistics for the video signal.
- Live-System monitoring.
Video output
There are different ways to play the video signal.
The publication website is the simplest, immediately-ready, and internally hosted landing page by Restreamer. The player page can also transmit to Chromecast and AirPlay. Basic settings like adjusting the background image and adding a logo in the player are possible directly in the Restreamer. Those who know HTML can customize the page for themselves. Advanced users can inject code to use the site with external modules like a chat. A statistics module under the video player shows the active viewers and all views. The Share button supports the distribution of the live stream. HTTPS certificates for the website are active with Let's Encrypt without much effort. With a simple port forwarding for HTTPS to the LAN IP of the Raspberry Pi, the website is publicly accessible.
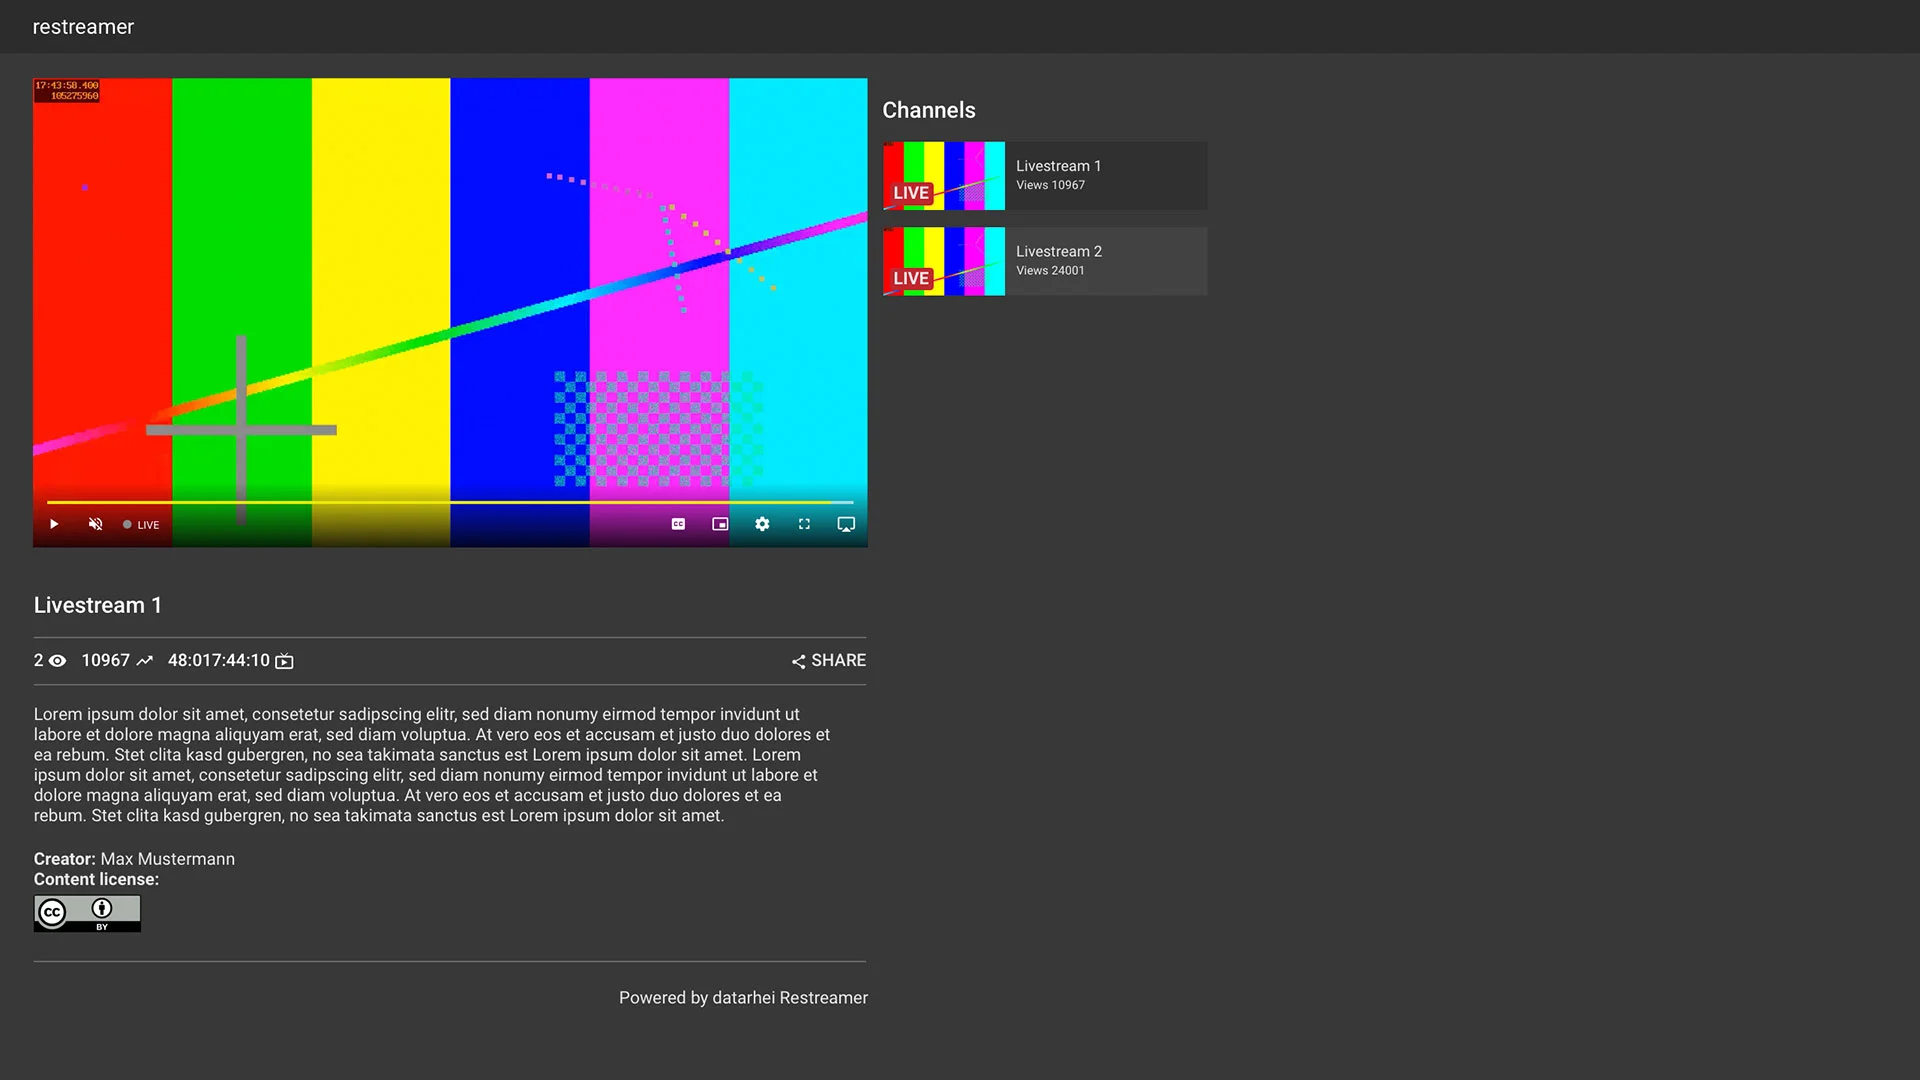
(Sven Erbeck, CC BY-SA 4.0)
The publication services are a great way to restream content. There are numerous ready-made modules for popular websites like YouTube, Twitch, or PeerTube. Likewise, for other streaming software, to popular CDNs. Complete control over the video protocols allows streaming to all RTMP, HLS, and SRT-capable destination addresses. An HTML snippet code with the video player works on web pages.
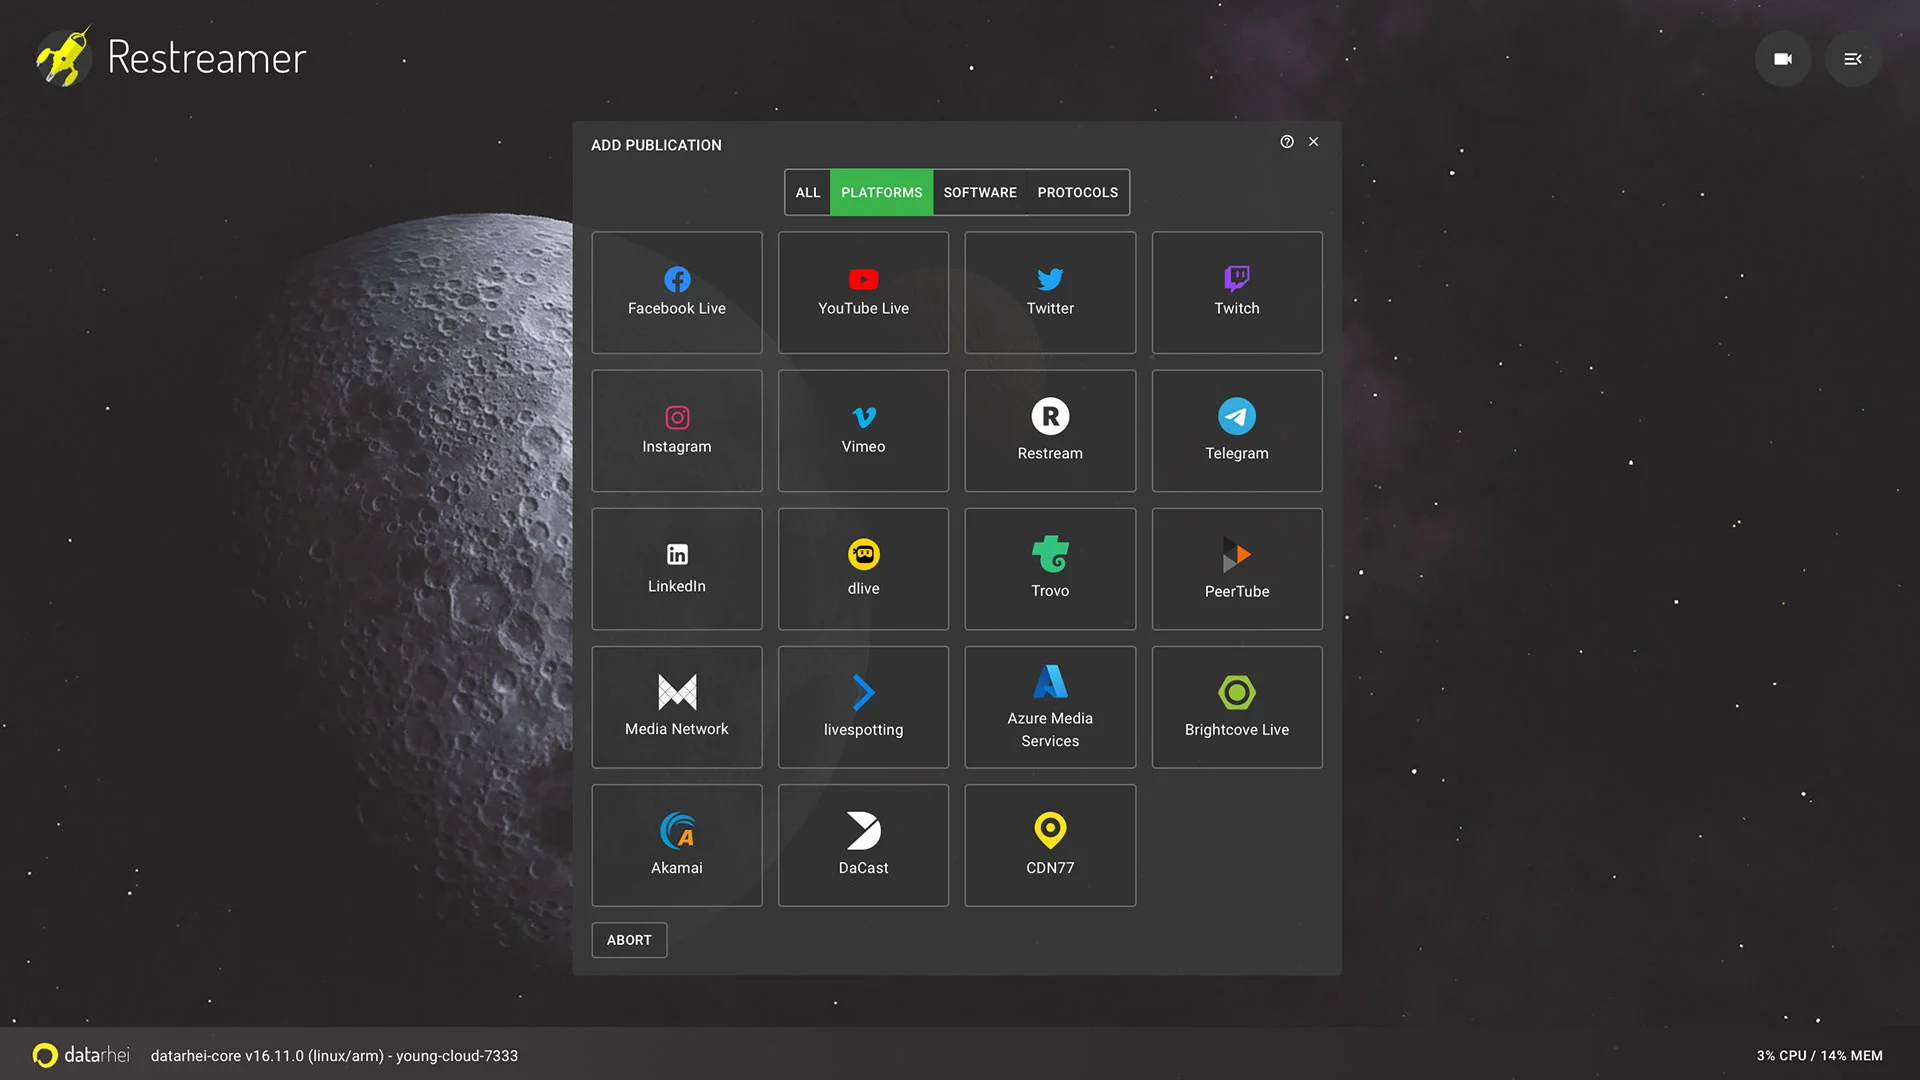
(Sven Erbeck, CC BY-SA 4.0)
Save power while streaming with Raspberry Pi
This article shows how to turn the Raspberry Pi into a streaming server. The Raspberry Pi platform allows you to interact with various video signals in a power-saving way. The pre-settings make it easy to configure the server, and advanced users can make some adjustments to the system. You can use it for restreaming, hosting for live-streaming on a website, or integration into system landscapes with OBS. Using different video sources and transport protocols offer great flexibility as a basis for a project and make this system highly customizable. Furthermore, the datarhei Core with FFmpeg makes it easy for software developers to extend all application processes.
The program turns the Raspberry Pi into a dedicated streaming server. Depending on your internet upload, you can live stream to websites or multi-stream to different video networks independently and without an additional video provider.
Test a fully functional demo before installation on the project website with the login name admin and password demo.


Comments are closed.