When you think of the word wiki, chances are the first thing that comes to mind is Wikipedia. That's not a surprise, considering that Wikipedia did help put the concept of the wiki into the popular consciousness. Wikis, which are websites you can edit, are great tools for collaborating and organizing. But wikis usually require a lot of digital plumbing and a bit of care to use and maintain. All of that's overkill for personal use.
While you can install desktop wikis on your computer, they're not as portable as some people want or need them to be.
Enter TiddlyWiki, the brainchild of British software developer Jeremy Ruston. Not only is it great for organizing yourself, but it's also easy to use and very portable.
Let's take a quick look at the basics of using TiddlyWiki to get organized.
What's TiddlyWiki?
TiddlyWiki isn't software quite as you know it. It's a large web page (consisting of HTML and a lot of JavaScript) that weighs in at around 2MB. You can edit and save the file in a web browser.
It's very flexible. You can use TiddlyWiki to take notes, manage task lists, save bookmarks, publish a blog or website, create a presentation, and a lot more. And people have used it to do some interesting things.
As I mentioned, TiddlyWiki is very portable. You can put it in a folder in, say, Nextcloud and share a TiddlyWiki between computers and mobile devices. Or, you can carry it around on a flash drive.
Getting started
Head over to the TiddlyWiki website and download the file empty.html. Rename that file to something a bit more meaningful and descriptive. Then open it in a web browser.
You'll see the Getting Started tiddler (more on tiddlers in a moment):
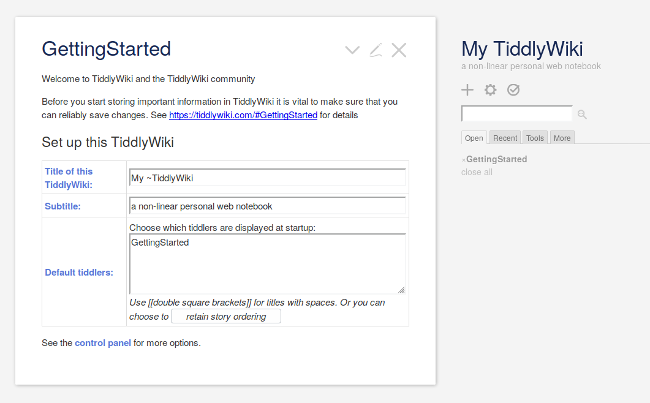
Click the pencil icon in the top-right corner and change the information. Then, click the checkmark icon to save the TiddlyWiki.
A note about saving your TiddlyWiki
Since your web browser thinks a TiddlyWiki is a file, it'll save your TiddlyWiki to the folder on your computer where downloads go. And when it does that, your browser will probably save it with a file name like tiddlywiki(1).html. You don't want that.
If you're using Chrome or Chromium, set the browser to ask you where to save files by selecting Settings, then clicking Show advanced settings on the Settings page. Then click the Ask where to save each file before downloading option.
If you're using Firefox, click on the stacker menu in the top-right corner and select Options. Find the Downloads option, and click Always ask you where to save files.
Working with TiddlyWiki
You can use TiddlyWiki for just about anything. And people have done just that. But instead of jumping into the scary depths, let's look at the basics of using TiddlyWiki.
Since I prefer to focus on specific tasks with my tools, I'm going to look at using TiddlyWiki for:
- Taking notes
- Managing tasks
- Keeping a journal
Taking notes
To get going, create a new tiddler, which is an individual page within TiddlyWiki. To be honest, I don't know how many tiddlers a single TiddlyWiki can contain before it slows down, but I wouldn't be surprised if it's in the hundreds or thousands.
Create a new tiddler by clicking the + icon.
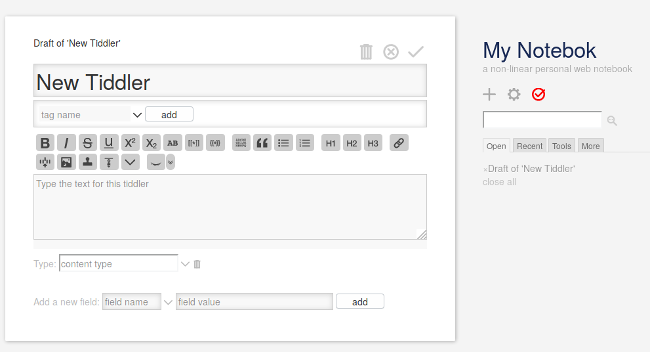
Give your tiddler a name, like Notes for netbooks essay. You can also type a tag in the Tag name field—doing that will let you filter your tiddlers so you can find them quickly when you have a lot of them. Then start typing.
You can format your tiddler using TiddlyWiki's markup. You can also use the formatting toolbar to add character formatting, lists, quotes, headings, images, and links.
When you're done, click the checkmark icon to save the tiddler.

Creating a task list
Again, create a new tiddler. Give it a name like Tasks - 4 May 2019 and type Tasks in the Tag name field.
From there, type your tasks—one line for each. Put an asterisk (*) in front of each one to create a bullet list. Then save your list.
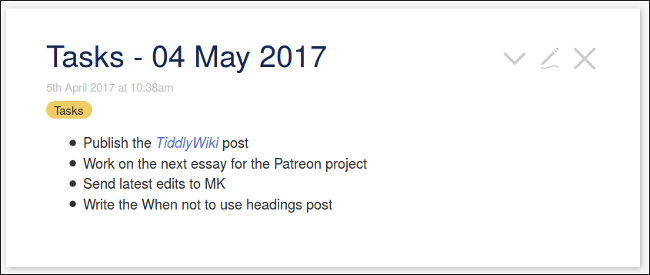
To mark off a completed task, edit the tiddler, highlight the task, and click the Strikethrough button on the toolbar.
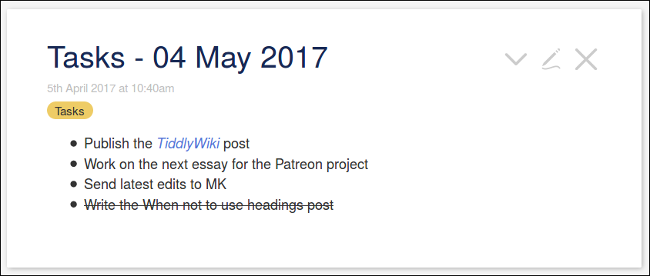
That's a pretty simple, and frankly lame, way to deal with tasks. If you're looking for something more visually appealing, watch this video. This method requires a bit more setup, but you also get nifty checkboxes that you can click when you finish a task.
Keeping a journal
If you want to keep a journal, first click the Tools tab and select the New journal option. That puts the Create a new journal tiddler button on the main TiddlyWiki toolbar.
Click that button and you'll notice that the journal tiddler has today's date as its name and has been tagged Journal.
As with any other tiddler, type your text and save the tiddler when you're done.
The power of plugins
What if you want or need more from TiddlyWiki? You can use plugins to extend and customize TiddlyWiki's capabilities. You can change its appearance, add editors and support for Markdown, turn TiddlyWiki into a personal kanban board (à la WeKan), add a more powerful search engine, and more.
TiddlyWiki has a plugin library, which you can access from its control panel. There's a list of plugins created by users, and this toolmap lists over 600 plugins, tips, and tricks.
One TiddlyWiki or several?
You can load up your TiddlyWiki with everything you need to do. Eventually, though, it could get so full of tiddlers that it's difficult to easily find what you need to find, even with good tagging.
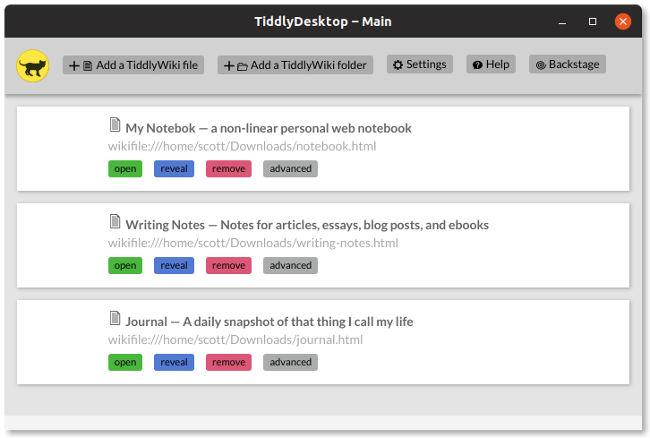
An alternative to that is to have several TiddlyWiki files—for example, one for notes, one for tasks, one for outlines, one for journaling. Keeping track of those files could become a chore. The desktop version can help you better organize two or more TiddlyWiki files.
Learning more
I've only covered the basics of using TiddlyWiki. There is a lot you can do with it, even if (like me) you're using it just for simple tasks.
Here are some good resources that can help you learn more about using TiddlyWiki:
- The TiddlyWiki website has a number of tutorials in the Learning section
- Francis Meetze has created several videos explaining how to do things with TiddlyWiki
- A one-page TiddlyWiki cheatsheet PDF
- Five Steps to TiddlyWiki 5, which helps you get up and running with TiddlyWiki




3 Comments