The .NET framework was released in 2000 by Microsoft. An open source implementation of the platform, Mono, was the center of controversy in the early 2000s because Microsoft held several patents for .NET technology and could have used those patents to end Mono implementations. Fortunately, in 2014, Microsoft declared that the .NET development platform would be open source under the MIT license from then on. In 2016, Microsoft purchased Xamarin, the company that produces Mono.
Both .NET and Mono have grown into cross-platform programming environments for C#, F#, GTK#, Visual Basic, Vala, and more. Applications created with .NET and Mono have been delivered to Linux, BSD, Windows, MacOS, Android, and even some gaming consoles. You can use either .NET or Mono to develop .NET applications. Both are open source, and both have active and vibrant communities. This article focuses on getting started with Microsoft's implementation of the .NET environment.
How to install .NET
The .NET downloads are divided into packages: one containing just a .NET runtime, and the other a .NET software development kit (SDK) containing the .NET Core and runtime. Depending on your platform, there may be several variants of even these packages, accounting for architecture and OS version. To start developing with .NET, you must install the SDK. This gives you the dotnet terminal or PowerShell command, which you can use to create and build projects.
Linux
To install .NET on Linux, first, add the Microsoft Linux software repository to your computer.
On Fedora:
$ sudo rpm --import https://packages.microsoft.com/keys/microsoft.asc
$ sudo wget -q -O /etc/yum.repos.d/microsoft-prod.repo https://packages.microsoft.com/config/fedora/27/prod.repo
On Ubuntu:
$ wget -q https://packages.microsoft.com/config/ubuntu/19.04/packages-microsoft-prod.deb -O packages-microsoft-prod.deb
$ sudo dpkg -i packages-microsoft-prod.deb
Next, install the SDK using your package manager, replacing <X.Y> with the current version of the .NET release:
On Fedora:
$ sudo dnf install dotnet-sdk-<X.Y>On Ubuntu:
$ sudo apt install apt-transport-https
$ sudo apt update
$ sudo apt install dotnet-sdk-<X.Y>
Once all the packages are downloaded and installed, confirm the installation by opening a terminal and typing:
$ dotnet --version
X.Y.Z
Windows
If you're on Microsoft Windows, you probably already have the .NET runtime installed. However, to develop .NET applications, you must also install the .NET Core SDK.
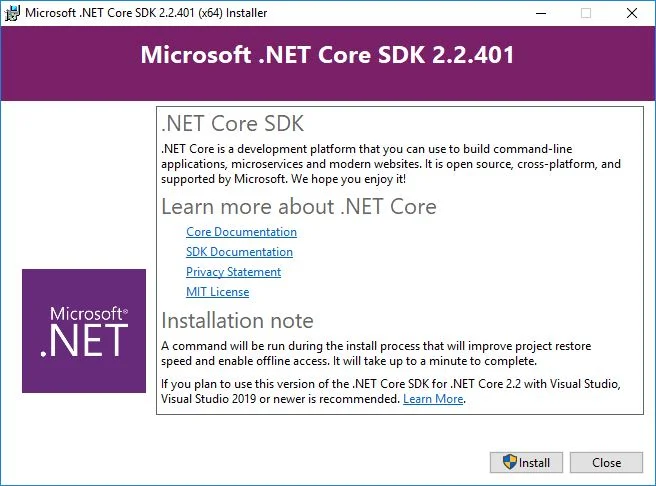
First, download the installer. To keep your options open, download .NET Core for cross-platform development (the .NET Framework is Windows-only). Once the .exe file is downloaded, double-click it to launch the installation wizard, and click through the two-step install process: accept the license and allow the install to proceed.

Afterward, open PowerShell from your Application menu in the lower-left corner. In PowerShell, type a test command:
PS C:\Users\osdc> dotnetIf you see information about a dotnet installation, .NET has been installed correctly.
MacOS
If you're on an Apple Mac, download the Mac installer, which comes in the form of a .pkg package. Download and double-click on the .pkg file and click through the installer. You may need to grant permission for the installer since the package is not from the App Store.
Once all packages are downloaded and installed, confirm the installation by opening a terminal and typing:
$ dotnet --version
X.Y.Z
Hello .NET
A sample "hello world" application written in .NET is provided with the dotnet command. Or, more accurately, the command provides the sample application.
First, create a project directory and the required code infrastructure using the dotnet command with the new and console options to create a new console-only application. Use the -o option to specify a project name:
$ dotnet new console -o hellodotnetThis creates a directory called hellodotnet in your current directory. Change into your project directory and have a look around:
$ cd hellodotnet
$ dir
hellodotnet.csproj  obj  Program.cs
The file Program.cs is an empty C# file containing a simple Hello World application. Open it in a text editor to view it. Microsoft's Visual Studio Code is a cross-platform, open source application built with dotnet in mind, and while it's not a bad text editor, it also collects a lot of data about its user (and grants itself permission to do so in the license applied to its binary distribution). If you want to try out Visual Studio Code, consider using VSCodium, a distribution of Visual Studio Code that's built from the MIT-licensed source code without the telemetry (read the documentation for options to disable other forms of tracking in even this build). Alternatively, just use your existing favorite text editor or IDE.
The boilerplate code in a new console application is:
using System;

namespace hellodotnet
{
    class Program
    {
        static void Main(string[] args)
        {
            Console.WriteLine("Hello World!");
        }
    }
}
To run the program, use the dotnet run command:
$ dotnet run
Hello World!
That's the basic workflow of .NET and the dotnet command. The full C# guide for .NET is available, and everything there is relevant to .NET. For examples of .NET in action, follow 's mutation testing articles here on opensource.com.


2 Comments