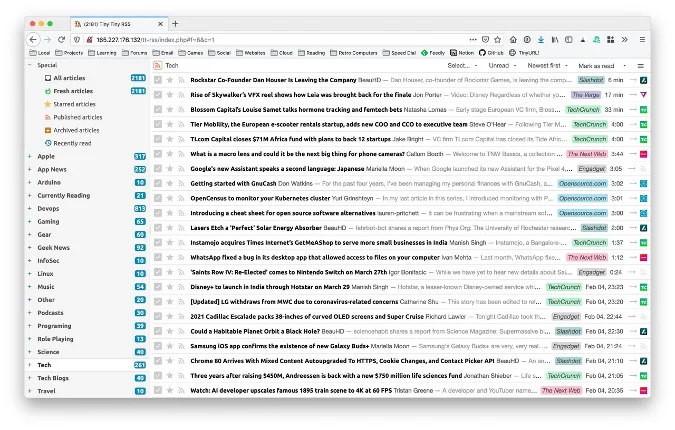
Tiny Tiny RSS (TT-RSS) is a free and open source web-based news feed (RSS/Atom) reader and aggregator. It's ideally suited to those who are privacy-focused and still rely on RSS for their daily news. Tiny Tiny RSS is self-hosted software, so you have 100% control of the server, your data, and your overall privacy. It also supports a wide range of plugins, add-ons, and themes, Want a dark mode interface? No problem. Want to filter your incoming news based on keywords? TT-RSS has you covered there, as well.

Now that you know what TT-RSS is and why you may want to use it, I'll explain everything you need to know about installing it on a Raspberry Pi or a Debian 10 server.
Install and configure TT-RSS
To install TT-RSS on a Raspberry Pi, you must also install and configure the latest version of PHP (7.3 as of this writing), PostgreSQL for the database backend, the Nginx web server, Git, and finally, TT-RSS.
1. Install PHP 7
Installing PHP 7 is, by far, the most involved part of this process. Thankfully, it's not as difficult as it might appear. Start by installing the following support packages:
$ sudo apt install -y ca-certificates apt-transport-httpsNow, add the repository PGP key:
$ wget -q https://packages.sury.org/php/apt.gpg -O- | sudo apt-key add -Next, add the PHP repository to your apt sources:
$ echo "deb https://packages.sury.org/php/ buster main" | sudo tee /etc/apt/sources.list.d/php.listThen update your repository index:
$ sudo apt updateFinally, install PHP 7.3 (or the latest version) and some common components:
$ sudo apt install -y php7.3 php7.3-cli php7.3-fpm php7.3-opcache php7.3-curl php7.3-mbstring php7.3-pgsql php7.3-zip php7.3-xml php7.3-gd php7.3-intlThe command above assumes you're using PostgreSQL as your database backend and installs php7.3-pgsql. If you'd rather use MySQL or MariaDB, you can easily change this to php7.3-mysql.
Next, verify that PHP is installed and running on your Raspberry Pi:
$ php -vNow it's time to install and configure the webserver.
2. Install Nginx
Nginx can be installed via apt with:
$ sudo apt install -y nginxModify the default Nginx virtual host configuration so that the webserver will recognize PHP files and know what to do with them:
$ sudo nano /etc/nginx/sites-available/defaultYou can safely delete everything in the original file and replace it with:
server {
        listen 80 default_server;
        listen [::]:80 default_server;

        root /var/www/html;
        index index.html index.htm index.php;
        server_name _;

        location / {
                try_files $uri $uri/ =404;
        }

        location ~ \.php$ {
          include snippets/fastcgi-php.conf;
          fastcgi_pass unix:/run/php/php7.3-fpm.sock;
        }

}
Use Ctrl+O to save your new configuration file and then Ctrl+X to exit Nano. You can test your new configuration with:
$ nginx -tIf there are no errors, restart the Nginx service:
$ systemctl restart nginx3. Install PostgreSQL
Next up is installing the database server. Installing PostgreSQL on the Raspberry Pi is super easy:
$ sudo apt install -y postgresql postgresql-client postgisCheck to see if the database server was successfully installed by entering:
$ psql --version4. Create the Tiny Tiny RSS database
Before you can do anything else, you need to create a database that the TT-RSS software will use to store data. First, log into the PostgreSQL server:
sudo -u postgres psqlNext, create a new user and assign a password:
CREATE USER username WITH PASSWORD 'your_password' VALID UNTIL 'infinity';Then create the database that will be used by TT-RSS:
CREATE DATABASE tinyrss;Finally, grant full permissions to the new user:
GRANT ALL PRIVILEGES ON DATABASE tinyrss to user_name;That's it for the database. You can exit the psql app by typing \q.
5. Install Git
Installing TT-RSS requires Git, so install Git with:
$ sudo apt install git -yNow, change directory to wherever Nginx serves web pages:
$ cd /var/www/htmlThen download the latest source for TT-RSS:
$ git clone https://git.tt-rss.org/fox/tt-rss.git tt-rssNote that this process creates a new tt-rss folder.
6. Install and configure Tiny Tiny RSS
It's finally time to install and configure your new TT-RSS server. First, verify that you can open https://your.site/tt-rss/install/index.php in a web browser. If you get a 403 Forbidden error, your permissions are not set properly on the /var/www/html folder. The following will usually fix this issue:
$ chmod 755 /var/www/html/ -vIf everything goes as planned, you'll see the TT-RSS Installer page, and it will ask you for some database information. Just tell it the database username and password that you created earlier; the database name; localhost for the hostname; and 5432 for the port.
Click Test Configuration to continue. If all went well, you should see a red button labeled Initialize Database. Click on it to begin the installation. Once finished, you'll have a configuration file that you can copy and save as config.php in the TT-RSS directory.
After finishing with the installer, open your TT-RSS installation at https://yoursite/tt-rss/ and log in with the default credentials (username: admin, password: password). The system will recommend that you change the admin password as soon as you log in. I highly recommend that you follow that advice and change it as soon as possible.
Set up TT-RSS
If all went well, you can start using TT-RSS right away. It's recommended that you create a new non-admin user, log in as the new user, and start importing your feeds, subscribing, and configuring it as you see fit.
Finally, and this is super important, don't forget to read the Updating Feeds section on TT-RSS's wiki. It describes how to create a simple systemd service that will update your feeds. If you skip this step, your RSS feeds will not update automatically.
Conclusion
Whew! That was a lot of work, but you did it! You now have your very own RSS aggregation server. Want to learn more about TT-RSS? I recommend checking out the official FAQ, the support forum, and the detailed installation notes. Feel free to comment below if you have any questions or issues.


Comments are closed.