
One thing I especially like about Linux is the amazing and vast array of choices in almost everything. Don't like one application for something? There are usually several more you can choose from. Don't like how the desktop works? Pick one of many other desktops. Don't like the window decorations on your desktop? There are many others you can download and try.
What if you don't like one little thing about your choice of window decorations—and all other sets of decorations are not even close?
One of the advantages of open source is that I can change anything I want. So I did.
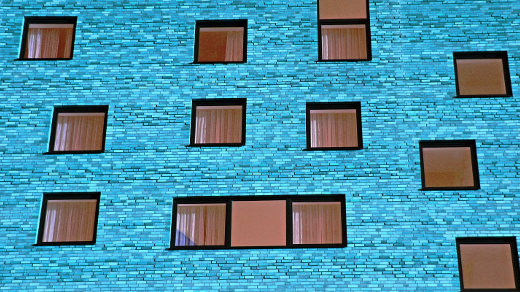
I use the Alienware-Bluish theme on my Xfce desktop. I like its futuristic look, the cyan and gray colors that match my dark primary color schemes—and sometimes my moods. It has a nice 3D relief in the corners, and the corners and edges are wide enough to grab easily, even with my Hi-DPI resolution. Figure 1 shows the original Alienware-Bluish decorations with the gradient-black-324.0 color scheme I prefer.
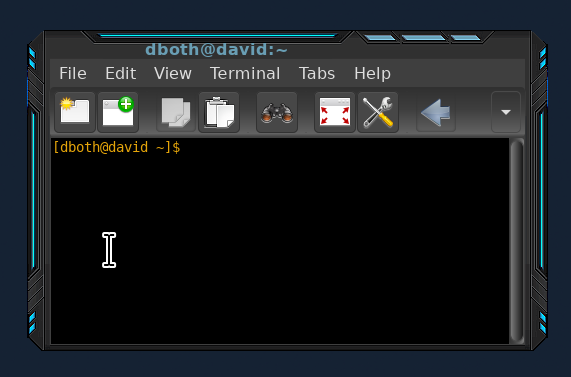
Figure 1. An active window (with the focus) using the original Alienware-Bluish decorations (David Both, CC BY-SA 4.0)
Two things bother me about this window. First, the intensity of the window name in the title bar for active windows is just too dull for me. The inactive windows have a bright white title that attracts my eye more than the dull cyan color of the active title.
Second, I like dark wallpapers, as you can see in Figure 1. Because the bottom edge of the window does not have a cyan highlight, it can be difficult to determine where the bottom of the windows are located, especially when there are a lot of overlapping windows open.
Pretty minor annoyances, I know, but they just bothered me. And that is one of the coolest things about open source: I can modify anything I want, even for trivial reasons. It just takes a bit of knowledge, which I am sharing with you.
Where are the decoration files?
The first thing I needed to do was locate the files for the decorations I am using, Alienware-Bluish. I know this because of the many decorations I have downloaded over the years.
All of the decorative themes I download are located in the /usr/share/themes/ directory so all users will have access to them. Each theme is located in a subdirectory, so the Alienware-Bluish theme is located in the /usr/share/themes/Alienware-Bluish/xfwm4/ directory. The xfwm stands for xf window manager version 4.
If you install your themes in your home directory, they will be located in the ~/.local/share/themes/Alienware-Bluish/xfwm4 directory. Themes stored in your home directory are not available to other users on your computer.
Preparation
I don't like to work on the original files for anything important like a theme, so I used my own non-root account to copy the /usr/share/themes/Alienware-Bluish directory and its contents to a new directory, /usr/share/themes/Alienware-Bluish-2. This gives me a safe place to work without inadvertently damaging the original beyond repair. It also copies files and changes the ownership of the copied files to my own account, so I can copy and edit the files.
Besides, I want to keep the original so I can continue to use it.
Getting started
View the files in the /usr/share/themes/Alienware-Bluish-2/xfce directory using Thunar or another file manager that lets you view image thumbnails, then zoom in to increase the size of the images. Expand the images so you can see them better. Each *.xpm (X11 Pixmap) file is an image of a small window frame section, as you can see in Figure 2.
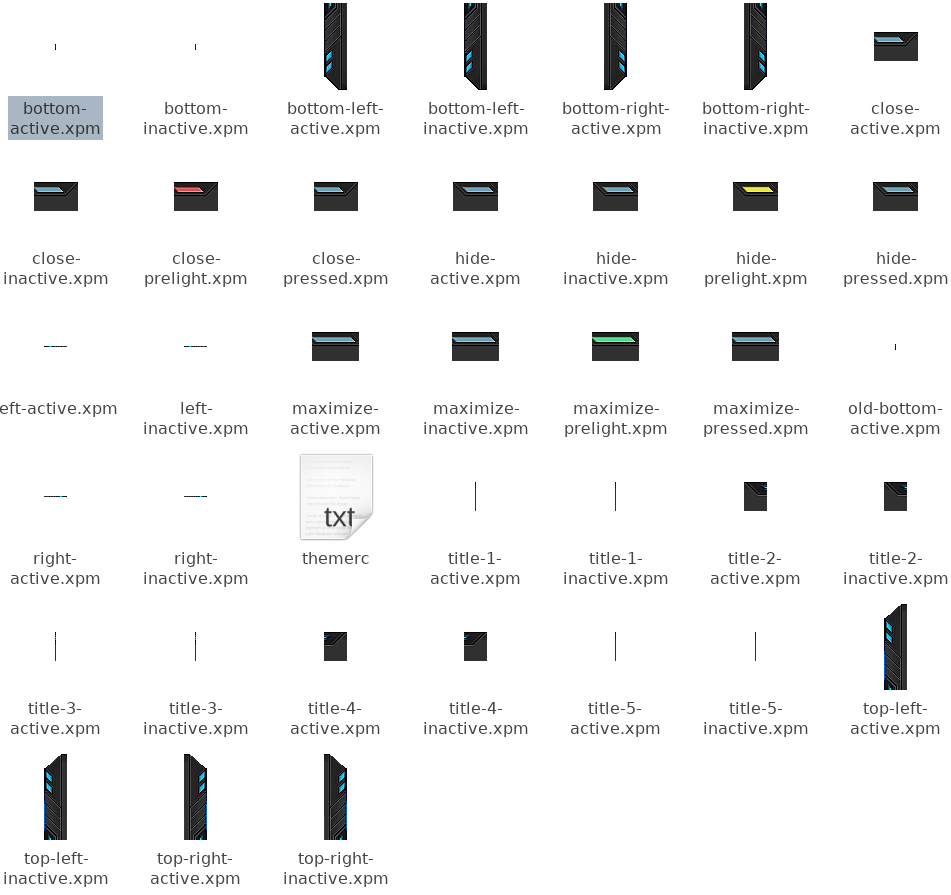
Figure 2: The files that make up the various segments of a window (David Both, CC BY-SA 4.0)
Notice that the different components each have an active and an inactive version. In the case of this theme, they are mostly the same. I now own these copied files, so I can copy and edit them.
Look especially at the bottom-active.xpm and bottom-inactive.xpm files. These are the two files that define the look of the bottom of the window. These two images are only one pixel wide, so they are essentially invisible in Figure 2. The window manager uses as many instances as necessary to create the bottom edge of the window.
Themes for other desktops may use different file formats.
Making the changes
First, I changed the title color. The themerc file contains text configuration data that defines several aspects of the title bar. This file is an ASCII text file. Here is the content for the theme:
full_width_title=true
title_alignment=center
button_spacing=2
button_offset=30
button_layout=S|HMC
active_text_color=#699eb4
inactive_text_color=#ffffff
title_vertical_offset_active=5
title_vertical_offset_inactive=5
The hex numbers in the text color entries define the colors for active and inactive title text. To change the active title text, I need to determine what value to use in this field. Fortunately, there is a tool that can help. The KcolorChooser can be used to select a color from the color palette, or the Pick Screen Color button can be used to choose a color already displayed on the screen.
I used this color picker to locate the cyan highlight in the side of the window, but I found it just a little too bright for the bottom. I wanted it a bit less bright, so I used the tools on the KcolorChooser to adjust the color and intensity to my preference. You can see the result in Figure 3.
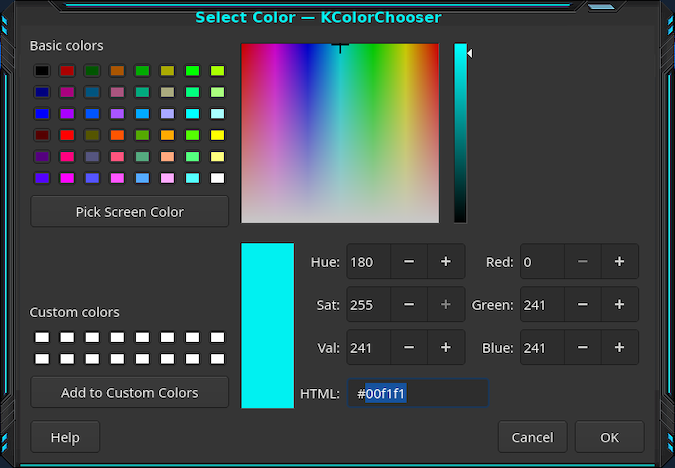
Figure 3. Using the KcolorChooser to select a specific color (David Both, CC BY-SA 4.0)
The KcolorChooser can be installed if you don't have it already. On Fedora and other Red Hat-based distros, you can use the following command:
dnf -y install kcolorchooserIf you don't already have the KDE desktop or any of its tools installed, this command will install a large number of KDE libraries and other dependencies. It was already installed on my workstation because I have the KDE Plasma desktop installed.
After deciding which color I wanted, I obtained the hex digits for that color from the HTML text box. I then typed those into the themerc file so the active_text_color line looks like this:
active_text_color=#00f1f1The next part, changing the bottom-active.xpm image file, is a little more complicated. I used GIMP to modify the bottom-active.xpm file, but you can use any graphics editor you are comfortable with. One catch: the image is so small that it needs to be enlarged by a huge amount to be a reasonable size for editing. I found that 8,000% worked well on my display. You can see this in Figure 4. This image is 6 pixels high by 1 pixel wide and black and shades of dark gray.
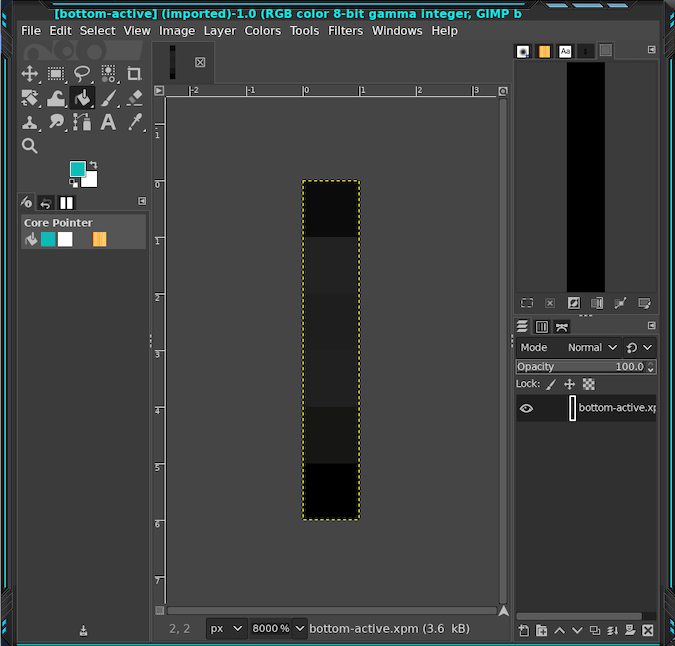
Figure 4. The bottom-active.xpm file shown at 8,000% magnification in GIMP (David Both, CC BY-SA 4.0)
I used the KcolorChooser to find a shade of cyan a little darker than that on the side and top edges of the window. After some playing around with it, I settled on the shade #10b0ae, which I then copied into the text field of the GIMP colors dialog. I had to add this dialog to the dock area at the upper right of the GIMP window by selecting Menu Bar Tools > Dockable Dialogs > Colors. Alternatively, I could have used the color picker, the eye-dropper icon, in the GIMP Colors dialog to simply pick the color from the sample display area of the KcolorChooser.
At any rate, I now had the color I liked in the GIMP color dialog. I used the Rectangle Select tool to select the 3 pixels highlighted in Figure 5 and the Bucket Fill tool to fill the selected area with the new color. Figure 5 shows the final color.
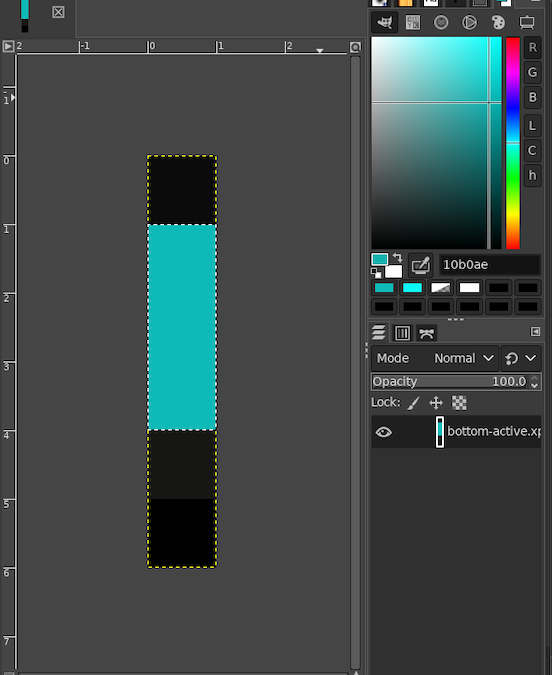
Figure 5. The modified bottom-active.xpm file with the addition of cyan (David Both, CC BY-SA 4.0)
Exporting the revised file
GIMP converted the .xpm file into a data format it could use, but it can't save the data directly into a .xpm file. Instead, I used the export function to save the file. This was not a big deal, but a bit unexpected the first time.
During the export, I was presented with a dialog asking for an Alpha Threshold value. I don't know enough about GIMP or manipulating graphics files to know what that is, so I left it alone and clicked on the Export button.
Testing
The changes I made to this theme are easy to test. I simply used the Window Manager to select the Alienware-Bluish-2 theme. This loads the new theme instantly, so I can see the results right away.
Had I not liked the results, I could have made additional changes and tested again. At this point, however, I would have had to change back to the original Alienware-Bluish theme (or any other theme) and then back to the Alienware-Bluish-2 theme to verify the change. The revised files are not loaded until the theme is re-read.
Figure 6 shows the revised theme using the cyan highlights in the bottom window edge. I think it looks much better.
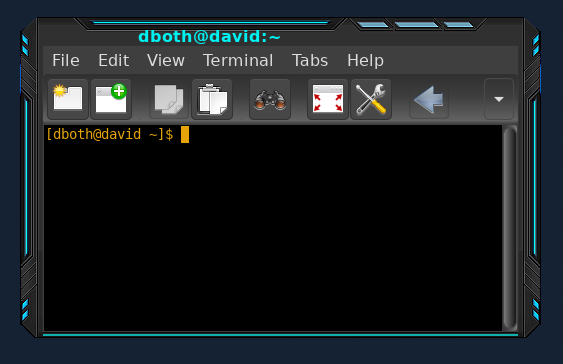
Figure 6. A window showing the altered bottom edge (David Both, CC BY-SA 4.0)
Final thoughts
I had no idea how to fix minor problems and annoyances with window decorations until I started this little project. It did take some time and research to figure out how to do this. I learned there is an xpm graphics format, and I learned a little more about working in GIMP, including how to export into that file format. I also discovered this was a fairly easy change to make.
I still don't feel I have the skill or creative vision for graphics to design a completely new window decoration theme. But now I can easily make minor changes to themes someone else has created.


1 Comment