

I wanted to write an article demonstrating "How to automate XYZ with the Raspberry Pi" or some other interesting, curious, or useful application around the Raspberry Pi. As you might realize from the title, I cannot offer such an article anymore because I destroyed my beloved Raspberry Pi.
The Raspberry Pi is a standard device on every technology enthusiast's desk. As a result, tons of tutorials and articles tell you what you can do with it. This article instead covers the dark side: I describe what you had better not do!
Cable colors
I want to provide some background before I get to the actual point of destruction. You have to deal with different cable colors when doing electrical work in and around the house. Here in Germany, each house connects to the three-phase AC supply grid, and you usually find the following cable colors:
- Neutral conductor: Blue
- (PE) Protective conductor: Yellow-green
- (L1) Phase 1: Brown
- (L2) Phase 2: Black
- (L3) Phase 3: Grey
For example, when wiring a lamp, you pick up neutral (N, blue) and phase (L, 1/3 chance that it is brown), and you get 230V AC between them.
Wiring the Raspberry Pi
Earlier this year, I wrote an article about OpenWrt, an open source alternative to firmware for home routers. In the article, I used a TP-link router device. However, the original plan was to use my Raspberry Pi model 4.
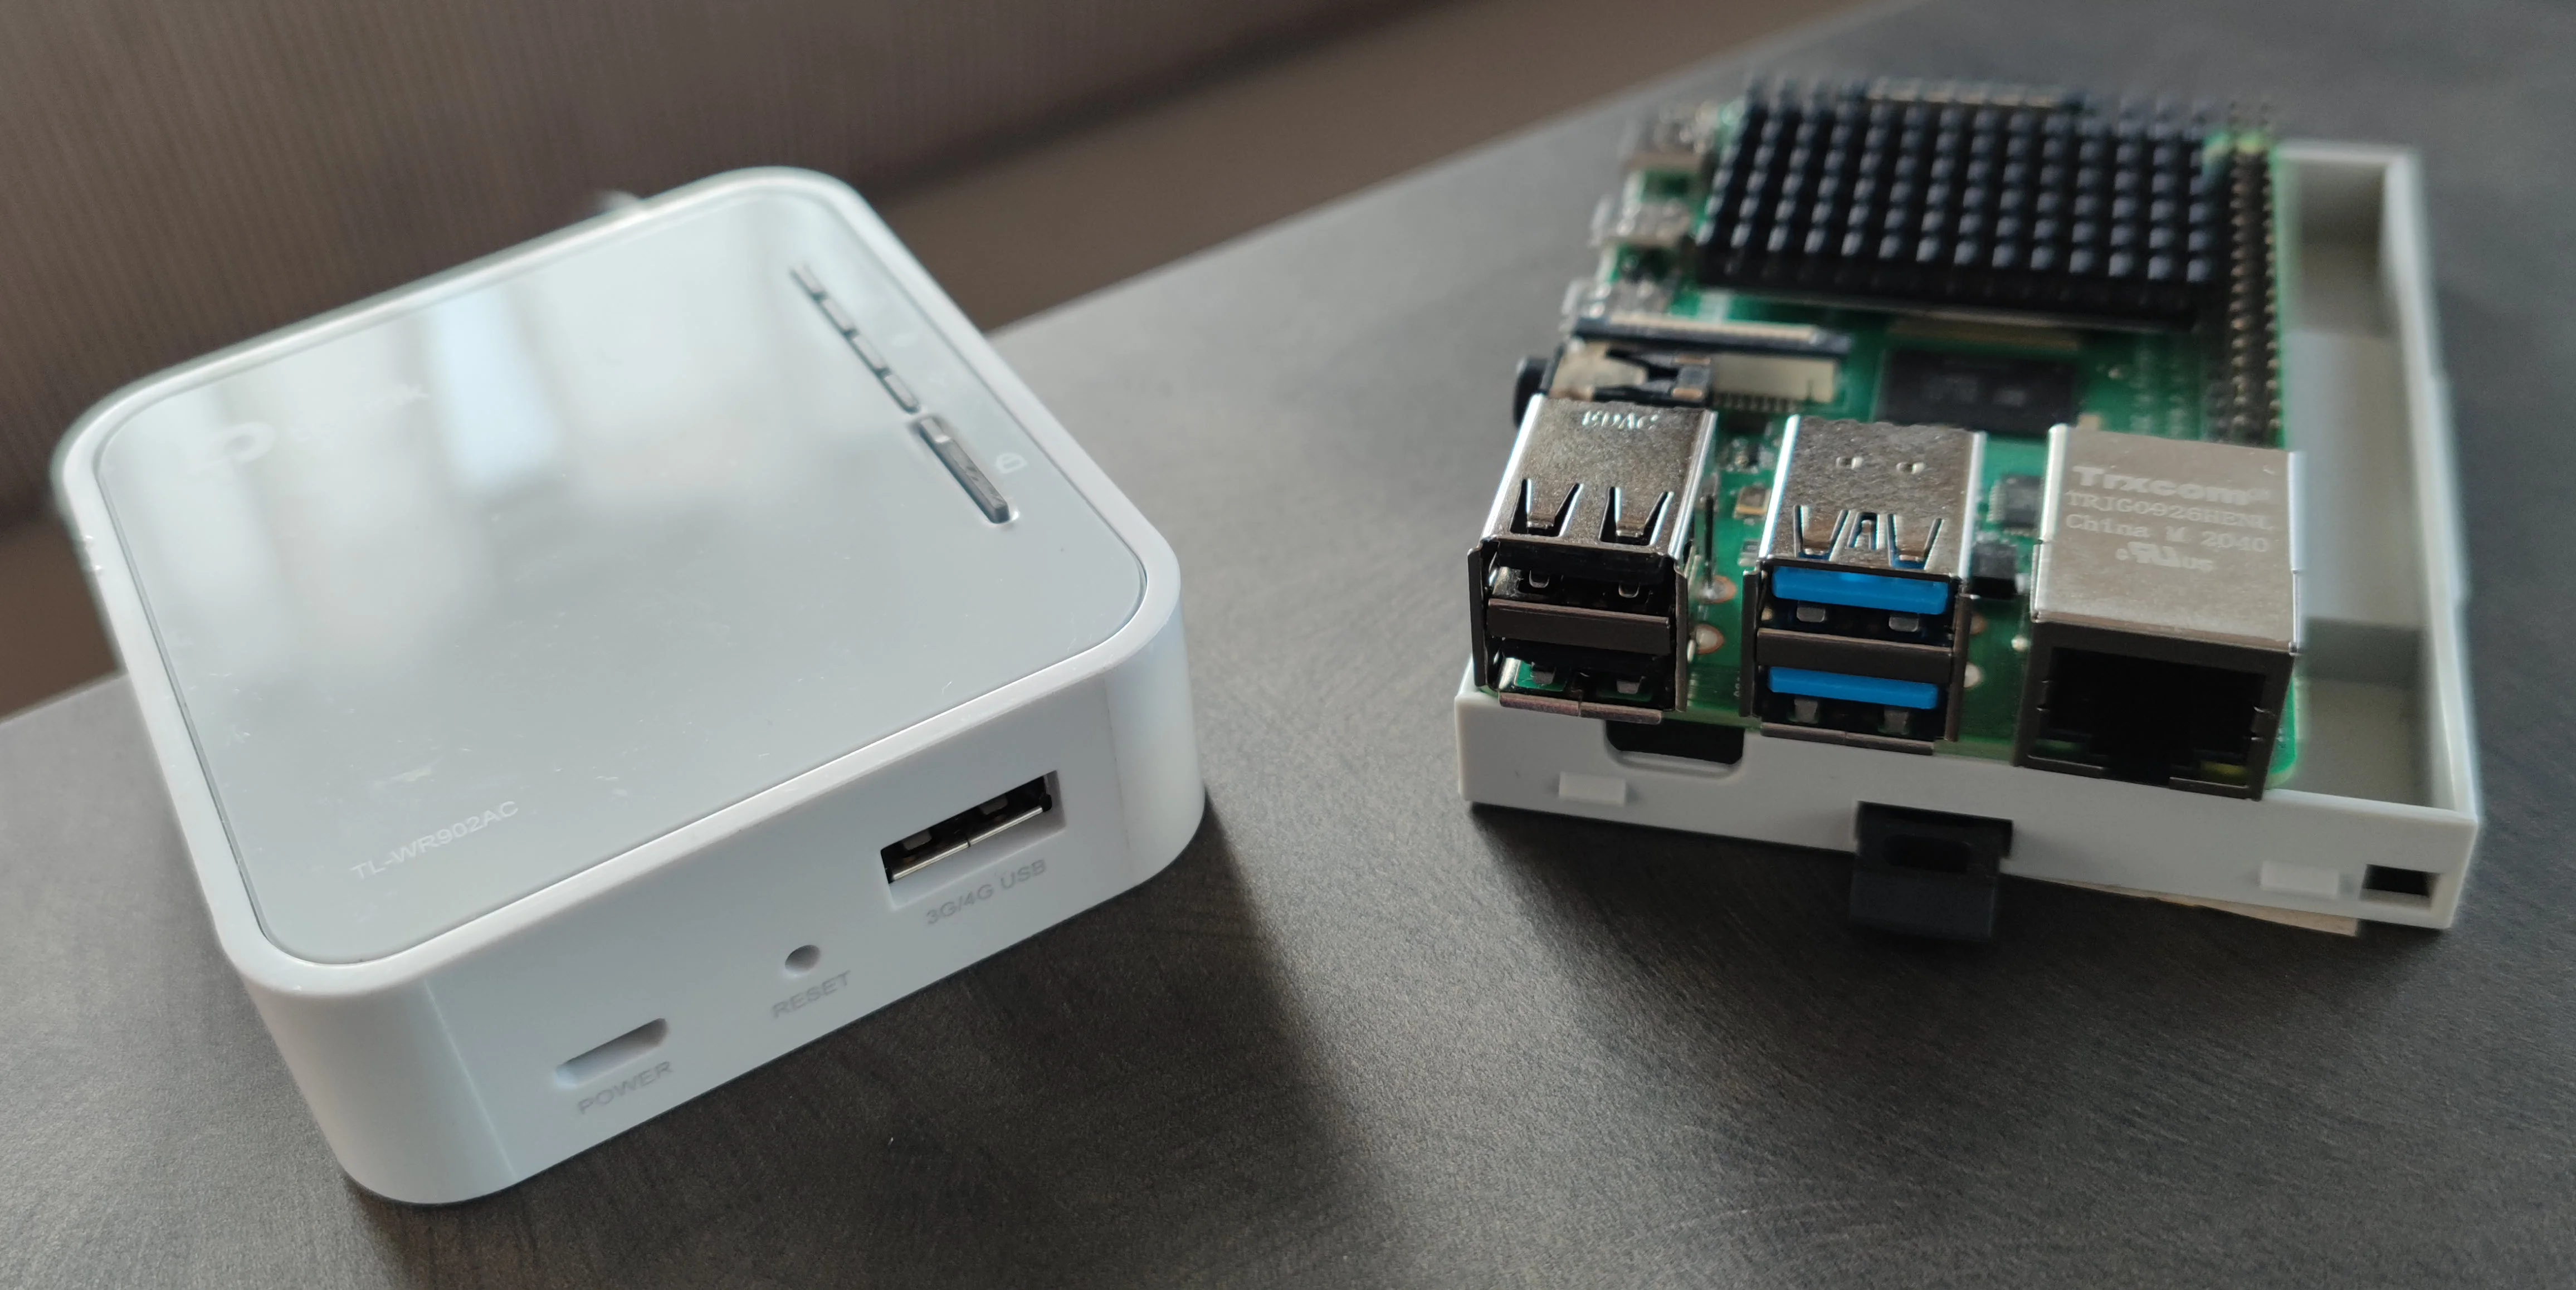
(Stephan Avenwedde, CC BY-SA 4.0)
The idea was to build a travel router that I could install in my caravan to improve the internet connectivity at a campsite (I'm the kind of camper who can't do without the internet). To do so, I added a separate USB-Wifi-dongle to my Raspberry Pi to connect a second Wifi antenna and installed OpenWrt. Additionally, I added a 12V-to-5V DC/DC converter to connect with the 12V wiring in the caravan. I tested this setup with a 12V vehicle battery on my desk, and it worked as expected. After everything was set up and configured, I started to install it in my caravan.
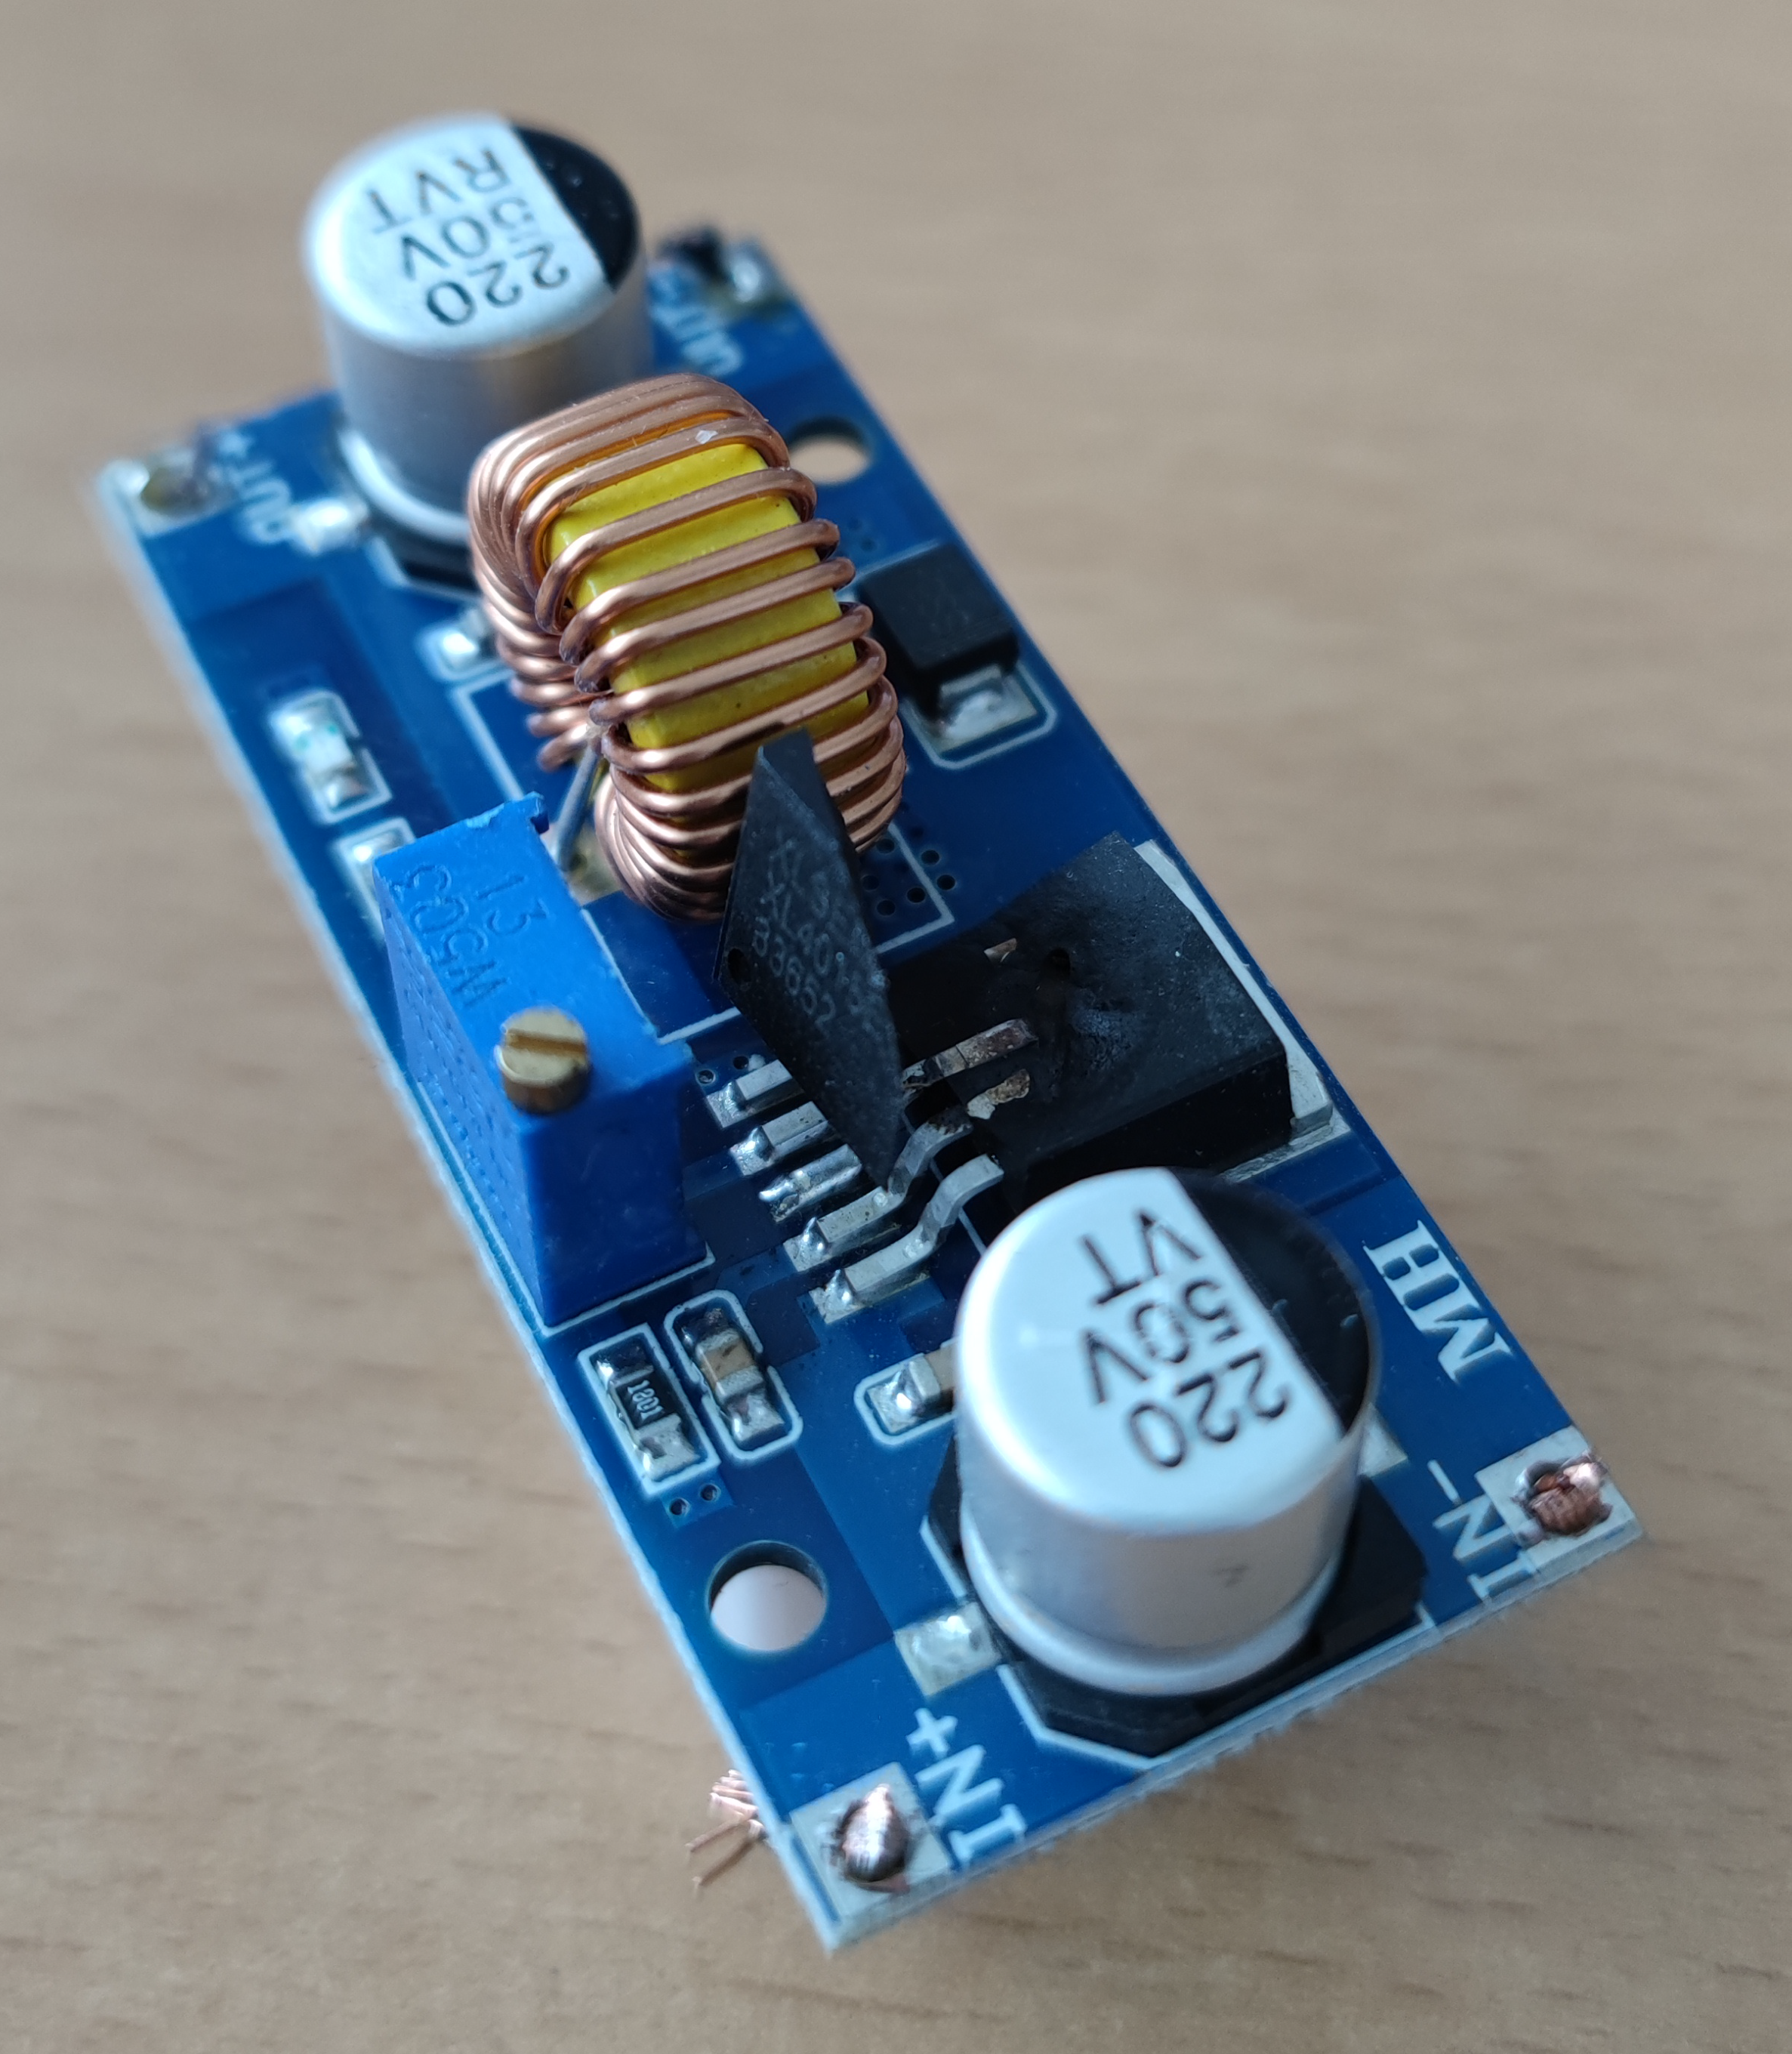
In my caravan, I found a blue and a brown wire, connected it with the 12V-to-5V DC/DC converter, put the fuses back in, and…
(Stephan Avenwedde, CC BY-SA 4.0)
The chip, which disassembled itself, is the actual step-down transformer. I was so confident that the blue wire was on 0V potential and the brown one was on 12V that I didn't even measure. I have since learned that the blue cable is on 12V, and the brown cable is on ground potential (which is pretty common in vehicle electronics).
Wrap up
Since this accident, my Raspberry Pi has never booted up. Because the prices for the Raspberry Pi have skyrocketed, I had to find an alternative. Luckily, I came across the TP-Link travel router, which can also run Open-WRT and does its job satisfactorily. In closing: It's better to measure too often than one time too few.


2 Comments