Armed with a few simple open source commands, you can drastically reduce the effort involved in prepping your work for print.
Going to print is an exciting time for any designer. Your hard work finally gets rendered into an attractive-looking PDF, you send it away to the great big print shop, and eventually you go to the magazine store or bookshop and find the results of your hard work on display for all to see.
Reading between the lines of that process, though, there are quite a few processes that have to happen to move a design from the desktop to the printed page. The most obvious is the content and design itself, and after that the layout, and finally the management of the pages and generation of signatures. It's the last part that I'll cover in this article, and then I'll work backwards next month to discuss layout with Scribus.
There are several Linux tools that I use when prepping something for press, and they're all run from the Unix shell. This may seem frightening, especially if you're a visual person as many designers are, but when you're faced with a 300-page book and you have to generate a printer spread, the last thing you want is a point-and-click page manager that forces you to place every page manually. This is exactly where a shell command excels: repetitive, mindless, boring work that you'd like to have done for you at the press of a button.
Printer spreads
How many sides are there to a sheet of paper?
If you said "two", you're (surprisingly) wrong! At least in professional printing, pages can have four sides, or more. Not physically, of course, but when you print, you often print two "pages" per side of a sheet of paper, making four "pages" per one sheet of paper.
A sheet of paper that contains smaller "pages" on each side of it, intended for printing, is called a signature.

I'm a fan of do-it-yourself, so it's worth mentioning that even if you're not going to press in the formal sense of going to a printshop to pay for professional print jobs, there is great power in understanding signatures. Simply by designing a booklet or brochure in the right spread, you can create easy 8- or 16- page foldable zines that you can print and "bind" (actually, just cut and fold) at home.
What all of this means is that you get to design your work in a "reader spread" layout, which is the order and layout in which the reader will actually view your work, and then output to PDF to get your design into the PostScript language that printers (the hardware, not the people) communicate in, and then convert to a printer spread for the actual physical act of printing.
PDFJam and Pdfbook
Some printshops are happy to convert your reader spread to a printer spread themselves, so you should communicate with your printer as early as possible to find out their requirements and preferences. I have had bad experiences with some printers, though, because frequently their workflow involves opening a PDF reader spread in some Adobe product in order to re-order the pages to a printer spread. That seems like a sensible (albeit non-open source) solution, except that sometimes the Adobe product munges vector paths or tries to convert or re-size a font (or maybe gets confused about the font to use? I'm not sure what the issue is, actually, but I know the result, and it ain't pretty), and the design comes out different than what was sent in. Which, incidentally, defeats the purpose of the PDF format. For that reason, I prefer to send my own printer spread when possible; this cuts out the middleman and essentially uses the printshop as a print server and paper stock vendor.
There are several ways to convert a PDF to a printer spread, but the easiest tool is PDFJam, a collection of shell scripts that do all the hard maths and repetitive page jockeying for you.
Manipulating PDFs is usually dependent upon either Java or LaTeX; PDFJam relies on the latter, so a healthy texlive install is vital. And when I say "healthy", I mean do a search for texlive in your Linux distribution's software repository, and install everything you find. At a minimum, you should install texlive and texlive-extra-utils, which should contain pdflatex.
PDFJam is the master script, but it comes bundled with a few smaller wrapper scripts to simplify common tasks.
A simple example:
$ pdfbook --landscape slackermedia_14.2.pdf This produces a 2-up (four page signature), duplex-printable (along the long side of the sheet) printer spread as a file called, in this example, slackermdia_14.2-book.pdf. Print that file, and you have paper that can be bound into a volume that, when viewed, is in the appropriate order for reading, just as you designed it.
The pdfbook command is just a simplified parser for a more complex pdfjam. This is an example of Pdfbook's functionality as a pure pdfjam command:
$ pdfjam --booklet 'true' --landscape \
--signature '4' --landscape slackermedia.pdf \
-o slackermedia.pdf
All of the helper scripts resolve to a more complex pdfjam command, and each tells you exactly what you've run after it completes the task. Use whatever you are most comfortable with.
pdfnup
Sometimes you're not printing a book, or you're printing a book but you need more than just a 2-up. Maybe you need n-up. If you do, you can use the pdfnup command.
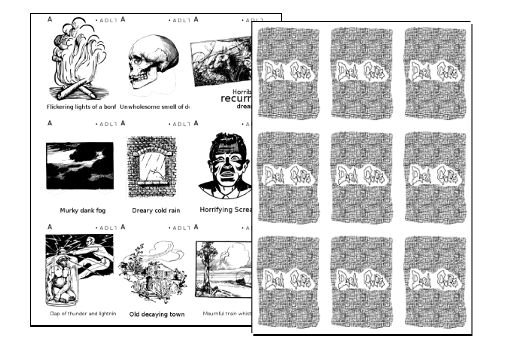
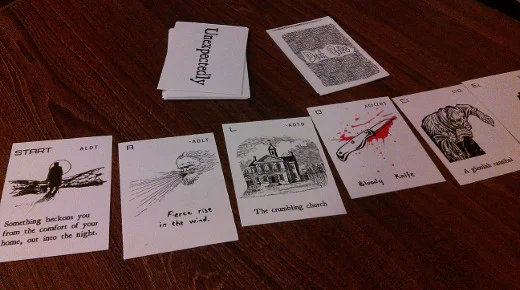
I was recently printing a RPG-like card game at home, so I needed a 9-up spread. Fancy looping aside (this isn't a Bash tutorial, so I'm simplifying), the command boils down to:
$ pdfnup --nup 3x3 --suffix '3x3' \
`\ls -1 *.png | head -n9` \
&& mv -i `ls -1 *.png | head -n9` prepped/
The result was a matrix of cards, ready for slicing.


PDFtk
Aside from PDFjam, the other major PDF manipulation application useful for pre-press is PDFtk. This handy command specializes in separating and concatenating PDF documents.
My two primary uses for PDFtk are appending front and back matter to a PDF, and any time it's more convenient to print several PDFs as one document.
Concatenating several PDF files is simple; it's one of the examples provided in the man page, so it's a pretty common use:
$ pdftk ch1.pdf ch2.pdf cat output book.pdf
For several PDFs, use a wildcard:
$ pdftk *.pdf cat output book.pdf ImageMagick
ImageMagick is truly a "Swiss army knife" application. Like pdfjam, it consists of several smaller task-spetific commands, almost all of which are useful to a designer. It really deserves an article on its own, although its own extensive and excellent documentation covers that pretty well.
I use ImageMagick to quickly convert image formats as needed. It's easily scriptable, being a Unix command, so it's one of those things you can incorporate into a Makefile or build script. For example, if all of my source images for a textbook are in SVG format and I need them to be rasterized for whatever reason, then:
$ for FILE in *svg ; do \
convert $FILE -density 300 $FILE.png; \
done
It can also, conveniently, convert to PDF, in the event that your printer accepts only PDF:
$ convert image.tiff image.pdf The tool does a lot more than just conversion; as the documentation reveals, you can resize and manipulate images nearly as much as you can with a GUI tool like GIMP. As I mentioned in my Semi Useless Toys article, there are even pre-made scripts from users that'll make some of the heavy lifting surprisingly simple.
Take Linux to the press
Armed with these simple commands, you can drastically reduce the time it takes to get both print and web versions of your work in order. And even more importantly, you maintain control over the quality of your product; what you send to a printer will be exactly what you get back, and the entire workflow can be scripted so that you only have to figure it out once.
It all makes for a powerful and customize-able system. Design yours today!


1 Comment