

Databases are a great way to add data persistence to your project or application. You can write data in one session and it'll be there the next time you want to look. A well-designed database can be efficient at looking up data in large datasets, and you won't have to worry about how it looks, just what you want it to find. It's fairly simple to set up a database for basic CRUD (create, record, update, delete) applications, which is a common pattern, and it is useful in many projects.
Why PostgreSQL, commonly known as Postgres? It's considered to be the best open source database in terms of features and performance. It'll feel familiar if you've used MySQL, but when you need more advanced usage, you'll find the optimization in Postgres is far superior. It's easy to install, easy to use, easy to secure, and runs well on the Raspberry Pi 3.
This tutorial explains how to install Postgres on a Raspberry Pi; create a table; write simple queries; use the pgAdmin GUI on a Raspberry Pi, a PC, or a Mac; and interact with the database from Python.
Once you've learned the basics, you can take your application a lot further with complex queries joining multiple tables, at which point you need to think about optimization, best design practices, using primary and foreign keys, and more.
Installation
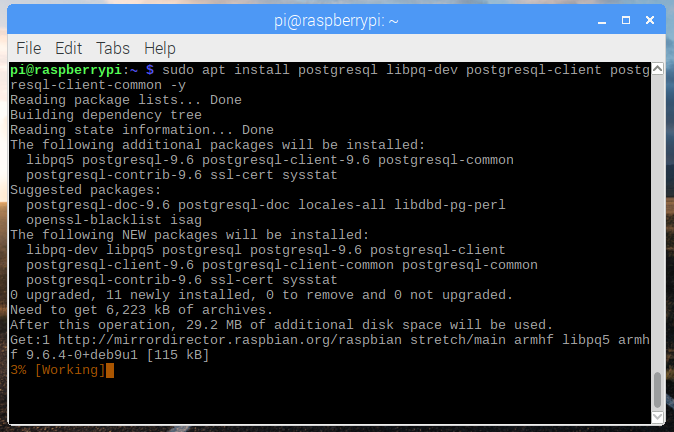
To get started, you'll need to install Postgres and some other packages. Open a terminal window and run the following command while connected to the internet:
sudo apt install postgresql libpq-dev postgresql-client
postgresql-client-common -y
opensource.com
When that's complete, switch to the Postgres user to configure the database:
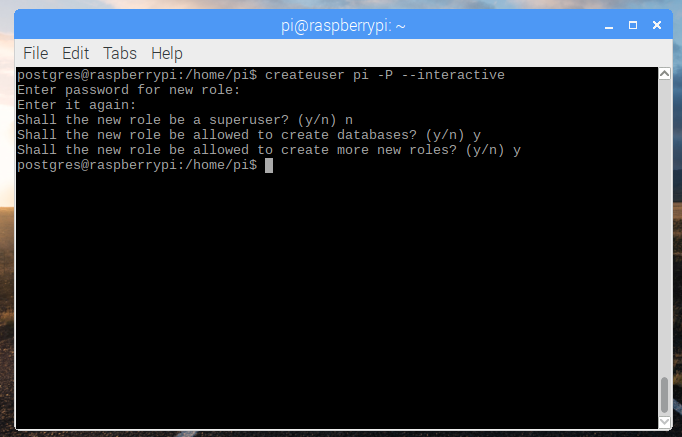
sudo su postgresNow you can create a database user. If you create a user with the same name as one of your Unix user accounts, that user will automatically be granted access to the database. So, for the sake of simplicity in this tutorial, I'll assume you're using the default pi user. Run the createuser command to continue:
createuser pi -P --interactiveWhen prompted, enter a password (and remember what it is), select n for superuser, and y for the next two questions.
opensource.com
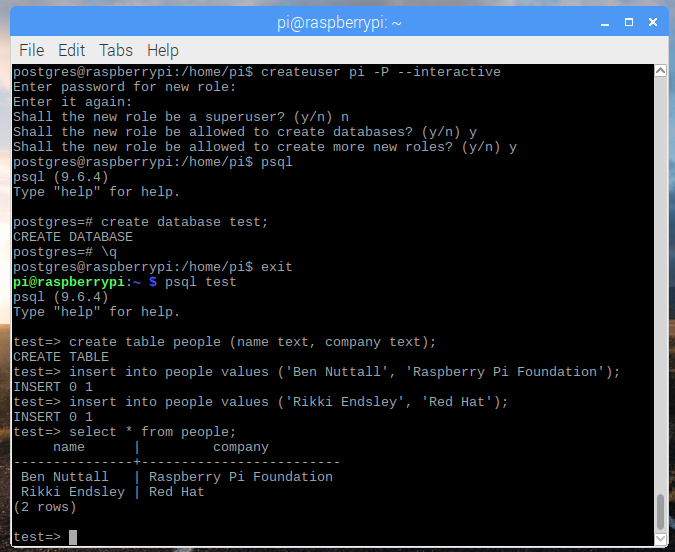
Now connect to Postgres using the shell and create a test database:
$ psql
> create database test;
Exit from the psql shell and again from the Postgres user by pressing Ctrl+D twice, and you'll be logged in as the pi user again. Since you created a Postgres user called pi, you can access the Postgres shell from here with no credentials:
$ psql testYou're now connected to the "test" database. The database is currently empty and contains no tables. You can create a simple table from the psql shell:
test=> create table people (name text, company text);Now you can insert data into the table:
test=> insert into people values ('Ben Nuttall', 'Raspberry Pi Foundation');

test=> insert into people values ('Rikki Endsley', 'Red Hat');
And try a select query:
test=> select * from people;

     name      |         company
---------------+-------------------------
 Ben Nuttall   | Raspberry Pi Foundation
 Rikki Endsley | Red Hat
(2 rows)
opensource.com
test=> select name from people where company = 'Red Hat';

     name      | company
---------------+---------
 Rikki Endsley | Red Hat
(1 row)
pgAdmin
You might find it useful to use a graphical tool to access the database. PgAdmin is a full-featured PostgreSQL GUI that allows you to create and manage databases and users, create and modify tables, write and execute queries, and browse results in a more familiar view, similar to a spreadsheet. The psql command-line tool is fine for simple queries, and you'll find many power users stick with it for speed (and because they don't need the assistance the GUI gives), but midlevel users may find pgAdmin a more approachable way to learn and do more with a database.
Another useful thing about pgAdmin is that you can either use it directly on the Pi or on another computer that's remotely connected to the database on the Pi.
If you want to access it on the Raspberry Pi itself, you can just install it with apt:
sudo apt install pgadmin3It's exactly the same if you're on a Debian-based system like Ubuntu; if you're on another distribution, try the equivalent command for your system. Alternatively, or if you're on Windows or macOS, try downloading pgAdmin from pgAdmin.org. Note that the version available in apt is pgAdmin3 and a newer version, pgAdmin4, is available from the website.
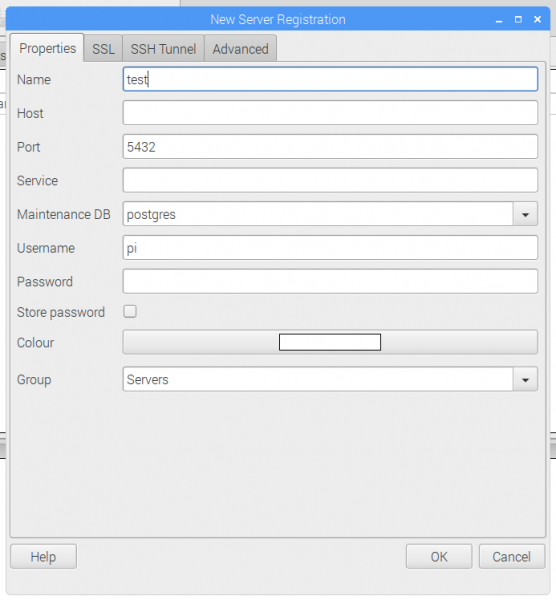
To connect to your database with pgAdmin on the same Raspberry Pi, simply open pgAdmin3 from the main menu, click the new connection icon, and complete the registration fields. In this case, all you'll need is a name (you choose the connection name, e.g. test), change the username to "pi," and leave the rest of the fields blank (or as they were). Click OK and you'll find a new connection in the side panel on the left.
opensource.com
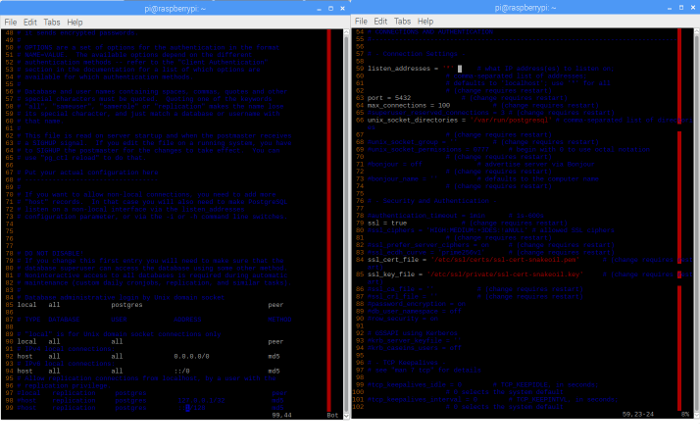
To connect to your Pi's database with pgAdmin from another computer, you'll first need to edit the PostgreSQL configuration to allow remote connections:
1. Edit the PostgreSQL config file /etc/postgresql/9.6/main/postgresql.conf to uncomment the listen_addresses line and change its value from localhost to *. Save and exit.
2. Edit the pg_hba config file /etc/postgresql/9.6/main/pg_hba.conf to change 127.0.0.1/32 to 0.0.0.0/0 for IPv4 and ::1/128 to ::/0 for IPv6. Save and exit.
3. Restart the PostgreSQL service: sudo service postgresql restart.
Note the version number may be different if you're using an older Raspbian image or another distribution.
opensource.com
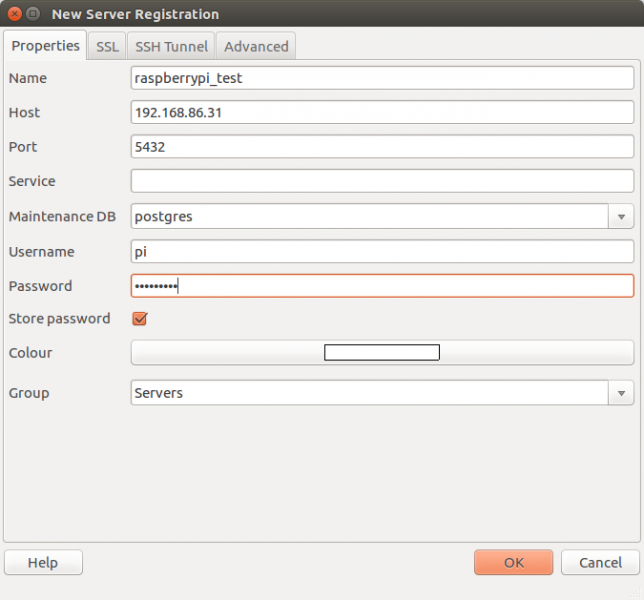
Once that's done, open pgAdmin on your other computer and create a new connection. This time, in addition to giving the connection a name, enter the Pi's IP address as the host (this can be found by hovering over the WiFi icon in the taskbar or by typing hostname -I in a terminal).
opensource.com
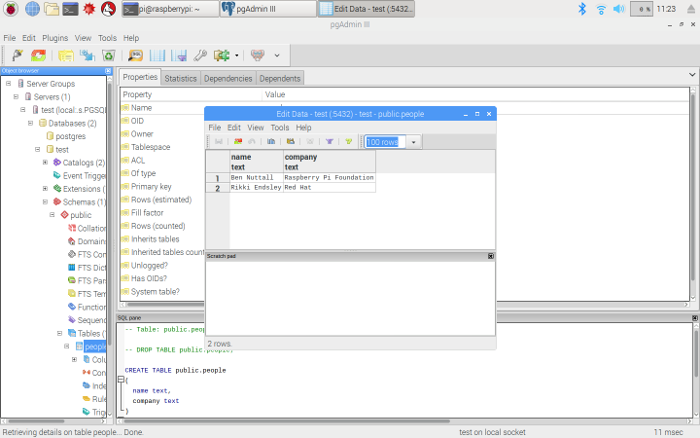
Whether you connected locally or remotely, click to open Server Groups > Servers > test > Schemas > public > Tables, right-click the people table and select View Data > View top 100 Rows. You'll now see the data you entered earlier.
opensource.com
You can now create and modify databases and tables, manage users, and write your own custom queries using the GUI. You might find this visual method more manageable than using the command line.
Python
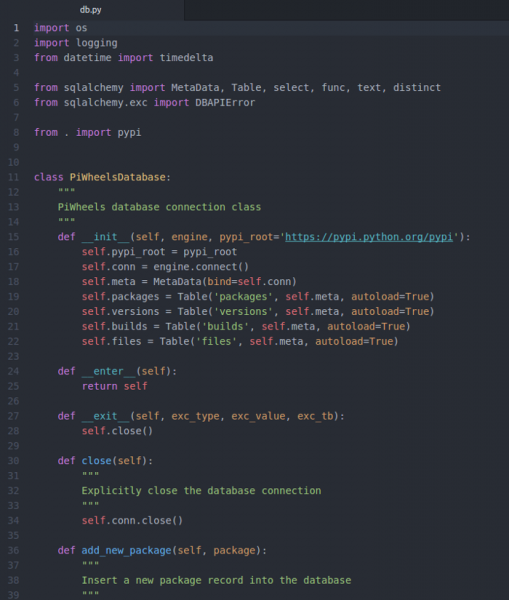
To connect to your database from a Python script, you'll need the Psycopg2 Python package. You can install it with pip:
sudo pip3 install psycopg2Now open a Python editor and write some code to connect to your database:
import psycopg2

conn = psycopg2.connect('dbname=test')
cur = conn.cursor()

cur.execute('select * from people')

results = cur.fetchall()

for result in results:
    print(result)
Run this code to see the results of the query. Note that if you're connecting remotely, you'll need to supply more credentials in the connection string, for example, adding the host IP, username, and database password:
conn = psycopg2.connect('host=192.168.86.31 user=pi
password=raspberry dbname=test')
You could even create a function to look up this query specifically:
def get_all_people():
    query = """
    SELECT
        *
    FROM
        people
    """
    cur.execute(query)
    return cur.fetchall()
And one including a lookup:
def get_people_by_company(company):
    query = """
    SELECT
        *
    FROM
        people
    WHERE
        company = %s
    """
    values = (company, )
    cur.execute(query, values)
    return cur.fetchall()
Or even a function for adding records:
def add_person(name, company):
    query = """
    INSERT INTO
        people
    VALUES
        (%s, %s)
    """
    values = (name, company)
    cur.execute(query, values)
Note this uses a safe method of injecting strings into queries. You don't want to get caught out by little bobby tables!
opensource.com
Now you know the basics. If you want to take Postgres further, check out this article on Full Stack Python.


2 Comments