

Are you looking for a phone system for your small business or home office? I've been interested in a scalable VoIP (Voice over IP) solution, and that's when I came across an implementation of Asterisk on the Raspberry Pi.
My curiosity was piqued and I was determined to give it a try, so I downloaded the software from Asterisk and then set about building the server using my Raspberry Pi 3.
Getting started
First, I burned the downloaded image onto a MicroSD card; the suggested minimum is 4GB. After transferring the image to the MicroSD card and inserting it into the appropriate slot on the Raspberry Pi, I connected an Ethernet cable to the Pi and to an Ethernet port on my home router.
Next, I opened a terminal on my Linux computer and entered ssh root@192.168.1.8, which is the IP address of my server. I was prompted to log in as root on the raspbx. The default password is "raspberry." (For security reasons, be sure to change your passwords from the default settings if you plan to do more than just try it out.)
Once I was logged into the shell on the raspbx, I then needed to prepare the server for use. Following the documentation provided on the site, I created new host keys as directed by entering regen-hostkeys at the shell prompt. Then, I configured the time zone for the server by entering configure-timezone at the shell prompt. I configured the locale setting by entering, dpkg-reconfigure locales at the prompt. I also installed Fail2Ban to provide security on my server.
Now I was ready to test my configuration.
Testing
I logged out of the raspbx shell and then opened a browser and pointed it at the IP address of my server. Loading the server IP address into the browser, I was presented with a lovely login page.
FreePBX provides a very nice web-based, open source graphical user interface, which I used to control and configure Asterisk (find on GitHub). (FreePBX is licensed under the GPL.) I used it to complete the rest of the configuration. The default login for FreePBX is username:admin;password:admin.

Once in, I navigated to the Application Menu, which is located at the upper left of the display. I clicked on the menu link and selected the second option, which is Applications, and selected the fourth option, which is labeled Extensions. From there I created a New Chan_Sip extension.
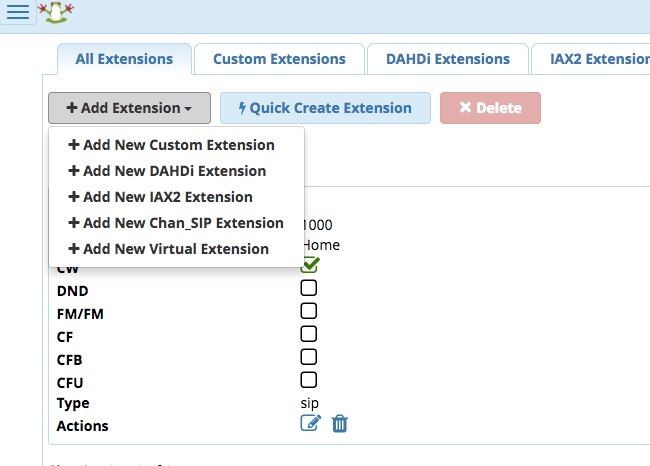
I configured a Sip extension user with a password. Passwords are either automatically generated or you can elect to create your own.
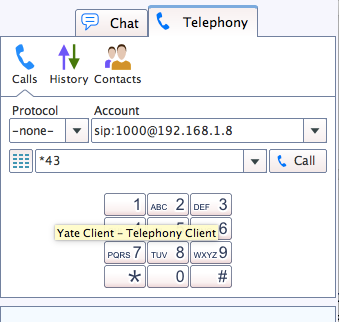
Now that I had a functioning extension I was anxious to try out my new VoIP server. I downloaded and installed Yate Client, which I discovered in the process of building the server. After installing Yate, I wanted to test the connectivity with the server. I discovered that I could connect to the server for an echo test using Yate and entering *43. I was really excited when I heard the instructions through the client.
I decided to create another Sip extension so that I could test the voicemail capabilities of the system. Once I completed that I used the Yate client to call that extension and leave a brief voice message. Then using Yate again, I called that extension and entered *97 and retrieved the voice message. Then I wanted to see if I could use my new server to call an outside line. Returning to the menu, I chose the Connectivity option and added a Google Voice line.

Then I returned to the Connectivity menu and added Google Voice to the Outbound routes.

Completing a call
Returning to the Yate client, I entered an outside line and successfully completed that call.
I'm convinced that this particular VoIP solution could easily work for a small office. According to the Frequently Asked Questions section of the RasPBX website, a typical Raspberry Pi system could support up to 10 concurrent calls on a Raspberry Pi 1.
Asterisk has many nuances and the FreePBX software easily leveraged them.
For more information about the Asterisk on Raspberry Pi project, follow their blog. You can find additional information about FreePBX source code on their website.


8 Comments