In the first two articles in this series, I explained how to use Corteza Low Code to create an application to track donations and set up its data structure with modules and fields. In the third article, I will explain how to create the graphical part of the Donations application.
Pages is the HTTP web layer of Corteza Low Code. For comfort of design and to ensure your application is responsive and mobile-ready by default, Pages are built-in blocks. Each block can be resized and dragged wherever you desire. In all blocks, you can define the title, the description, and the layout.
There are two types of pages: Record pages (which show data for or related to a single record) and List pages (which show a searchable list of multiple records). Each type is described below.
Record pages
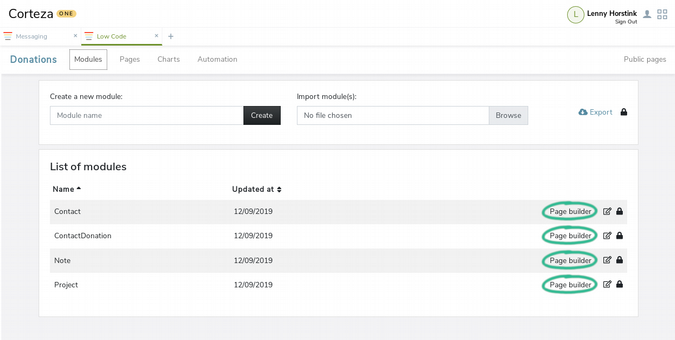
A module without a Record page cannot do anything. To store data inside a module, you need to create a Record page and add it to a module by selecting the appropriate Page builder button on the Modules page. This opens the drag-and-drop page editor.
The Donations application has four modules, and each one has the Page builder link:
First, create the record page for the Contact module. When you click on the Page builder link, an empty record page opens. Add blocks with the + Add block button.

There are multiple block types available.
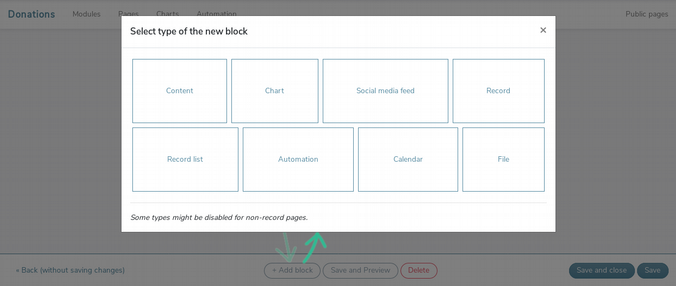
The "Contact" record page in the "Donations" application uses two block types: Record and Record list.
Record blocks
The Record block is the most important block for a Record page. You can select the block's layout and the fields you want to show. The Contact record page needs to show: Name, Email, Phone, and Address. Select those fields and hit Save and close, and the block will be added.
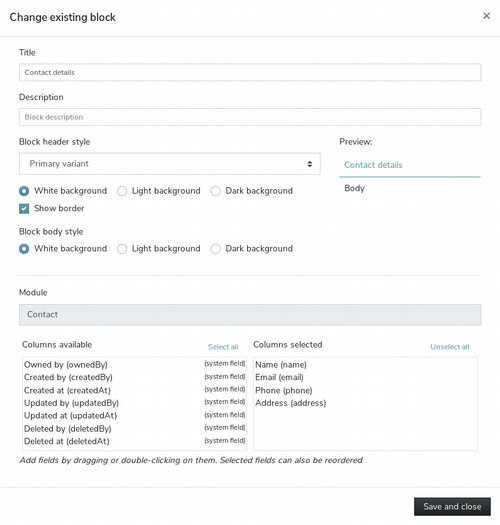
When you view a record, the values of these fields are shown as strings, and when you add or edit a record, these fields turn into form-input fields.
Tip: You can drag-and-drop the fields and place them in any order you prefer.
Record list blocks
The Contact page will show the list of donation each contact has given. Create a list of records by selecting the Record list block.
Make Donations the title, and select the ContactDonation module in the Module field. After selecting a module, the columns that are available are populated automatically, and you can select the columns you want to show in the Record list: Donation, Project, and the system field Created at.
If you saved the Record list block right now, you would see all donations from all contacts. Because you want to show the donations related to a single contact record, you need to add a prefilter.
The Prefilter records field allows simplified SQL "Where" conditions, and variables like ${recordID}, ${ownerID}, and ${userID} are evaluated (when available). For the Record list, you want to filter ContactDonation records by contact, so you need to fill in: ${recordID} = contactId. Note: contactId is a Record field in the module ContactDonation. Take a look back at the second article in this series for more info about linking modules.
You also want to be able to sort a contact's donations by date. This can be done in the Presort records field by inserting createdAt DESC. This field supports simplified SQL Order by condition syntax.
You can also select to hide or show the New record button and Search box, and you can define the number of records shown. A best practice is to adjust this number to the size of the block.
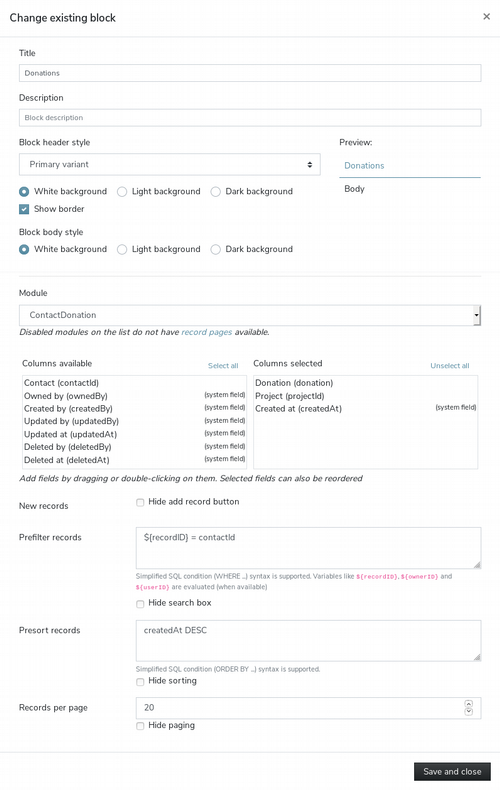
To save the block and add it to the page, hit Save and close. Now the second block has been added to the page.
Other block types
Other block types are:
- Content: This block allows you to add fixed text, which you can create with a rich text editor. This is ideal for "help" texts or links to resources, such as the sales handbook on an intranet.
- Chart: Inserts charts that have been created with the chart builder. This is very useful when you are creating dashboards.
- Social media feed: You can show live content from Twitter here—either a fixed Twitter feed (which is shown in all records) or from a Module field that represents a Twitter link (which enables each record to have his own feed).
- Automation: In this block, you can add automation rules that have a manual trigger and that are available for the module, as well as automation rules with no primary module. They are shown to end users as buttons. You can format the automation rule buttons by inserting custom text and selecting a style, and you can change the order of them (when you have multiple buttons) with a drag-and-drop.
- Calendar: This block inserts a calendar, which can be shown in the following formats:
- Month
- Month agenda
- Week agenda
- Day agenda
- Month list
- Week list
- Day list
The source of the calendar is a list of records from one or multiple modules. For each source, you can select which field represents the title, start date, and end date of the event.
- File: You can upload a file and show it on the page. Just like the Content block, the content of this block will be the same for all records. To have files that are related to a record, you need to use the File field type when creating fields in a module.
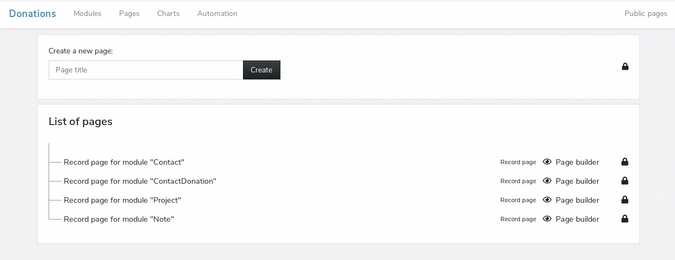
Next, add the Record pages for the other modules in the Donations application. Once that is done, you will see the following list under Pages:
Change the page layout
After adding blocks to pages, such as the Contact Details and Donations blocks in the Contact module's Record page, you can resize and position them to create the layout you want.
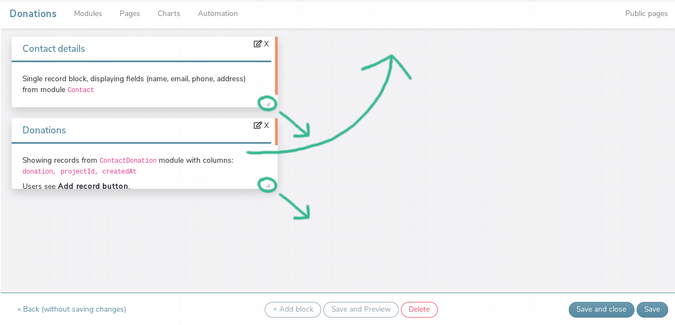
The end result is:
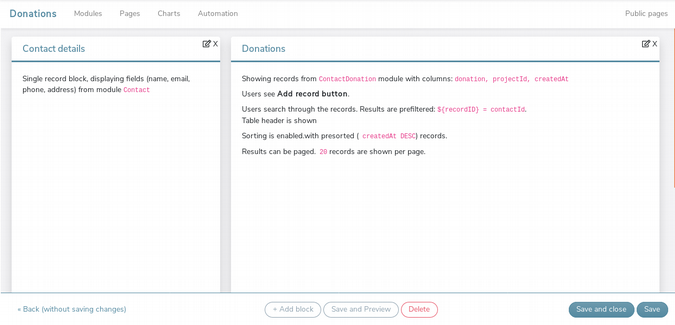
Corteza Low-Code is responsive by default, so the blocks will resize and reposition automatically on devices with small screens.
List pages
List pages are not related to any single record; rather, they show lists of records. This page type is used to create a home page, list of contacts, list of projects, dashboards, etc. List pages are important because you can't enter new records without viewing a list because the Add new record button is shown on lists.
For the Donations application, create the following list pages: Home, Contacts, and Projects.
To create a List page, you need to go to the Pages administrative page and enter a title in the Create a new page box at the top. When you submit this form, it opens the Edit page form, which allows you to add a page description (for internal use; the end user will not see it), and you can set the page to Enabled so it can be accessed.
Your list of pages will now look like:
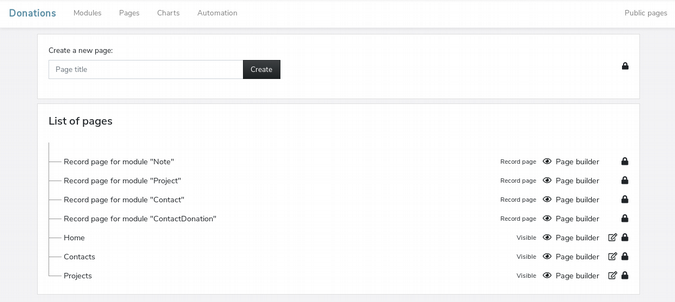
You can drag-and-drop to rearrange this to:

Rearranging pages makes it easier to maintain the application. It also allows you to generate the application menu structure because List pages (but not Record pages) are shown as menu items.
Adding content to each List page is exactly the same as adding blocks to Record pages. The only difference is that you cannot select the Record block type (because it is related to a single record).
Create a menu
The menu in a Corteza Low-Code application is automatically generated by the tree of pages on the admin page Pages. It only shows List pages and ignores Record pages.
To reorder the menu, simply drag-and-drop the pages in the desired order within the tree of pages.
Add charts
Everybody loves charts and graphs. If pictures are worth 1,000 words, then you can create a priceless application in Corteza.
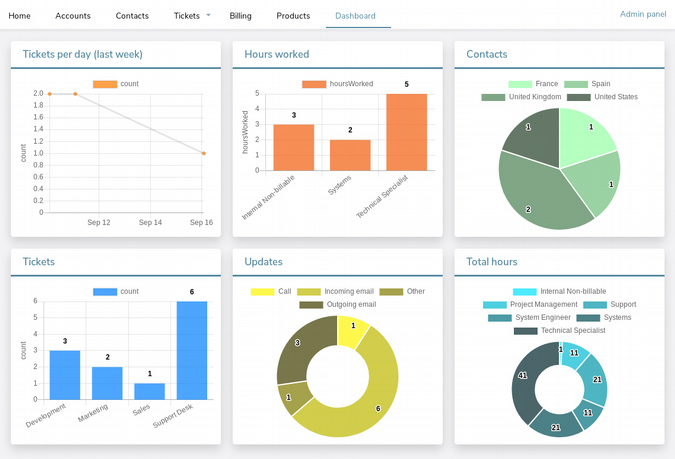
Corteza Low-Code comes with a chart builder that allows you to build line, bar, pie, and donut charts:
As an example, add a chart that shows how many donations have been made to each Project. To begin, enter the Charts page in the admin menu.

To create a new chart, use the Create a new chart field.
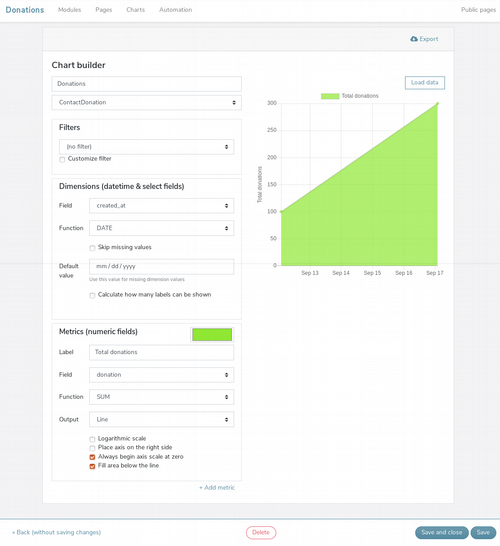
Inside the chart builder, you will find the following fields:
- Name: Enter a name for the chart; e.g., Donations.
- Module: This is the module that provides the data to the chart.
- Filters: You can select one of the predefined filters, such as Records created this year, or add any custom filter (such as status = "Active").
- Dimensions: These can be Datetime and Select fields. Datetime fields allow grouping (e.g., by day, by week, by month). The Skip missing values option is handy to remove values that would return null (e.g., records with incomplete data), and Calculate how many labels can be shown can avoid overlapping labels (which is useful for charts with many dates on the X-axis).
- Metrics: Metrics are numeric fields and have a predefined count option. You can add multiple metric blocks and give each a different label, field (source), function (COUNTD, SUM, MAX, MIN, AVG, or STD, if possible), output (line or bar), and color.
This sample chart uses the ContactDonation module and shows total donations per day.
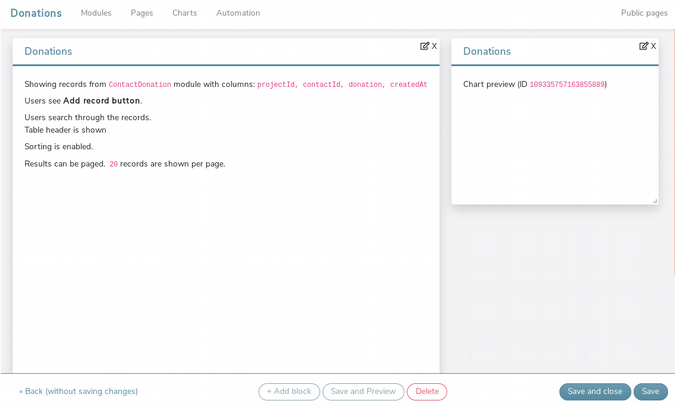
The final step is to add a chart to a page. To add this chart to the home page:
- Enter Pages in the admin menu.
- Click on the Page builder link of the Home page.
- Add a page block of the type Chart, add a block title, and select the chart.
- Resize and reposition the block (or blocks) to make the layout look nice.
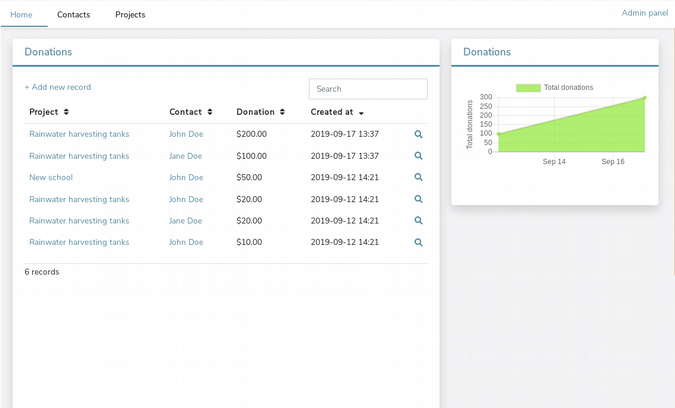
When you save the page and enter your Donation application (via the Public pages link on the top right), you will see the home page with the chart.
opensource.com
Add automation
Automation can make your Corteza Low Code application more efficient. With the Automation tool, you can create business logic that evaluates records automatically when they are created, updated, or deleted, or you can execute a rule manually.
Triggers are written in JavaScript, one of the most used programming languages in the world, enabling you to write simple code that can evaluate, calculate, and transform data (such as numbers, strings, or dates). Corteza Low Code comes with extra functions that allow you to access, create, save, or delete records; find users; send notifications via email; use Corteza Messaging; and more.
Corteza CRM has an extensive set of automation rules that can be used as examples. Some of them are:
- Account: Create new case
- Account: Create new opportunity
- Case: Insert case number
- Contract: Send contract to custom email
- Lead: Convert a lead into an account and opportunity
- Opportunity: Apply price book
- Opportunity: Generate new quote
- Quote: Submit quote for approval
A complete manual on how to use the automation module, together with code examples, is in development.
Deploy an application
Deploying a Corteza Low Code application is very simple. As soon as it's Enabled, it's deployed and available in the Corteza Low Code Namespaces menu. Once deployed, you can start using your application!
For more information
As I mentioned in parts 1 and 2 of this series, the complete Donations application created in this series is available on the Corteza community server. You need to be logged in or create a free Corteza community server account to check it out.
Also, check out the documentation on the Corteza website for other, up-to-date user and admin tutorials.
If you have any questions—or would like to contribute—please join the Corteza Community. After you log in, please introduce yourself in the #Welcome channel.


Comments are closed.