Git is one of those rare applications that has managed to encapsulate so much of modern computing into one program that it ends up serving as the computational engine for many other applications. While it's best-known for tracking source code changes in software development, it has many other uses that can make your life easier and more organized. In this series leading up to Git's 14th anniversary on April 7, we'll share seven little-known ways to use Git.
Creating a website used to be both sublimely simple and a form of black magic all at once. Back in the old days of Web 1.0 (that's not what anyone actually called it), you could just open up any website, view its source code, and reverse engineer the HTML—with all its inline styling and table-based layout—and you felt like a programmer after an afternoon or two. But there was still the matter of getting the page you created on the internet, which meant dealing with servers and FTP and webroot directories and file permissions. While the modern web has become far more complex since then, self-publication can be just as easy (or easier!) if you let Git help you out.
Create a website with Hugo
Hugo is an open source static site generator. Static sites are what the web used to be built on (if you go back far enough, it was all the web was). There are several advantages to static sites: they're relatively easy to write because you don't have to code them, they're relatively secure because there's no code executed on the pages, and they can be quite fast because there's no processing aside from transferring whatever you have on the page.
Hugo isn't the only static site generator out there. Grav, Pico, Jekyll, Podwrite, and many others provide an easy way to create a full-featured website with minimal maintenance. Hugo happens to be one with GitLab integration built in, which means you can generate and host your website with a free GitLab account.
Hugo has some pretty big fans, too. For instance, if you've ever gone to the Let's Encrypt website, then you've used a site built with Hugo.

Install Hugo
Hugo is cross-platform, and you can find installation instructions for MacOS, Windows, Linux, OpenBSD, and FreeBSD in Hugo's getting started resources.
If you're on Linux or BSD, it's easiest to install Hugo from a software repository or ports tree. The exact command varies depending on what your distribution provides, but on Fedora you would enter:
$ sudo dnf install hugoConfirm you have installed it correctly by opening a terminal and typing:
$ hugo helpThis prints all the options available for the hugo command. If you don't see that, you may have installed Hugo incorrectly or need to add the command to your path.
Create your site
To build a Hugo site, you must have a specific directory structure, which Hugo will generate for you by entering:
$ hugo new site mysiteYou now have a directory called mysite, and it contains the default directories you need to build a Hugo website.
Git is your interface to get your site on the internet, so change directory to your new mysite folder and initialize it as a Git repository:
$ cd mysite
$ git init .
Hugo is pretty Git-friendly, so you can even use Git to install a theme for your site. Unless you plan on developing the theme you're installing, you can use the --depth option to clone the latest state of the theme's source:
$ git clone --depth 1 \
https://github.com/darshanbaral/mero.git\
themes/mero
Now create some content for your site:
$ hugo new posts/hello.mdUse your favorite text editor to edit the hello.md file in the content/posts directory. Hugo accepts Markdown files and converts them to themed HTML files at publication, so your content must be in Markdown format.
If you want to include images in your post, create a folder called images in the static directory. Place your images into this folder and reference them in your markup using the absolute path starting with /images. For example:
Choose a theme
You can find more themes at themes.gohugo.io, but it's best to stay with a basic theme while testing. The canonical Hugo test theme is Ananke. Some themes have complex dependencies, and others don't render pages the way you might expect without complex configuration. The Mero theme used in this example comes bundled with a detailed config.toml configuration file, but (for the sake of simplicity) I'll provide just the basics here. Open the file called config.toml in a text editor and add three configuration parameters:
languageCode = "en-us"
title = "My website on the web"
theme = "mero"

[params]
  author = "Seth Kenlon"
  description = "My hugo demo"
Preview your site
You don't have to put anything on the internet until you're ready to publish it. While you work, you can preview your site by launching the local-only web server that ships with Hugo.
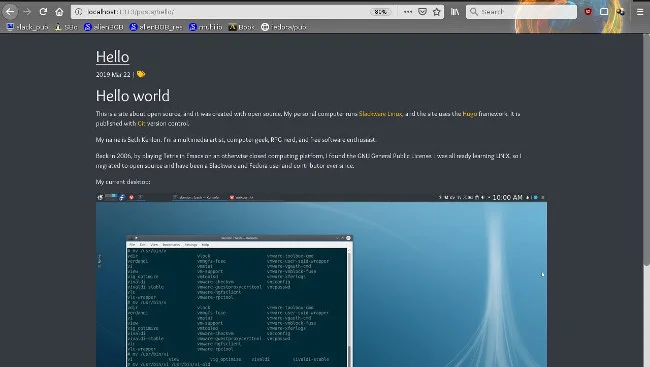
$ hugo server --buildDrafts --disableFastRenderOpen a web browser and navigate to https://localhost:1313 to see your work in progress.
Publish with Git to GitLab
To publish and host your site on GitLab, create a repository for the contents of your site.
To create a repository in GitLab, click on the New Project button in your GitLab Projects page. Create an empty repository called yourGitLabUsername.gitlab.io, replacing yourGitLabUsername with your GitLab user name or group name. You must use this scheme as the name of your project. If you want to add a custom domain later, you can.
Do not include a license or a README file (because you've started a project locally, adding these now would make pushing your data to GitLab more complex, and you can always add them later).
Once you've created the empty repository on GitLab, add it as the remote location for the local copy of your Hugo site, which is already a Git repository:
$ git remote add origin git@gitlab.com:skenlon/mysite.gitCreate a GitLab site configuration file called .gitlab-ci.yml and enter these options:
image: monachus/hugo

variables:
  GIT_SUBMODULE_STRATEGY: recursive

pages:
  script:
  - hugo
  artifacts:
    paths:
    - public
  only:
  - master
The image parameter defines a containerized image that will serve your site. The other parameters are instructions telling GitLab's servers what actions to execute when you push new code to your remote repository. For more information on GitLab's CI/CD (Continuous Integration and Delivery) options, see the CI/CD section of GitLab's docs.
Set the excludes
Your Git repository is configured, the commands to build your site on GitLab's servers are set, and your site ready to publish. For your first Git commit, you must take a few extra precautions so you're not version-controlling files you don't intend to version-control.
First, add the /public directory that Hugo creates when building your site to your .gitignore file. You don't need to manage the finished site in Git; all you need to track are your source Hugo files.
$ echo "/public" >> .gitignoreYou can't maintain a Git repository within a Git repository without creating a Git submodule. For the sake of keeping this simple, move the embedded .git directory so that the theme is just a theme.
Note that you must add your theme files to your Git repository so GitLab will have access to the theme. Without committing your theme files, your site cannot successfully build.
$ mv themes/mero/.git ~/.local/share/Trash/files/Alternately, use a trash command such as Trashy:
$ trash themes/mero/.gitNow you can add all the contents of your local project directory to Git and push it to GitLab:
$ git add .
$ git commit -m 'hugo init'
$ git push -u origin HEAD
Go live with GitLab
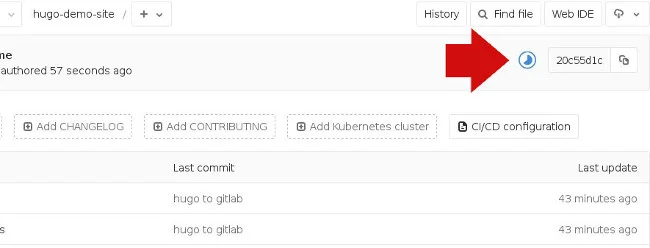
Once your code has been pushed to GitLab, take a look at your project page. An icon indicates GitLab is processing your build. It might take several minutes the first time you push your code, so be patient. However, don't be too patient, because the icon doesn't always update reliably.

While you're waiting for GitLab to assemble your site, go to your project settings and find the Pages panel. Once your site is ready, its URL will be provided for you. The URL is yourGitLabUsername.gitlab.io/yourProjectName. Navigate to that address to view the fruits of your labor.

If your site fails to assemble correctly, GitLab provides insight into the CI/CD pipeline logs. Review the error message for an indication of what went wrong.
Git and the web
Hugo (or Jekyll or similar tools) is just one way to leverage Git as your web publishing tool. With server-side Git hooks, you can design your own Git-to-web pipeline with minimal scripting. With the community edition of GitLab, you can self-host your own GitLab instance or you can use an alternative like Gitolite or Gitea and use this article as inspiration for a custom solution. Have fun!


Comments are closed.