This year, I joined in on the Open Jam, a "game jam" in which programmers around the world dedicate a weekend to create open source games. The jam is essentially an excuse to spend a weekend coding, and the majority of the games that come out of the challenge are small distractions rather than something you're likely to play for hours on end. But they're fun, diverse, and open source, and that's a pretty good feature list for a game.
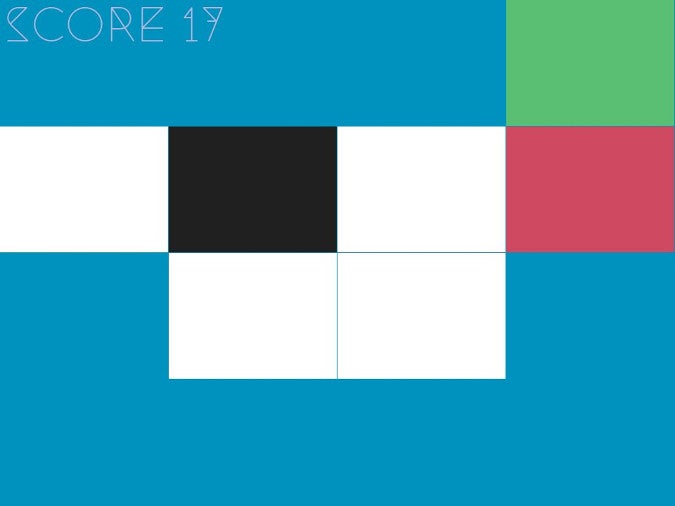
The game I submitted is Unveil, a calming puzzle game in which the player must first discover the goal, and then work to achieve it with the greatest number of points. Because part of the game is the discovery process, I won't reveal any more about the gameplay than that.

(Klaatu, CC BY-SA 4.0)
The whole game is only 338 lines, written in Python using the Pygame module. It's, of course, open source, and part of it may serve as a good introduction to a few programming concepts that used to confound me (two-dimensional arrays being the most significant). For simple game design, a two-dimensional array is very useful because so many enduring games are built on them. You can probably think of several, although if you don't know what a two-dimensional array is, you may not realize it.
Arrays in gaming
An array is a collection of data. An array can be listed across a page or an X-axis (in mathematical terms). For instance:
artichoke, lettuce, carrot, aubergine, potatoAn array may also be represented as a list or a Y-axis:
artichoke
lettuce
carrot
aubergine
potato
This is a one-dimensional array. A two-dimensional array extends on both the X-axis and Y-axis.
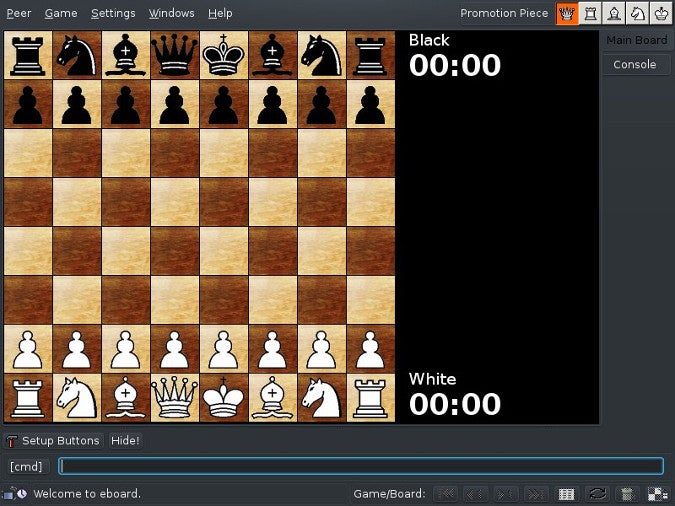
Here's a common two-dimensional array seen in the world of board games:

(Klaatu, CC BY-SA 4.0)
Yes, two-dimensional arrays are used as the board for chess, draughts, noughts and crosses (also called tic-tac-toe), RPG battle maps, minesweeper, Carcassonne, Forbidden Island, and in slightly modified forms, games like Monopoly and even Ur (literally the oldest game we know of).
If you can comfortably create a two-dimensional array, you have a great start at programming any number of games.
Creating tiles in Pygame
If you're not familiar with Python, you should take some time to review this Python (and Pygame) introductory series. If you feel confident enough to translate code to other libraries, though, there's nothing specific to Pygame in the "important" parts of this code (the array constructor), so you can use any library or language.
For simplicity, I'll call the individual squares in the game board array tiles. To construct a two-dimensional array, or game board as the case may be, you must have tiles. In object-oriented programming, you consider each component as a unique object based upon a template (or class, in programming terminology). So, before creating the game board, you must first create the infrastructure for the board's building blocks: tiles.
First, set up a simple Pygame project, creating a display (your window into the game world), a group to represent the game board, and a few standard variables:
import pygame

pygame.init()
game_world = pygame.display.set_mode((960, 720))
game_board = pygame.sprite.Group()

running = True
black = (0, 0, 0)
white = (255, 255, 255)
red = (245, 22, 22)
world_x = 960
world_y = 720
Next, create a Tile class to establish the template from which each tile gets cast. The first function initializes a new tile when one is created and gives it the necessary basic fields: width, height, an image (actually, I just filled it with the color white), and whether or not it's active. In this case, I use is_pressed, as if the tile is a button, because that's what it'll look like when the code is finished: when the user clicks a tile, it changes color as if it were a button being lit up. For other purposes, this state needn't be visible. In chess, for example, you might instead have a field to represent whether a tile is occupied and, if so, by what kind of chess piece.
class Tile(pygame.sprite.Sprite):
    def __init__(self, x, y, w, h, c):
        pygame.sprite.Sprite.__init__(self)
        self.image = pygame.Surface((w, h))
        self.image.fill(c)
        self.rect = self.image.get_rect()
        self.rect.x = x
        self.rect.y = y
        self.is_pressed = False
The second function is an update function. Specifically, it checks whether a tile has been clicked by the user. This requires mouse coordinates, which you'll get later in the code during the event loop.
For this demonstration, I'll make this function fill the tile with the color red when it's in the is_pressed state and back to white otherwise:
    def was_clicked(self, mouse):
        if self.rect.collidepoint(mouse) and not self.is_pressed:
            self.image.fill(red)
            self.is_pressed = True
        elif self.rect.collidepoint(mouse) and self.is_pressed:
            self.image.fill(white)
            self.is_pressed = False
        else:
            return False
Main loop
This demo's main loop is simple. It checks for two kinds of input: a quit signal and a mouse down (click) event. When it detects a mouse click, it calls the was_clicked function to react (filling it with red or white, depending on its current state).
Finally, the screen fills with black, the game board state is updated, and the screen is redrawn:
"""
holding place for game board construction
"""

while running:
    for event in pygame.event.get():
        if event.type == pygame.QUIT:
            running = False

        elif event.type == pygame.MOUSEBUTTONDOWN:
            for hitbox in game_board:
                hitbox.was_clicked(event.pos)

    game_world.fill(black)
    game_board.update()
    game_board.draw(game_world)
    pygame.display.update()

pygame.quit()
Board construction
To build a two-dimensional array, you must first decide how many tiles you want in both directions. I'll use eight for this example because that's how a chessboard is constructed, but you could use fewer or more. You could even accept arguments at launch to define the array's size depending on options, such as --row and --column:
rows = 8
columns = 8
Because you don't know the size of the board, you must calculate the width of the rows and columns based on the size of your display. I also include one pixel of padding between each tile, because, without a gap, it looks like one big block of color:
column_width = world_x / columns
row_height = world_y / rows
pad = 1
Laying out tiles across the display is simple. Of course, this isn't the goal, as it only draws along the X-axis, but it's a good start:
j = 0

while j < rows:
    tile = Tile(j * column_width, row_height, column_width - pad, row_height - pad, white)
    game_board.add(tile)
    j += 1
The idea is that the variable j starts at 0, so the first tile is placed from 0 to column_width, less the value of the padding. Then the variable j is incremented to 1, so the next tile is placed at 1 times the value of column_width, and so on.
You can run that code to see the partial success it renders. What this solution obviously lacks is any awareness of further rows.
Use a second counter variable to track rows:
j = 0
k = 0

while j < rows:
    while k < columns:
        tile = Tile(k * column_width, j * row_height, column_width - pad, row_height - pad, white)
        game_board.add(tile)
        k += 1
    j += 1
    k = 0
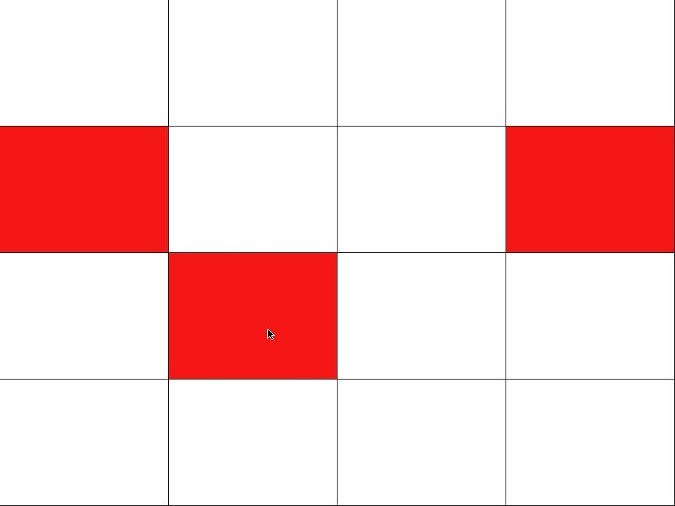
In this code block, which achieves the desired result, each tile is positioned in a space determined by the current value of either j or k.
The k variable is incremented within its loop so that each tile is progressively placed along the X-axis.
The j variable is incremented outside the nested loop so that everything gets moved down one row.
The k variable is then set to 0 so that when the inner loop starts again, everything is shunted back to the far left of the screen.

(Klaatu, CC BY-SA 4.0)
Easy arrays
Creating a grid can seem mathematically and syntactically intensive, but with this example plus a little bit of thought about what result you want, you can generate them at will. The only thing left for you to do now is to create a game around it. That's what I did, and you're welcome to play it by downloading it from its home on Itch.io or from its source repository on git.nixnet.xyz. Enjoy!


Comments are closed.