Virtualization opens up a wonderland of new opportunities for anyone, including ordinary computer users who want to try out a new operating system. Are you using a Mac but want to try Microsoft Windows? You can, with a virtualization solution. What about if you are using Windows but want to try a macOS or a Linux platform? This is also possible with virtualization.
Various virtualization solutions exist. Mac users typically think of Parallels, but it is proprietary software. If you are a developer, you might know about VirtualBox. While VirtualBox is an excellent tool, there is another option: QEMU, which is an open source machine emulator and virtualizer available under the GPLv2 license.
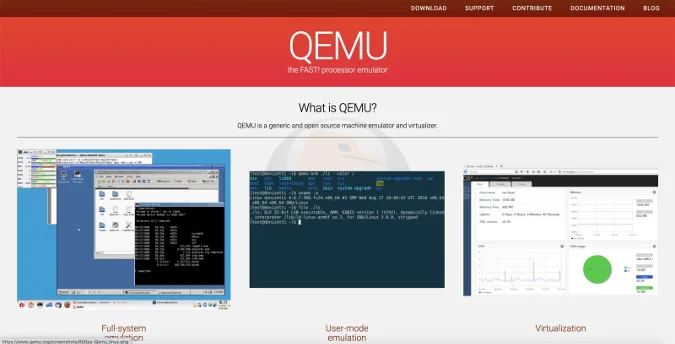
(Bryant Son, CC BY-SA 4.0)
This step-by-step tutorial explains how to use QEMU to run Fedora Linux on macOS. QEMU is also supported on pretty much every platform, including Windows and various Linux distributions.
If you prefer watching a video to reading, please see the YouTube version of this tutorial:
Step 1: Install QEMU with Homebrew
If you're not using macOS, visit QEMU's download page to install it for your operating system.
If you're using a Mac, you can use Homebrew to install QEMU. If you don't have Homebrew yet, Matthew Broberg's introduction to Homebrew will help you install and configure it.
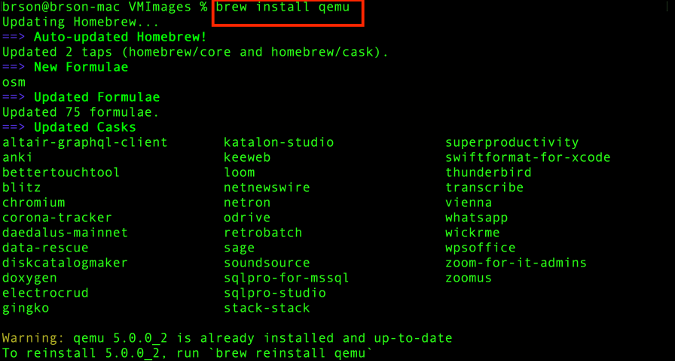
To install QEMU with Homebrew, enter:
brew install qemu
This command should install all of QEMU's dependencies, utilities, and more.
(Bryant Son, CC BY-SA 4.0)
Step 2: Download a Fedora ISO image for your workstation
Next, download a Fedora Workstation image you can use to boot a Fedora environment through QEMU. Fedora is an open source Linux distribution, and its primary license is GPLv2. One great thing about virtualization is, if you want to use a different platform, you can.
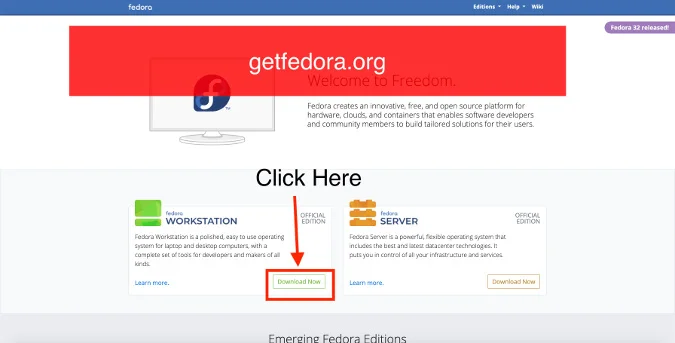
Get the Fedora Workstation ISO image by visiting the Fedora homepage and clicking the Download Now button under Fedora Workstation.
(Bryant Son, CC BY-SA 4.0)
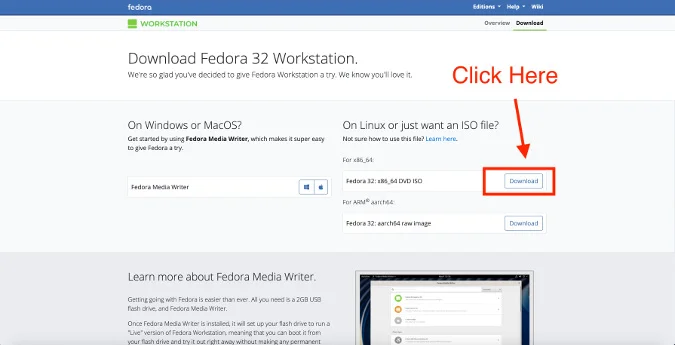
You want to download an ISO image, so click the Download button under x86_64. Save the file in a new directory that you can remember.
(Bryant Son, CC BY-SA 4.0)
Step 3: Download a Fedora QCOW2 image for the file drive
In addition to the ISO image above (which is used for booting a Fedora Workstation), you also need a QCOW2 image, which stands for QEMU Copy On Write. QCOW2 uses a disk-storage optimization strategy that delays storage allocation until it is needed. The QCOW2 format is used by QEMU, OpenStack, and KVM.
Visit the Fedora Cloud Base images page and click the Download link next to Cloud Base Image for OpenStack. This will download the QCOW2 image; save the file in the same directory where you put your Fedora Workstation ISO image.
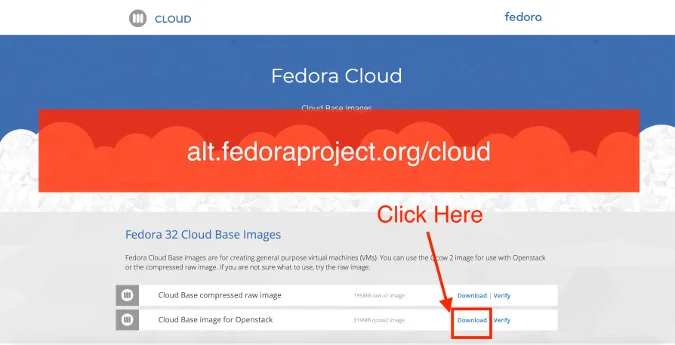
(Bryant Son, CC BY-SA 4.0)
Step 4: Resize the QCOW2 image
You should have two files in this directory. You can check with the ls command.
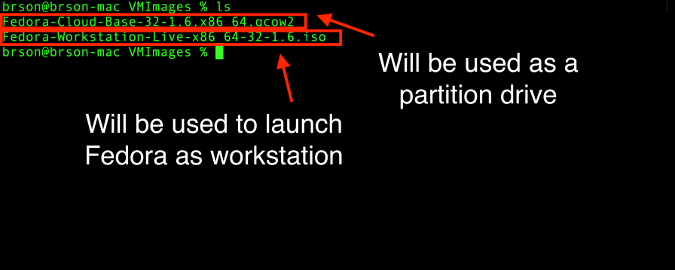
(Bryant Son, CC BY-SA 4.0)
The qemu-img command will allow you to resize the downloaded QCOW2 image to any size you want to allocate. Use this command to allocate 10GB for your drive:
qemu-img create -f qcow2 DOWNLOADED_QCOW2_FILE 10G
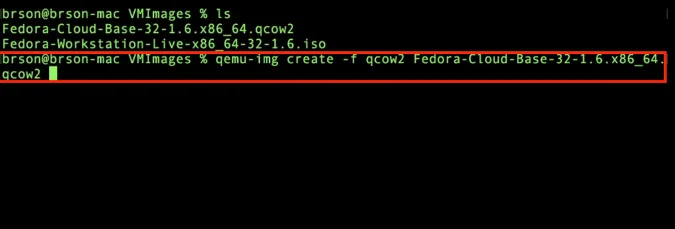
(Bryant Son, CC BY-SA 4.0)
Step 5: Run Fedora with QEMU
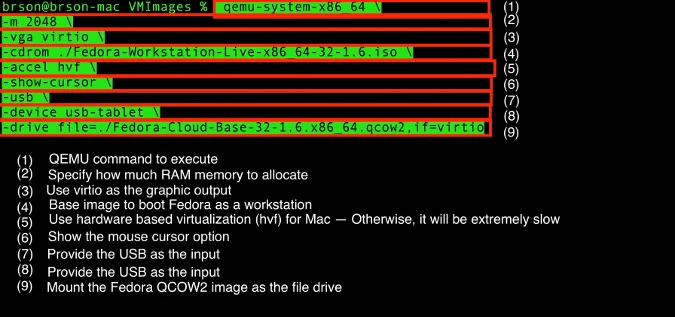
Run Fedora with the following qemu-system-x86_64 command:
 qemu-system-x86_64 \
-m 2048 \
-vga virtio \
-cdrom ./Fedora-Workstation-Live-x86_64-32-1.6.iso \
-accel hvf \
-show-cursor \
-usb \
-device usb-tablet \
-drive file=./Fedora-Cloud-Base-32-1.6.x86_64.qcow2,if=virtio
(Bryant Son, CC BY-SA 4.0)
Here is what this command does:
qemu-system-x86_64is the QEMU utility command.- The
-mparameter specifies how much RAM you want to allocate. This allocates 2GB, but you can increase it, if you would like. -vgaspecifies the graphic output in virtio-vga. This is a modern, virtio-based display device designed for virtual machines and includes VGA-compatibility mode.-cdromspecifies the file you will use to boot your workstation.-accelspecifies the type of acceleration you want to use, which should behvffor hardware-based acceleration.-show-cursorensures that you see a mouse cursor.-usbspecifies the input device.-device usb-tabletindicates you are using a touchpad as the input device.-drive file=…specifies the partition disk you want to use.
This will launch Fedora Workstation through QEMU.
Step 6: Install Fedora on QCOW2
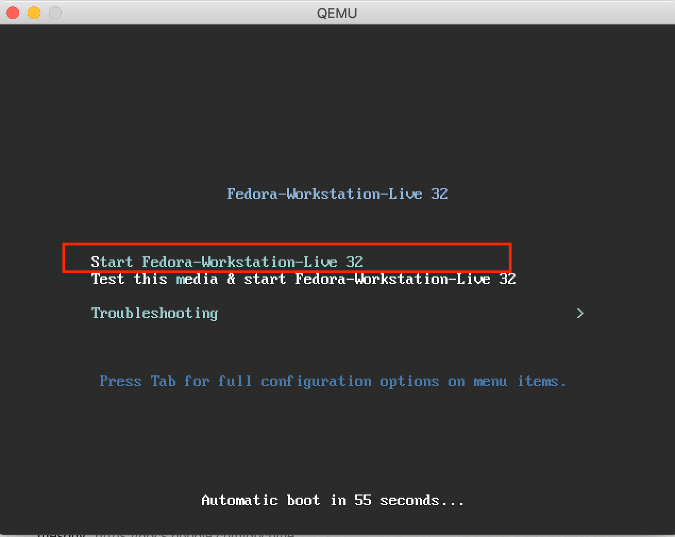
In the QEMU window, choose the first option, Start Fedora-Workstation. This will boot Fedora in a standard way.
(Bryant Son, CC BY-SA 4.0)
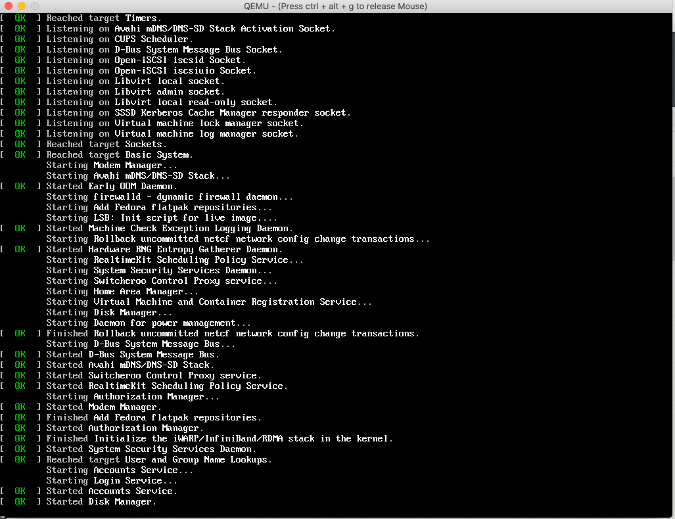
Booting can take little a little while, but it should go pretty smoothly.
(Bryant Son, CC BY-SA 4.0)
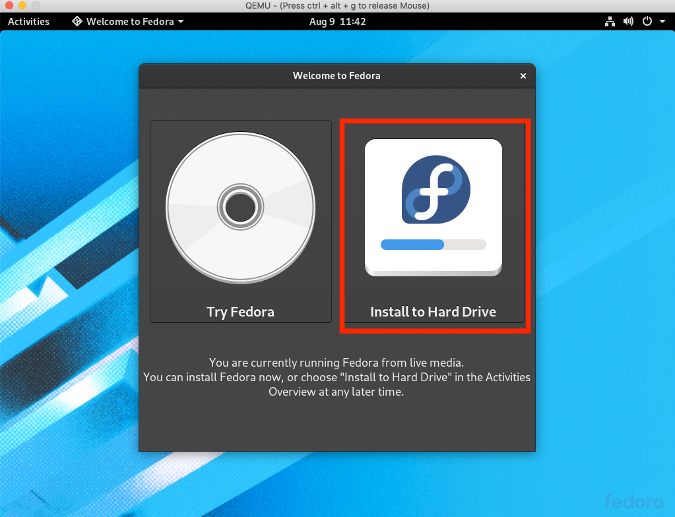
After it boots, you will have two options: Try Fedora and Install to Hard Drive. Choose Install to Hard Drive.
(Bryant Son, CC BY-SA 4.0)
You may see an empty screen, but things are loading.
(Bryant Son, CC BY-SA 4.0)
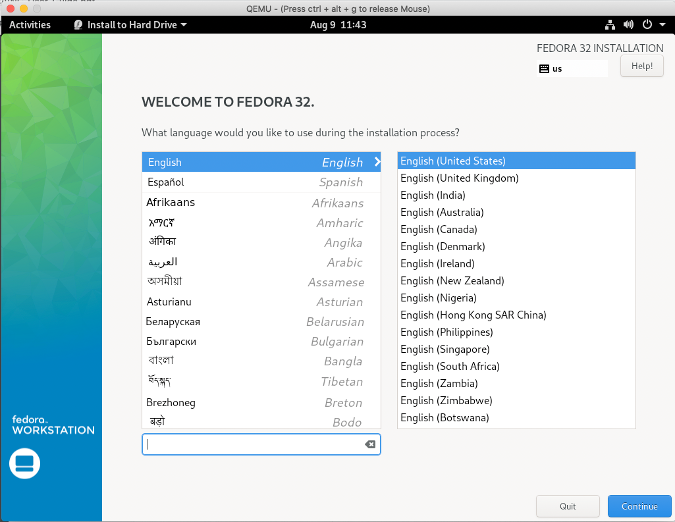
The first screen you see is the language selection menu. Choose the one you are comfortable with and click Continue.
(Bryant Son, CC BY-SA 4.0)
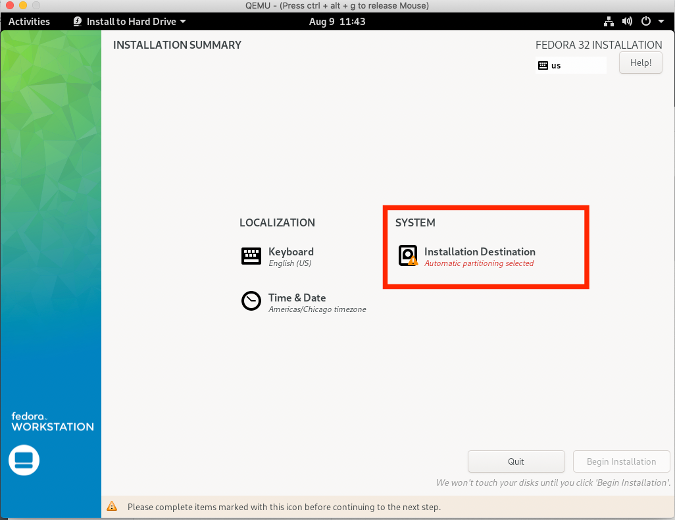
You will get an option to change other settings, such as time and date, but choose Installation Destination.
(Bryant Son, CC BY-SA 4.0)
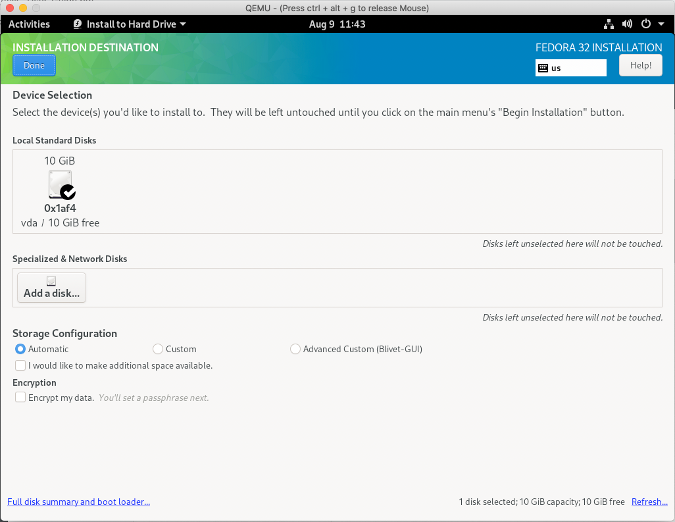
Notice the disk with 10GB? That is the QCOW2 image you set up earlier. Choose that, and click Done.
(Bryant Son, CC BY-SA 4.0)
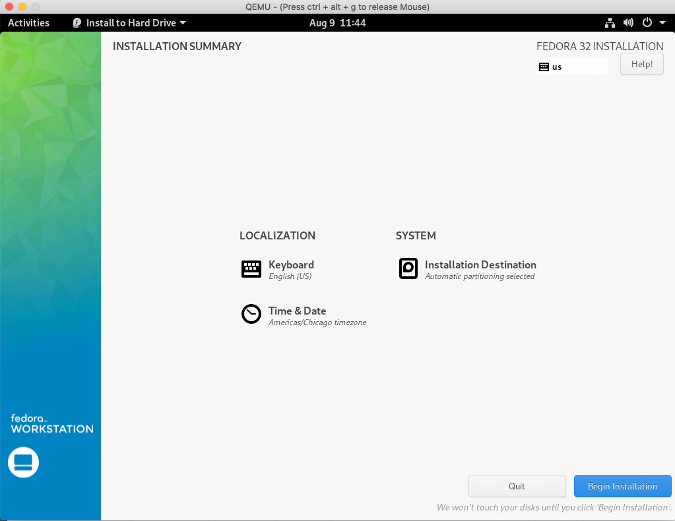
Finally, click Begin Installation. It will take a while to install everything, but once everything finishes, you will get a welcome screen instead of an installation option.
(Bryant Son, CC BY-SA 4.0)
That's it! As you can see, QEMU is a nice option for trying out a virtual environment without too much complexity and with open source.
I hope this helps you get started with Fedora through QEMU. Please try it out and share a comment about your experience.




4 Comments