Virtualization is one of the most used technologies. Fedora Linux uses Cloud Base images to create general-purpose virtual machines (VM), but there are many ways to set up Cloud Base images. Recently, the virt-install command-line tool for provisioning VMs added support for cloud-init, so it can now be used to configure and run a cloud image locally.
This article walks through how to set up a base Fedora cloud instance on bare metal. The same steps can be used with any raw or Qcow2 Cloud Base image.
What is --cloud-init?
The virt-install command creates a KVM, Xen, or LXC guest using libvirt. The --cloud-init option uses a local file (called a nocloud datasource) so you don't need a network connection to create an image. The nocloud method derives user data and metadata for the guest from an iso9660 filesystem (an .iso file) during the first boot. When you use this option, virt-install generates a random (and temporary) password for the root user account, provides a serial console so you can log in and change your password, and then disables the --cloud-init option for subsequent boots.
Set up a Fedora Cloud Base image
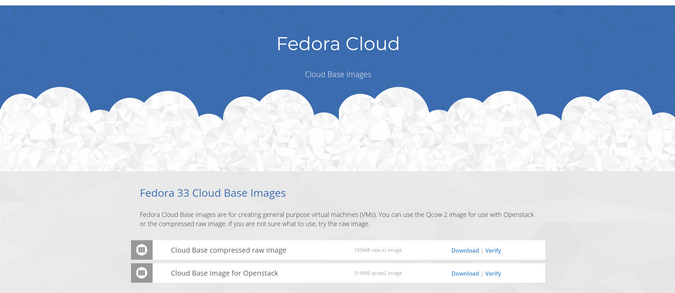
First, download a Fedora Cloud Base (for OpenStack) image.

(Sumantro Mukherjee, CC BY-SA 4.0)
Then install the virt-install command:
$ sudo dnf install virt-installOnce virt-install is installed and the Fedora Cloud Base image is downloaded, create a small YAML file named cloudinit-user-data.yaml to contain a few configuration lines that virt-install will use.
#cloud-config
password: 'r00t'
chpasswd: { expire: false }
This simple cloud-config sets the password for the default fedora user. If you want to use a password that expires, you can set it to expire after logging in.
Create and boot the VM:
$ virt-install --name local-cloud18012709 \
--memory 2000 --noreboot \
--os-variant detect=on,name=fedora-unknown \
--cloud-init user-data="/home/r3zr/cloudinit-user-data.yaml" \
--disk=size=10,backing_store="/home/r3zr/Downloads/Fedora-Cloud-Base-33-1.2.x86_64.qcow2"
In this example, local-cloud18012709 is the name of the virtual machine, RAM is set to 2000MiB, disk size (the virtual hard drive) is set to 10GB, and --cloud-init and backing_store contain the absolute path to the YAML config file you created and the Qcow2 image you downloaded.
Log in
After the image is created, you can log in with the username fedora and the password set in the YAML file (in my example, this is r00t, but you may have used something different). Change your password once you've logged in for the first time.
To power off your virtual machine, execute the sudo poweroff command, or press Ctrl+] on your keyboard.
Start, stop, and kill VMs
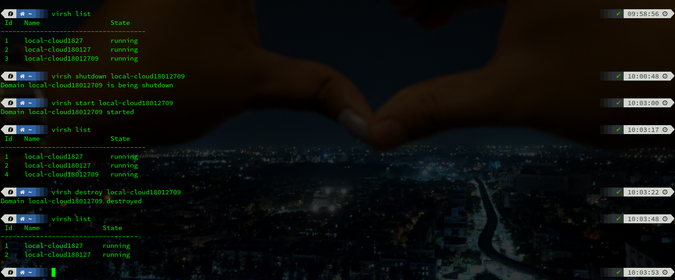
The virsh command is used to start, stop, and kill VMs.
To start any VM that is running:
$ virsh start <vm-name>To stop any running VM:
$ virsh shutdown <vm-name>To list all VMs that are in a running state:
$ virsh listTo destroy the VMs:
$ virsh destroy <vm-name>

(Sumantro Mukherjee, CC BY-SA 4.0)
Fast and easy
The virt-install command combined with the --cloud-init option makes it fast and easy to create cloud-ready images without worrying about whether you have a cloud to run them on yet. Whether you're preparing for a a major deployment or just learning about containers, give virt-install --cloud-init a try.
Do you have a favourite tool for your work in the cloud? Tell us about them in the comments.


Comments are closed.