Do you have videos you need to cut together but find video editing applications too complex? Flowblade is a minimal video editing application designed to enable you to assemble a cut of your video quickly and easily.
Video editing can be challenging. There's a lot to think about, lots of footage to review, a story you want to tell, and there's the software you have to learn on top of everything else. However, there's a common conundrum at play here: Most people only need about 80% of what's possible in video editing applications, and you can implement that 80% of everyday editing tasks with about 50% of the resources a big "professional" editor uses. That's where Flowblade really excels. It's a simple editor that can do all the basic tasks you need, plus quite a bit more. However, it focuses on the essentials so you can get started editing right away, and you're never likely to be overwhelmed by menu selections you may never use, much less understand.
Install Flowblade on Linux
Flowblade is available on most Linux distributions from your package manager. On Fedora, Mageia, and similar distributions:
$ sudo dnf install flowbladeOn Elementary, Mint, and other Debian-based distributions:
$ sudo apt install flowbladeHowever, I use Flowblade as a Flatpak.
Choosing a workflow
When you launch Flowblade for the first time, it prompts you to choose a default workflow. There's no right or wrong answer, but you may well not know yet what editing style you prefer. Suppose you're used to traditional offline film editing. In that case, the Film workflow will feel natural to you, allowing you to mostly work with each clip in a Moviola-style monitor, with insert and overwrite actions targeting specific tracks in the timeline. This happens to be my preferred workflow, and with a little practice, it's probably the fastest method, especially for a rough assembly of footage. However, the Standard setting is a great universal workflow that makes it easy to click around the application (and your footage) and just figure things out as you go.
For this article, I use the Standard setting and a generic workflow.
Flowblade interface
The Flowblade interface has four central components:
- The media bin in the top left
- The monitor in the top right
- The timeline along the bottom
- A horizontal toolbar straight through the middle
There's more to it, but those are the window panels you'll spend the majority of your time with.
Importing footage
Your first step is right in front of you in the media bin: Right Click to Add Media. To get your video footage into Flowblade, right-click in the media bin and select Add Video, Audio, and Image. As you import footage from your hard drive, you may get prompted to change your project profile. That's not an error. It just means your camera doesn't happen to record video at the same resolution and frame rate as the arbitrary settings of Flowblade. It's safe to let Flowblade adapt to your video footage.
The rough assembly
The first cut of video footage gets called a rough assembly because it's exactly that: A quick and imprecise assembly of video clips so that they tell a story. The story may not be complete, it may not be elegant, and it's longer than it needs to be, but it's from your rough assembly that you'll carve out something beautiful. But first, you need to get the clips you absolutely need to tell your story into your timeline.
To review a video clip, double-click its icon in your media bin to open it in the clip monitor panel on the right. You can play the clip in the monitor using the Spacebar to start and stop playback or the playback control buttons in the UI. You can click the monitor's progress bar to position your playhead at any specific frame. Because there's usually footage you don't need at the very start and very end of a clip (you're usually positioning the camera or calling "action" or "cut" at those points), you can mark just the part of the clip you need using the Mark In and Mark Out buttons, or by pressing the I and O keys on your keyboard.
Once you've selected the good part of your video footage ("good," meaning the portion of the clip that contributes to the story you're trying to tell), you can move it into your timeline.
Working in the timeline
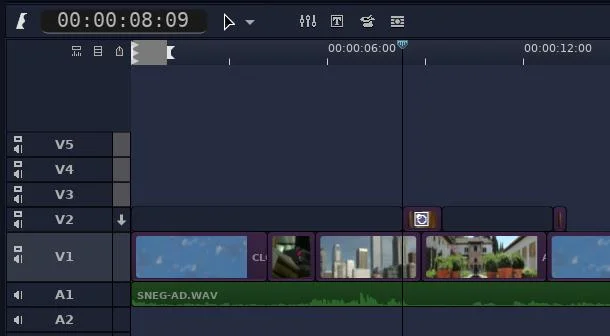
You can drag the video between your In and Out marks into your timeline from your clip monitor by clicking on the video frame in the monitor and dropping it in the timeline. This is the quick and intuitive way to add clips to a timeline, but it's actually the least precise method.
(Seth Kenlon, CC BY-SA 4.0)
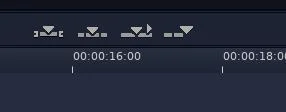
I find it quicker and less prone to errors to use the Insert, Overwrite, and Append shortcuts. Once you've marked the good part of a clip, you can press U to append the clip to the timeline.
(Seth Kenlon, CC BY-SA 4.0)
That means your functional workflow is:
- Open a clip in the clip monitor.
- Press I and O to mark the good parts.
- Press U to add the clip to the timeline.
It's a fast and efficient way of working.
If you forget an essential clip, you can make an insert edit instead of an append edit. Place the playhead where you need to insert a clip into your timeline, and then press Y to send the clip in your clip monitor to that position.
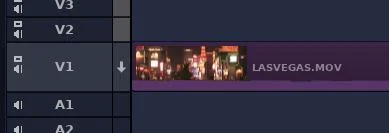
All edits in the timeline happen on the target track, which gets indicated by a Down-Arrow icon. By default, the target track is V1, so most of your initial story is built there.
(Seth Kenlon, CC BY-SA 4.0)
Telling your story with Flowblade
As you refine your story, you can refine and build upon your initial timeline track. Sometimes that means you'll need to change the target track and place cut-away footage above your main storyline. Other times it might mean you need to shorten or extend a clip already in your timeline.
To shorten or extend a clip once it's in the timeline, double-click on it and then mouse over either the head or the tail of the clip, clicking and dragging till you get it just right.
Exporting your project
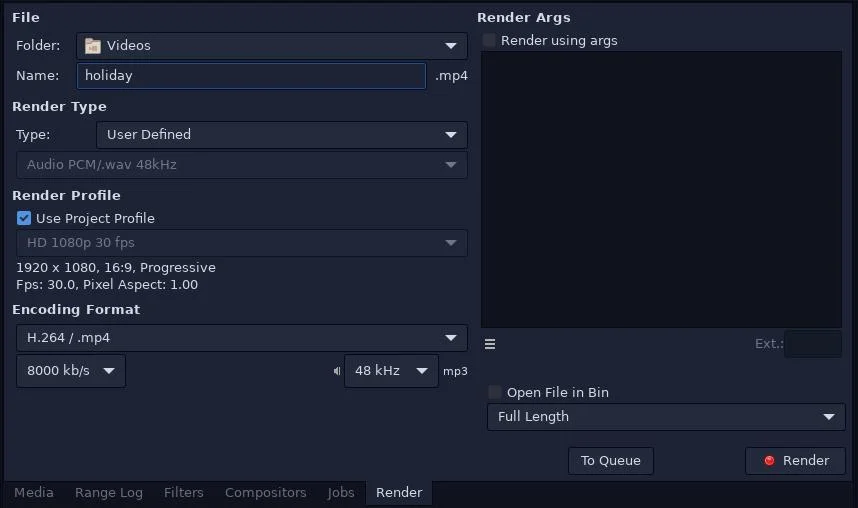
To share your movie with other people, you must render the clips in your timeline into a unified movie file. Flowblade uses a dedicated Batch Render Queue application for rendering, which you launch from Flowblade. It's actually a different computing process, so you can close Flowblade without stopping your render. Background rendering is one of my favorite features about Flowblade.
To start a render in Flowblade:
- Go to the Render menu and select Add to Batch Render Queue.
- Click the Render tab of your media bin panel.
- Choose a destination folder and a filename for your movie, and click Render.
(Seth Kenlon, CC BY-SA 4.0)
Quick and easy video editing on Linux
There's more to Flowblade than just basic edits. It's got video effects and transitions, a basic audio mixer plus the ability to export audio tracks to Ardour for a dedicated sound mix, more ways to add and remove clips from the timeline, and much more. However, the basics and the interface are kept simple, and that makes it easy to get started with editing from the very first launch, whether it's the first time you've ever edited video or just the first time you've edited with Flowblade. Flowblade keeps you in the flow, no matter what stage of editing you're on.




Comments are closed.