Whether it's due to snow days, a seasonal vacation, or time off for any number of holidays, December is a great time to settle down in front of your computer and get creative. One of my favorite pastimes is cutting video footage together. Sometimes I edit video to tell a story. Other times I edit video to convey a mood or a single idea, and sometimes I do it to provide visuals to music I've either discovered or composed. Maybe it's because I learned to edit film at a school while aiming for a career in the field, or maybe it's just because I like powerful open source tools. Still, my favorite video editing application to this day remains the formidable Kdenlive, a robust and professional editing software providing an intuitive workflow and plenty of effects and transitions.
Install Kdenlive on Linux
Kdenlive is available on most Linux distributions from your package manager. On Fedora, Mageia, and similar distributions:
$ sudo dnf install kdenliveOn Elementary, Mint, and other Debian-based distributions:
$ sudo apt install kdenliveHowever, I use Kdenlive as a Flatpak.
How to tell a story with video
What does it mean to "edit" video, anyway?
Editing footage has a somewhat inflated reputation. Sure, it's the process that enables big blockbuster movies to affect millions of people worldwide, but when you're sitting in front of your laptop, you don't have to think of it that way. Editing a video is, quite simply, removing the "bad" parts of a video until just the "good" stuff remains.
What makes footage bad or good is entirely up to your own tastes, and it may even change depending on what you're trying to "say" with your creation. If you're editing footage of the wildlife you find in your backyard, you might cut out the parts of the shots that prominently feature your rubbish bins or the shot of you stepping on a rake. What remains is sure to make your backyard look like a magical secret garden filled with hummingbirds, butterflies, a curious rabbit, and a playful dog. On the other hand, leave that "bad" footage in, and you can instead create a comedy about a suburbanite taking the rubbish out, stepping on a rake, frightening all the animals away, and generally making a nuisance of themselves. There's no right or wrong. Whatever you cut, nobody knows ever existed. Whatever you keep tells a story.
Importing footage
When you start Kdenlive, you have an empty project. The Kdenlive window consists of a Project Bin in the top left corner, an information panel in the center, and a Project Monitor in the top right. Along the bottom is the really important part—the Timeline. The Timeline is where your story gets created. Everything in the Timeline at the finish of your project is what your audience sees. That's your movie.
Before you start building a story in your timeline, you need some footage. Assuming you've taken some footage on a camera or mobile device, you must add clips to the Project Bin. Right-click in the empty space of the Project Bin panel and select Add Clip or Folder.
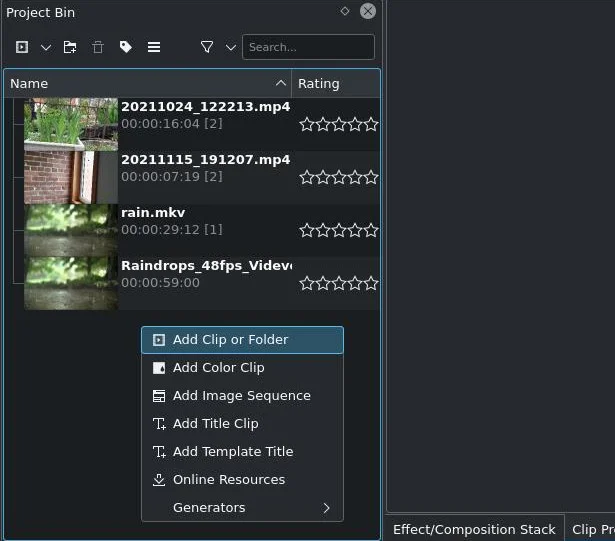
(Seth Kenlon, CC BY-SA 4.0)
Cutting footage
In Kdenlive, there are lots of ways to make cuts in video footage.
The three-point edit
Historically, the official way to make a cut is to perform a "three-point edit." Count the points:
1. Open a video clip in Kdenlive's Clip Monitor panel, find the point where you wish the video had started, and press I on your keyboard to mark in.
2. Then find the point where you wish the video had stopped and press O to mark out.
3. Drag the video clip from the Clip Monitor to a point in the Timeline at the bottom of the Kdenlive window.
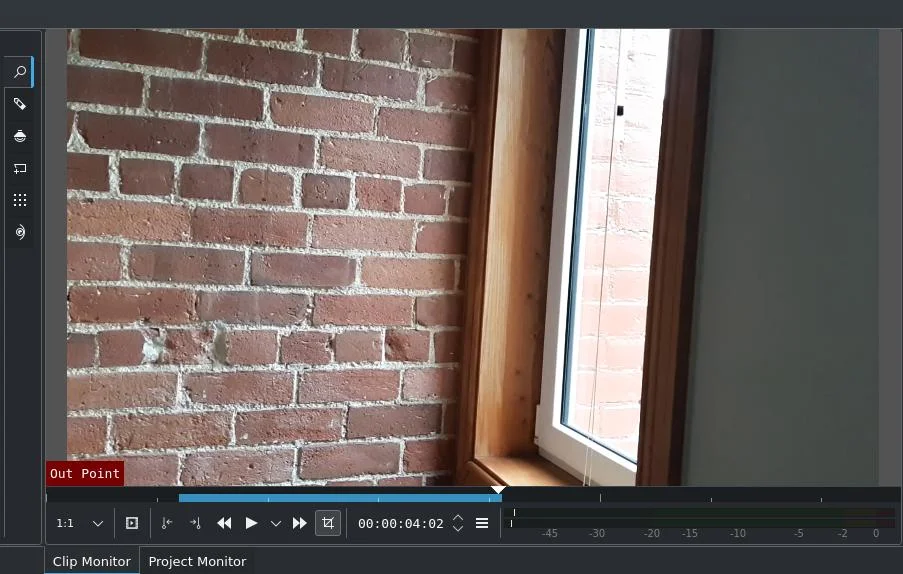
(Seth Kenlon, CC BY-SA 4.0)
This method is still important in some settings, but it's a little formal for many users.
Inline edits
Another way to make an edit is to drag a clip into Kdenlive's Timeline panel and then click and drag the edges of the clip until only the good part remains.

(Seth Kenlon, CC BY-SA 4.0)
The art of the cut-away
Another kind of edit is the cut-away. It's an important trick because it not only helps you skip over bad parts of a video clip, but it can add a lot of context for your audience. You've seen lots of cut-aways in movies and on TV, even if you don't realize it. Every time someone on the screen looks up in surprise, and then you see a shot of what they see, that is a cut-away. When a newscaster references a place in your city, and a shot of that place follows it, that is a cut-away.
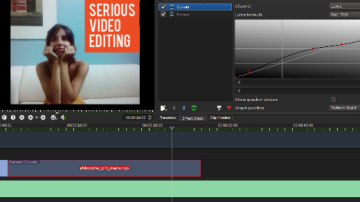
You can do cut-aways in Kdenlive easily because the Kdenlive Timeline is layered. There are four "tracks" in the Kdenlive timeline by default—the top two for video and the bottom two for any accompanying audio. When you place video footage on the timeline, the footage on the highest video track takes precedence over footage on a lower track. This means that you can functionally edit out footage on one video track just by placing something better on the track above it.
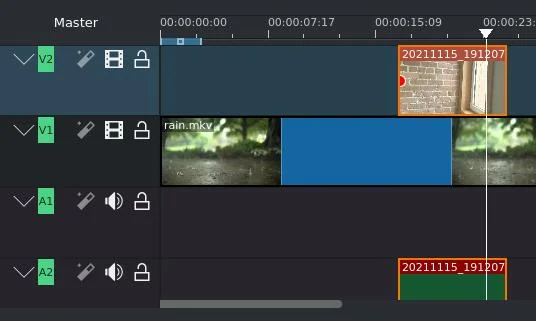
(Seth Kenlon, CC BY-SA 4.0)
Export your movie
When done with all of your edits, you can export your movie so you can post it online for others to see. To do that, click the Render button in the toolbar at the top of the Kdenlive window. In the Rendering window that appears, select the format compatible with your video hosting service. The WEBM format is pretty universal these days, and in addition to being open source it's also one of the best formats available both for distribution and archival purposes. It's capable of 4K, stereoscopic imagery, a wide color gamut, and much more, and all major browsers play it.
Rendering can take time, depending on how long your project is, how many edits you've made, and how powerful your computer is.
A long-lasting solution
As I write this, it was exactly ten years ago today that I published an introductory six-part series on Kdenlive here on Opensource.com. To my own surprise, that means I've been a Kdenlive user now longer than I'd been a user of the proprietary editors I learned in film school. That's some impressive longevity, and I still use it today because it delivers on flexibility and reliability as no other editor does. Heck, the video editor I learned on doesn't even exist, at least not in the same form, anymore (which makes me wish I'd learned to edit on an open source platform!).
Kdenlive is a powerful editor with lots of features, but don't let that intimidate you. My introductory series is as relevant and accurate today as it was ten years ago, which in my estimation, is a characteristic of a truly reliable application. Should you choose to explore Kdenlive as an editor, be sure to download our cheat sheet, so you can internalize keyboard shortcuts that reduce clicks and make the editing process seamless.
Now go tell your story!




2 Comments