OpenVPN creates an encrypted tunnel between two points, preventing a third party from accessing your network traffic. By setting up your virtual private network (VPN) server, you become your own VPN provider. Many popular VPN services already use OpenVPN, so why tie your connection to a specific provider when you can have complete control yourself?
The first article in this series set up a server for your VPN, the second article demonstrated how to install and configure the OpenVPN server software, while the third article explained how to configure your firewall and start the OpenVPN server software. This fourth and final article demonstrates how to use your OpenVPN server from client computers. This is the reason you did all the work in the previous three articles!
Create client certificates
Remember that the method of authentication for OpenVPN requires both the server and the client to have something (certificates) and to know something (a password). It's time to set that up.
First, create a client certificate and a private key for your client computer. On your OpenVPN server, generate a certificate request. It asks for a passphrase; make sure you remember it:
$ cd /etc/openvpn/ca
$ sudo /etc/openvpn/easy-rsa/easyrsa \
gen-req greglaptop
In this example, greglaptop is the client computer for which this certificate is being created.
There's no need to import the request into the certificate authority (CA) because it's already there. Review it to make sure:
$ cd /etc/openvpn/ca
$ /etc/openvpn/easy-rsa/easyrsa \
show-req greglaptop
You can sign as the client, too:
$ /etc/openvpn/easy-rsa/easyrsa \
sign-req client greglaptop
Install the OpenVPN client software
On Linux, Network Manager may already have an OpenVPN client included. If not, you can install the plugin:
$ sudo dnf install NetworkManager-openvpnOn Windows, you must download and install the OpenVPN client from the OpenVPN download site. Launch the installer and follow the prompts.
Copy certificates and private keys to the client
Now your client needs the authentication credentials you generated for it. You generated these on the server, so you must transport them over to your client. I tend to use SSH for this. On Linux, that's the scp command. On Windows, you can use WinSCP as administrator to pull the certificates and keys.
Assuming the client is named greglaptop, here are the file names and server locations:
/etc/openvpn/ca/pki/issued/greglaptop.crt
/etc/openvpn/ca/pki/private/greglaptop.key
/etc/openvpn/ca/pki/issued/ca.crt
On Linux, copy these to the /etc/pki/tls/certs/ directory. On Windows, copy them to the C:\Program Files\OpenVPN\config directory.
Copy and customize the client configuration file
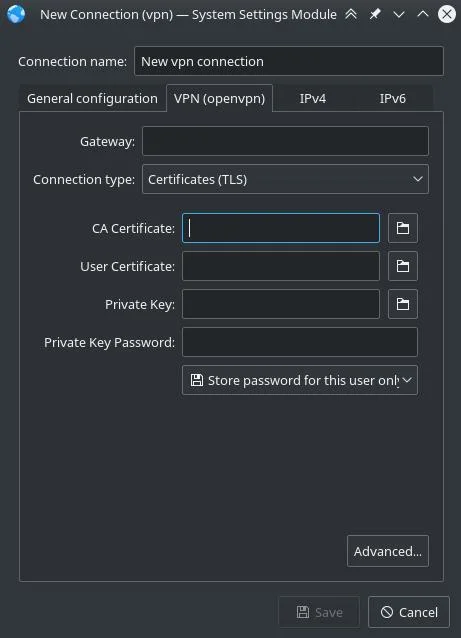
On Linux, you can either copy the /etc/openvpn/client/OVPNclient2020.ovpn file on the server to /etc/NetworkManager/system-connections/, or you can navigate to Network Manager in System Settings and add a VPN connection.
For the connection type, select Certificates. Point Network Manager to the certificates and keys you copied from the server.

(Seth Kenlon, CC BY-SA 4.0)
On Windows, run WinSCP as administrator to copy the client configuration template /etc/openvpn/client/OVPNclient2020.ovpn on the server to C:\Program Files\OpenVPN\config on the client. Then:
- Rename it to match the certificate above.
- Change the names of the CA certificate, client certificate, and key to match the names copied above from the server.
- Edit the IP information to match your network.
You need super administrative permissions to edit the client config files. The easiest way to get this might be to launch a CMD window as administrator and then launch Notepad from the administrator CMD window to edit the files.
Connect your client to the server
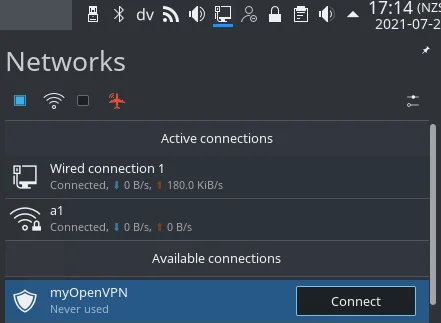
On Linux, Network manager displays your VPN. Select it to connect.

(Seth Kenlon, CC BY-SA 4.0)
On Windows, start the OpenVPN graphical user interface (GUI). It produces a graphic in the Windows System Tray on the right side of the taskbar, usually in the lower-right corner of your Windows desktop. Right-click the graphic to connect, disconnect, or view the status.
For the first connection, edit the "remote" line of your client config file to use the inside IP address of your OpenVPN server. Connect to the server from inside your office network by right-clicking on the OpenVPN GUI in the Windows System Tray and clicking Connect. Debug this connection. This should find and fix problems without any firewall issues getting in the way because both the client and server are on the same side of the firewall.
Next, edit the "remote" line of your client config file to use the public IP address for your OpenVPN server. Bring the Windows client to an outside network and connect. Debug any issues.
Connect securely
Congratulations! You have an OpenVPN network ready for your other client systems. Repeat the setup steps for the rest of your clients. You might even use Ansible to distribute certs and keys and keep them up to date.
This article is based on D. Greg Scott's blog and is reused with permission.


Comments are closed.