This article is a follow-up to my last article Set up a build system with CMake and VSCodium.
In the last article, I showed how to configure a build system based on VSCodium and CMake. This article refines this setup by integrating meaningful unit tests using GoogleTest and CTest.
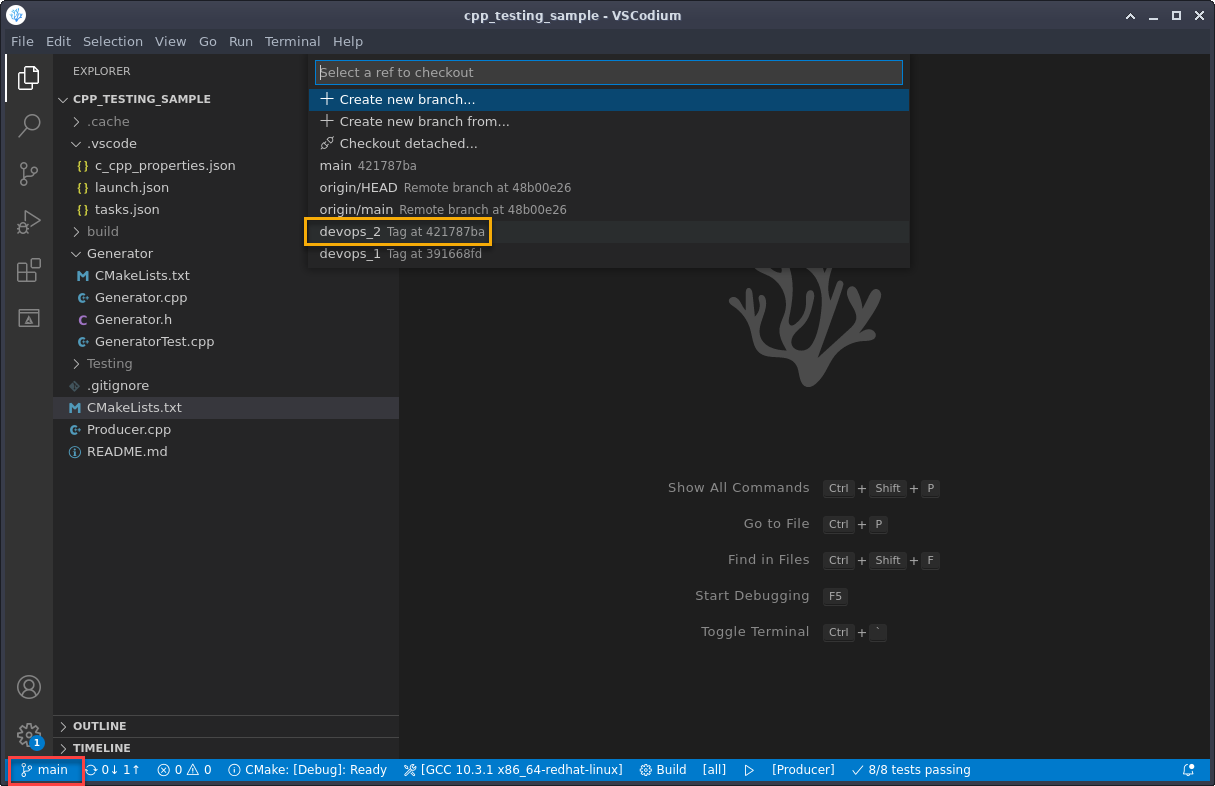
If not already done, clone the repository, open it in VSCodium and checkout the tag devops_2 by clicking on the main-branch symbol (red marker) and choosing the branch (yellow marker):
Stephan Avenwedde (CC BY-SA 4.0)
Alternatively, open the command line and type:
$ git checkout tags/devops_2GoogleTest
GoogleTest is a platform-independent, open source C++ testing framework. Even though GoogleTest is not meant to be exclusively for unit tests, I will use it to define unit tests for the Generator library. In general, a unit test should verify the behavior of a single, logical unit. The Generator library is one unit, so I'll write some meaningful tests to ensure proper function.
Using GoogleTest, the test cases are defined by assertions macros. Processing an assertion generates one of the following results:
- Success: Test passed.
- Nonfatal failure: Test failed, but the test function will continue.
- Fatal failure: Test failed, and the test function will be aborted.
The assertions macros follow this scheme to distinguish a fatal from a nonfatal failure:
ASSERT_*fatal failure, function is aborted.EXPECT_*nonfatal failure, function is not aborted.
Google recommends using EXPECT_* macros as they allow the test to continue when the tests define multiple assertions. An assertion macro takes two arguments: The first argument is the name of the test group (a freely selectable string), and the second argument is the name of the test itself. The Generator library just defines the function generate(...), therefore the tests in this article belong to the same group: GeneratorTest.
The following unit tests for the generate(...) function can be found in GeneratorTest.cpp.
Reference check
The generate(...) function takes a reference to a std::stringstream as an argument and returns the same reference. So the first test is to check if the passed reference is the same reference which the function returns.
TEST(GeneratorTest, ReferenceCheck){
    const int NumberOfElements = 10;
    std::stringstream buffer;
    EXPECT_EQ(
        std::addressof(buffer),
        std::addressof(Generator::generate(buffer, NumberOfElements))
    );
}
Here I use std::addressof to check if the address of the returned object refers to the same object I provided as input.
Number of elements
This test checks if the number of elements in the stringstream reference matches the number given as an argument.
TEST(GeneratorTest, NumberOfElements){
    const int NumberOfElements = 50;
    int nCalcNoElements = 0;

    std::stringstream buffer;

    Generator::generate(buffer, NumberOfElements);
    std::string s_no;

    while(std::getline(buffer, s_no, ' ')) {
        nCalcNoElements++;
    }

    EXPECT_EQ(nCalcNoElements, NumberOfElements);
}
Shuffle
This test checks the proper working of the random engine. If I invoke the generate function two times in a row, I expect not to get the same result.
TEST(GeneratorTest, Shuffle){

    const int NumberOfElements = 50;

    std::stringstream buffer_A;
    std::stringstream buffer_B;

    Generator::generate(buffer_A, NumberOfElements);
    Generator::generate(buffer_B, NumberOfElements);

    EXPECT_NE(buffer_A.str(), buffer_B.str());
}
Checksum
This is the largest test. It checks whether the sum of the digits of a numerical series from 1 to n is the same as the sum of the shuffled output series. I expect that the sum matches as the generate(...) function should simply create a shuffled variant of such a series.
TEST(GeneratorTest, CheckSum){

    const int NumberOfElements = 50;
    int nChecksum_in = 0;
    int nChecksum_out = 0;


    std::vector<int> vNumbersRef(NumberOfElements); // Input vector
    std::iota(vNumbersRef.begin(), vNumbersRef.end(), 1); // Populate vector

    // Calculate reference checksum
    for(const int n : vNumbersRef){
        nChecksum_in += n;
    }

    std::stringstream buffer;
    Generator::generate(buffer, NumberOfElements);

    std::vector<int> vNumbersGen; // Output vector
    std::string s_no;

    // Read the buffer back back to the output vector
    while(std::getline(buffer, s_no, ' ')) {
        vNumbersGen.push_back(std::stoi(s_no));
    }

    // Calculate output checksum
    for(const int n : vNumbersGen){
        nChecksum_out += n;
    }

    EXPECT_EQ(nChecksum_in, nChecksum_out);
}
The above tests can also be debugged like an ordinary C++ application.
CTest
In addition to the in-code unit test, the CTest utility lets me define tests that can be performed on executables. In a nutshell, I call the executable with certain arguments and match the output with regular expressions. This lets me simply check how the executable behaves with incorrect command-line arguments. The tests are defined in the top level CMakeLists.txt. Here is a closer look at three test cases:
Regular usage
If a positive integer is provided as a command-line argument, I expect the executable to produce a series of numbers separated by whitespace:
add_test(NAME RegularUsage COMMAND Producer 10)
set_tests_properties(RegularUsage
    PROPERTIES PASS_REGULAR_EXPRESSION "^[0-9 ]+"
)
No argument
If no argument is provided, the program should exit immediately and display the reason why:
add_test(NAME NoArg COMMAND Producer)
set_tests_properties(NoArg
    PROPERTIES PASS_REGULAR_EXPRESSION "^Enter the number of elements as argument"
)
Wrong argument
Providing an argument that cannot be converted into an integer should also cause an immediate exit with an error message. This test invokes the Producer executable with the command line parameter"ABC":
add_test(NAME WrongArg COMMAND Producer ABC)
set_tests_properties(WrongArg
    PROPERTIES PASS_REGULAR_EXPRESSION "^Error: Cannot parse"
)
Testing the tests
To run a single test and see how it is processed, invoke ctest from the command line providing the following arguments:
- Run single tst:
-R <test-name> - Enable verbose output:
-VV
Here is the command ctest -R Usage -VV:
$ ctest -R Usage -VV
UpdatecTest Configuration from :/home/stephan/Documents/cpp_testing sample/build/DartConfiguration.tcl
UpdateCTestConfiguration from :/home/stephan/Documents/cpp_testing sample/build/DartConfiguration.tcl
Test project /home/stephan/Documents/cpp_testing sample/build
Constructing a list of tests
Done constructing a list of tests
Updating test list for fixtures
Added 0 tests to meet fixture requirements
Checking test dependency graph...
Checking test dependency graph end
In this code block, I invoked a test named Usage.
This ran the executable with no command-line arguments:
test 3
    Start 3: Usage
3: Test command: /home/stephan/Documents/cpp testing sample/build/Producer
The test failed because the output didn't match the regular expression [^[0-9]+].
3: Enter the number of elements as argument
1/1 test #3. Usage ................

Failed Required regular expression not found.
Regex=[^[0-9]+]

0.00 sec round.

0% tests passed, 1 tests failed out of 1
Total Test time (real) =
0.00 sec
The following tests FAILED:
3 - Usage (Failed)
Errors while running CTest
$
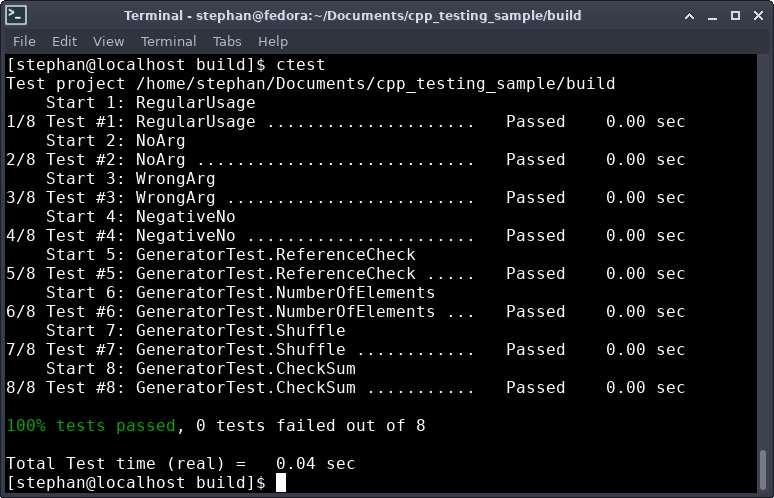
To run all tests (including the one defined with GoogleTest), navigate to the build directory and run ctest:
Stephan Avenwedde (CC BY-SA 4.0)
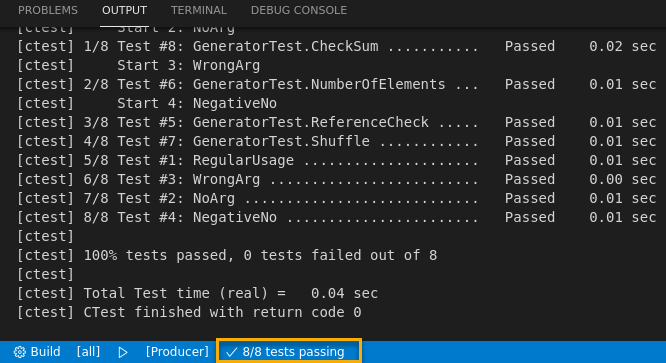
Inside VSCodium, click on the area marked yellow in the info bar to invoke CTest. If all tests pass, the following output is displayed:
Stephan Avenwedde (CC BY-SA 4.0)
Automate testing with Git Hooks
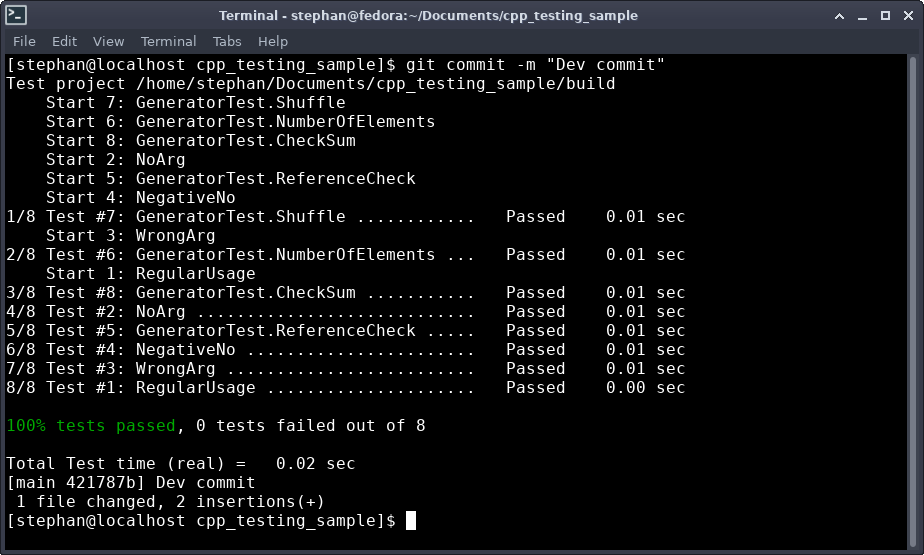
By now, running the tests is an additional step for the developer. The developer could also commit and push code that doesn't pass the tests. Thanks to Git Hooks, I can implement a mechanism that automatically runs the tests and prevents the developer from accidentally committing faulty code.
Navigate to .git/hooks, create an empty file named pre-commit, and copy and paste the following code:
#!/usr/bin/sh

(cd build; ctest --output-on-failure -j6)
After it, make this file executable:
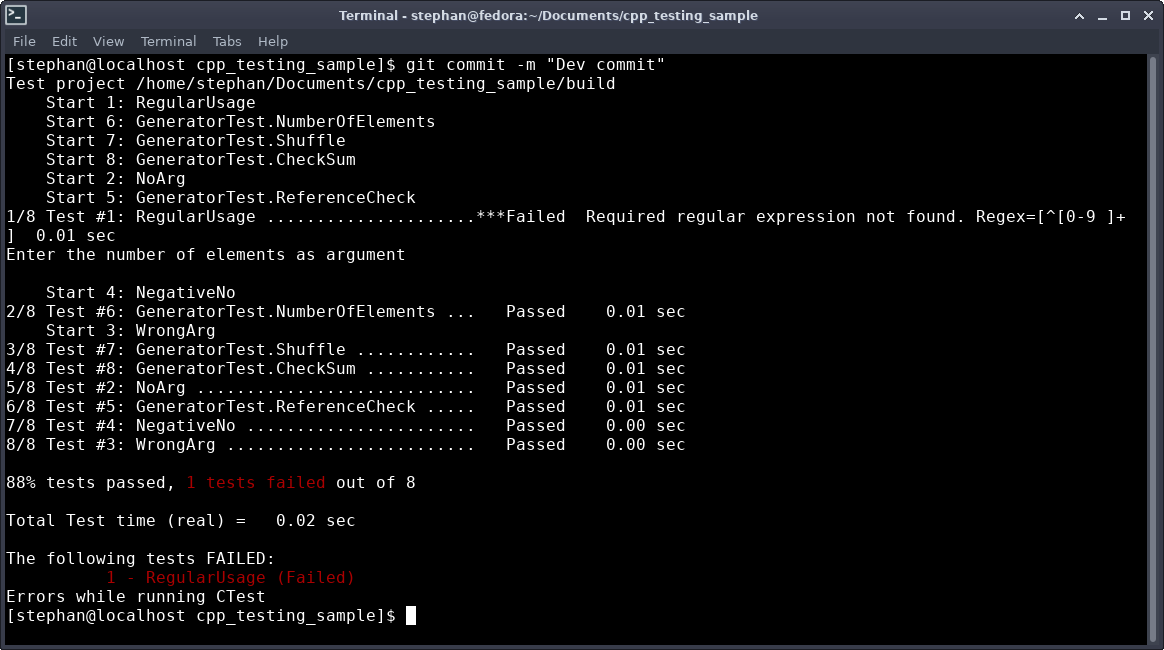
$ chmod +x pre-commitThis script invokes CTest when trying to perform a commit. If a test fails, like in the screenshot below, the commit is aborted:
Stephan Avenwedde (CC BY-SA 4.0)
If the tests succeed, the commit is processed, and the output looks like this:
Stephan Avenwedde (CC BY-SA 4.0)
The described mechanism is only a soft barrier: A developer could still commit faulty code using git commit --no-verify. I can ensure that only working code is pushed by configuring a build server. This topic will be part of a separate article.
Summary
The techniques mentioned in this article are easy to implement and help you quickly find bugs in your code. Using unit tests will likely improve your code's quality and, as I have shown, do so without disturbing your workflow. The GoogleTest framework provides features for every conceivable scenario; I only used a subset of its functionality. At this point, I also want to mention the GoogleTest Primer, which gives you an overview of the ideas, opportunities, and features of the framework.


Comments are closed.