

In a previous article, I gave an overview of six Python interpreters. On most systems, the CPython interpreter is the default, and also the poll in my last article showed that CPython is the most popular one. Specific to CPython is the ability to write Python modules in C using CPythons extensions API. Writing Python modules in C allows you to move computation-intensive code to C while preserving the ease of access of Python.
In this article, I’ll show you how to write an extension module. Instead of plain C, I use C++ because most compilers usually understand both. I have to mention one major drawback in advance: Python modules built this way are not portable to other interpreters. They only work in conjunction with the CPython interpreter. So if you are looking for a more portable way of interacting with C libraries, consider using the ctypes module.
Source code
As usual, you can find the related source code on GitHub. The C++ files in the repository have the following purpose:
my_py_module.cpp: Definition of the Python module MyModulemy_cpp_class.h: A header-only C++ class which gets exposed to Pythonmy_class_py_type.h/cpp: Python representation of our C++ classpydbg.cpp: Separate application for debugging purpose
The Python module you build in this article won’t have any meaningful use, but is a good example.
Build the module
Before looking into the source code, you can check whether the module compiles on your system. I use CMake for creating the build configuration, so CMake must be installed on your system. In order to configure and build the module, you can either let Python run the process:
$ python3 setup.py buildOr run the process manually:
$ cmake -B build
$ cmake --build build
After that, you have a file called MyModule.so in the /build subdirectory.
Defining an extension module
First, take a look on my_py_module.cpp, in particular, the function PyInit_MyModule:
PyMODINIT_FUNC
PyInit_MyModule(void) {
    PyObject* module = PyModule_Create(&my_module);

    PyObject *myclass = PyType_FromSpec(&spec_myclass);
    if (myclass == NULL){
        return NULL;
    }
    Py_INCREF(myclass);

    if(PyModule_AddObject(module, "MyClass", myclass) < 0){
        Py_DECREF(myclass);
        Py_DECREF(module);
        return NULL;
    }
    return module;
}
This is the most important code in this example because it acts as the entry point for CPython. In general, when a Python C extension is compiled and made available as a shared object binary, CPython searches for the function PyInit_<ModuleName> in the eponymous binary (<ModuleName>.so) and executes it when attempting to import it.
All Python types, whether declarations or instances, are exposed as pointers to PyObject. In the first part of this function, the root definition of the module is created by running PyModule_Create(...). As you can see in the module specification (my_module, same file), it doesn’t have any special functionality.
Afterward, PyType_FromSpec is called to create a Python heap type definition for the custom type MyClass. A heap type corresponds to a Python class. The type definition is then assigned to the module MyModule.
Note that if one of the functions fails, the reference count of previously created PyObjects must be decremented so that they get deleted by the interpreter.
Specifying a Python type
The specification for the type MyClass is found inside my_class_py_type.h as an instance of PyType_Spec:
static PyType_Spec spec_myclass = {
    "MyClass",                                  // name
    sizeof(MyClassObject) + sizeof(MyClass),    // basicsize
    0,                                          // itemsize
    Py_TPFLAGS_DEFAULT | Py_TPFLAGS_BASETYPE,   // flags
    MyClass_slots                               // slots
};
This structure defines some basic type information for the class. The value passed for the size consists of the size of the Python representation (MyClassObject) and the size of the plain C++ class (MyClass). The MyClassObject is defined as follows:
typedef struct {
    PyObject_HEAD
    int         m_value;
    MyClass*    m_myclass;
} MyClassObject;
The Python representation is basically of type PyObject, defined by the macro PyObject_HEAD, and some additional members. The member m_value is exposed as ordinary class member while the member m_myclass is only accessible from inside C++ code.
The PyType_Slot defines some additional functionality:
static PyType_Slot MyClass_slots[] = {
    {Py_tp_new,     (void*)MyClass_new},
    {Py_tp_init,    (void*)MyClass_init},
    {Py_tp_dealloc, (void*)MyClass_Dealloc},
    {Py_tp_members, MyClass_members},
    {Py_tp_methods, MyClass_methods},
    {0, 0} /* Sentinel */
};
Here, the jump addressed for some initialization and de-initialization functions are set as well as ordinary class methods and members. Additional functionality, like assigning an initial attribute dictionary, could also be set, but this is optional. Those definitions usually end with a sentinel, consisting of NULL values.
To complete the type specification, here is the method and member table:
static PyMethodDef MyClass_methods[] = {
    {"addOne", (PyCFunction)MyClass_addOne, METH_NOARGS,  PyDoc_STR("Return an incrmented integer")},
    {NULL, NULL} /* Sentinel */
};

static struct PyMemberDef MyClass_members[] = {
    {"value", T_INT, offsetof(MyClassObject, m_value)},
    {NULL} /* Sentinel */
};
In the method table, the Python method addOne is defined, and it points to the related function MyClass_addOne. This function acts as a wrapper. It invokes the addOne() method in the C++ class.
In the member table, there is just one member defined for demonstration purposes. Unfortunately, the use of offsetof in PyMemberDef doesn’t allow C++ specific types to be added to MyClassObject. If you try to place some C++ type container (such as std::optional), the compiler complains about it in the form of warnings related to memory layout.
Initialization and de-initialization
The method MyClass_new acts only to provide initial values for MyClassObject and allocates memory for the base type:
PyObject *MyClass_new(PyTypeObject *type, PyObject *args, PyObject *kwds){
    std::cout << "MtClass_new() called!" << std::endl;

    MyClassObject *self;
    self = (MyClassObject*) type->tp_alloc(type, 0);
    if(self != NULL){ // -> allocation successfull
        // assign initial values
        self->m_value   = 0;
        self->m_myclass = NULL;
    }
    return (PyObject*) self;
}
Actual initialization takes place in MyClass_init, which corresponds to the __init__() method in Python:
int MyClass_init(PyObject *self, PyObject *args, PyObject *kwds){

    ((MyClassObject *)self)->m_value = 123;

    MyClassObject* m = (MyClassObject*)self;
    m->m_myclass = (MyClass*)PyObject_Malloc(sizeof(MyClass));

    if(!m->m_myclass){
        PyErr_SetString(PyExc_RuntimeError, "Memory allocation failed");
        return -1;
    }

    try {
        new (m->m_myclass) MyClass();
    } catch (const std::exception& ex) {
        PyObject_Free(m->m_myclass);
        m->m_myclass = NULL;
        m->m_value   = 0;
        PyErr_SetString(PyExc_RuntimeError, ex.what());
        return -1;
    } catch(...) {
        PyObject_Free(m->m_myclass);
        m->m_myclass = NULL;
        m->m_value   = 0;
        PyErr_SetString(PyExc_RuntimeError, "Initialization failed");
        return -1;
    }

    return 0;
}
If you want to have arguments passed during initialization, you must call PyArg_ParseTuple at this point. For the sake of simplicity, all arguments passed during initialization are ignored in this example. In the first part of the function, the PyObject pointer (self) is reinterpreted to a pointer to MyClassObject in order to get access to our additional members. Additionally, the memory for the C++ class is allocated and its constructor is executed.
Note that exception handling and memory allocation (and de-allocation) must be carefully done in order to prevent memory leaks. When the reference count drops to zero, the MyClass_dealloc function takes care of freeing all related heap memory. There’s a dedicated chapter in the documentation about memory management for C and C++ extensions.
Method wrapper
Calling a related C++ class method from the Python class is easy:
PyObject* MyClass_addOne(PyObject *self, PyObject *args){
    assert(self);

    MyClassObject* _self = reinterpret_cast<MyClassObject*>(self);
    unsigned long val = _self->m_myclass->addOne();
    return PyLong_FromUnsignedLong(val);
}
Again, the PyObject* argument (self) is casted to MyClassObject* in order to get access to m_myclass, a pointer to the C++ class instance. With this information, the classes method addOne() is called and the result is returned in form of a Python integer object.
3 ways to debug
For debugging purposes, it can be valuable to compile the CPython interpreter in debugging configuration. A detailed description can be found in the official documentation. It’s possible to follow the next steps, as long as additional debug symbols for the pre-installed interpreter are downloaded.
GNU Debugger
Good old GNU Debugger (GDB) is, of course, also useful here. I include a gdbinit file, defining some options and breakpoints. There’s also the gdb.sh script, which creates a debug build and initiates a GDB session:
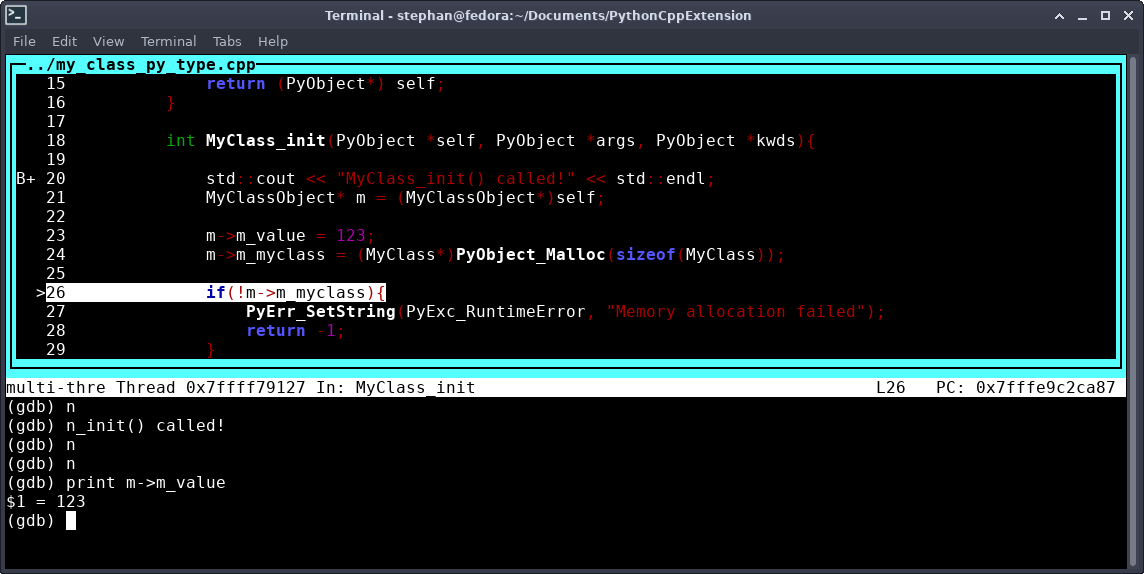
(Stephan Avenwedde, CC BY-SA 4.0)
GDB invokes the CPython interpreter with the script file main.py. The script file allows you to easily define all the actions you want to perform with the Python extension module.
C++ application
Another approach is to embed the CPython interpreter in a separate C++ application. In the repository, this can be found in the file pydbg.cpp:
int main(int argc, char *argv[], char *envp[])
{
    Py_SetProgramName(L"DbgPythonCppExtension");
    Py_Initialize();

    PyObject *pmodule = PyImport_ImportModule("MyModule");
    if (!pmodule) {
        PyErr_Print();
        std::cerr << "Failed to import module MyModule" << std::endl;
        return -1;
    }

    PyObject *myClassType = PyObject_GetAttrString(pmodule, "MyClass");
    if (!myClassType) {
        std::cerr << "Unable to get type MyClass from MyModule" << std::endl;
        return -1;
    }

    PyObject *myClassInstance = PyObject_CallObject(myClassType, NULL);

    if (!myClassInstance) {
        std::cerr << "Instantioation of MyClass failed" << std::endl;
        return -1;
    }

    Py_DecRef(myClassInstance); // invoke deallocation
    return 0;
}
Using the high level interface, it’s possible to include the extension module and perform actions on it. This allows you to debug in the native IDE environment. It also gives you finer control of the variables passed from and to the extension module.
The drawback is the high expense of creating an extra application.
VSCode and VSCodium LLDB extension
Using a debugger extension like CodeLLDB is probably the most convenient debugging option. The repository includes the VSCode or VSCodium configuration files for building the extension (task.json, CMake Tools) and invoking the debugger (launch.json). This approach combines the advantages of the previous ones: Debugging in an graphical IDE, defining actions in a Python script file or even dynamically in the interpreter prompt.
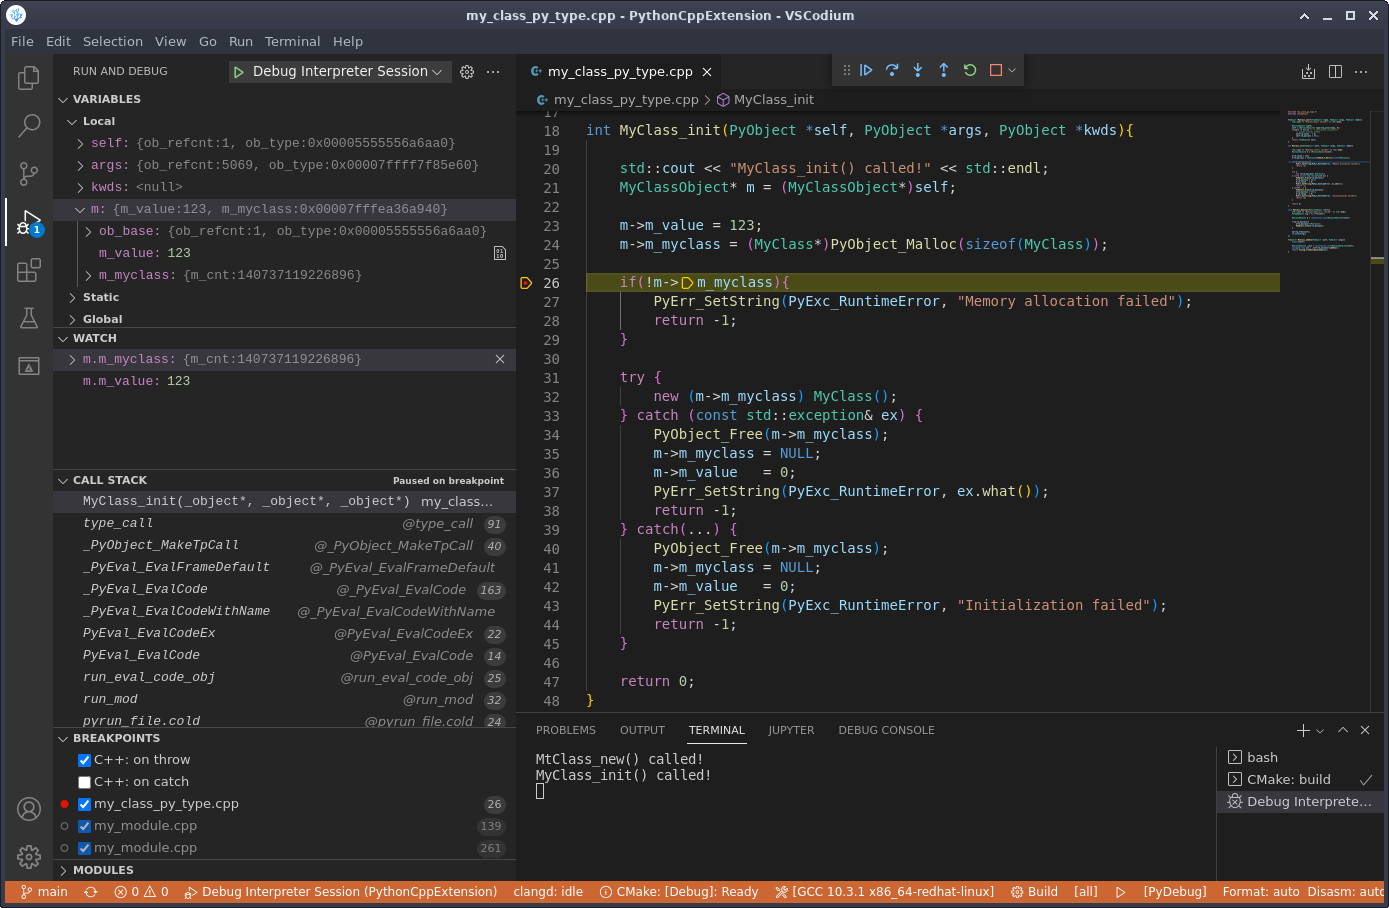
(Stephan Avenwedde, CC BY-SA 4.0)
Extend C++ with Python
All functionality available from Python code is also available from within a C or C++ extension. While coding in Python is often considered as an easy win, extending Python in C or C++ can also be a pain. On the other hand, while native Python code is slower than C++, a C or C++ extension makes it possible to elevate a computation-intensive task to the speed of native machine code.
You must also consider the usage of an ABI. The stable ABI provides a way to maintain backwards compatibility to older versions of CPython as described in the documentation.
In the end, you must weigh the advantages and disadvantages yourself. Should you decide to use C extensions to make certain functionality available to you in Python, you’ve seen how it can be done.


Comments are closed.