

Mastodon permits its users to self-verify. The easiest method to do this is through a verification link. For advanced verification, though, you can use the power of shared encrypted keys, which Mastodon can link to thanks to the open source project Keyoxide.
Install
Pretty good privacy (PGP) is a standard for shared key encryption. All PGP keys come in pairs. There's a public key, for use by anyone in the world, and a secret key, for use by only you. Anyone with your public key can encode data for you, and once it's encrypted only your secret key (which only you have access to) can decode it again.
If you don't already have a key pair, the first step for encrypted verification is to generate one.
There are many ways to generate a PGP key pair, but I recommend the open source GnuPG suite.
On Linux, GnuPG is already installed.
On Windows, download and install GPG4Win, which includes the Kleopatra desktop application.
On macOS, download and install GPGTools.
1. Create a key pair
If you already have a GPG key pair, you can skip this step. You do not need to create a unique key just for Mastodon.
To create a new key, you can use the Kleopatra application. Go to the File menu and select New key pair. In the Key Pair Creation Wizard that appears, click Create a personal OpenPGP key pair. Enter your name and a valid email address, and select the Protect the generated key with a passphrase option. Click Create to generate your key pair.
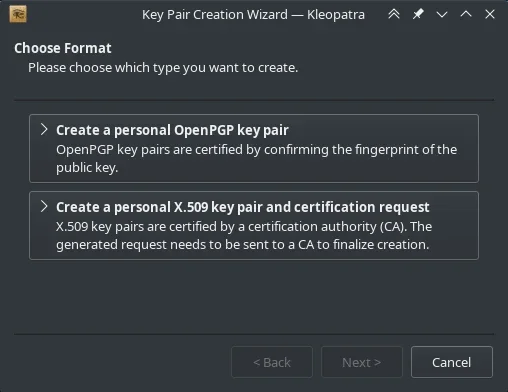
(Seth Kenlon, CC BY-SA 4.0)
Alternately, you can use the terminal:
$ gpg2 --full-generate-keyFollow the prompts until you have generated a key pair.
2. Add notation
Now that you have a key, you must add special metadata to it. This step requires the use of the terminal (Powershell on Windows) but it's highly interactive and isn't very complex.
First, take a look at your secret key:
gpg2 --list-secret-keysThe output displays your GnuPG keyring, containing at least one secret key. Locate the one you want to use for Mastodon (this might be the only key, if you've just created your first one today.) In the output, there's a long alphanumeric string just above a line starting with uid. That long number is your key's fingerprint. Here's an example:
sec   rsa4096 2022-11-17 [SC]
      22420E443871CF4313B9E90D50C9169F563E50CF
uid           [ultimate] Tux <tux@example.com>
ssb   rsa4096 2022-11-17 [E]
This example key's fingerprint is 22420E443871CF4313B9E90D50C9169F563E50CF. Select your key's fingerprint with your mouse, and then right-click and copy it to your clipboard. Then copy it into a document somewhere, because you're going to need it a lot during this process.
Now you can add metadata to the key. Enter the GnuPG interface using the gpg2 --edit-key command along with the fingerprint:
gpg2 --edit-key 22420E443871CF4313B9E90D50C9169F563E50CFAt the GnuPG prompt, select the user ID (that's your name and email address) you want to use as your verification method. In this example, there's only one user ID (uid [ultimate] Tux <tux@example.com>) so that's user ID 1:
gpg> uid 1Designate this user as the primary user of the key:
gpg> primaryFor Keyoxide to recognize your Mastodon identity, you must add a special notation:
gpg> notationThe notation metadata, at least in this context, is data formatted to the Ariadne specification. The metadata starts with proof@ariadne.id= and is followed by the URL of your Mastodon profile page.
In a web browser, navigate to your Mastodon profile page, and copy the URL. For me, in this example, the URL is https://example.com/@tux, so Enter the notation at the GnuPG prompt:
gpg> notation
Enter the notation: proof@ariadne.id=https://example.com/@tux
That's it. Type save to save and exit GnuPG.
gpg> save3. Export your key
Next, export your key. To do this in Kleopatra, select your key and click the Export button in the top toolbar.
Alternately, you can use the terminal. Reference your key by its fingerprint (I told you that you'd be using it a lot):
gpg2 --armor --export \
22420E443871CF4313B9E90D50C9169F563E50CF > pubkey.asc
Either way, you end up with a public key ending in .asc. It's always safe to distribute your public key. (You would never, of course, distribute your secret key because it is, as its very name implies, meant to be secret.)
4. Upload your key
Open your web browser and navigate to keys.openpgp.org.
On the keys.openpgp.org website, click the Upload link to upload your exported key. Do this even if you've had a GPG key for years and know all about the --send-key option. This is a unique step to the Keyoxide process, so don't skip it.
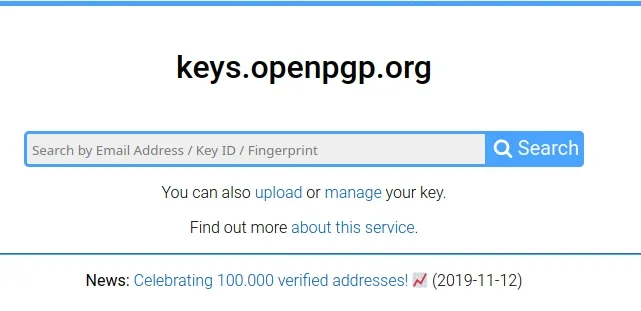
(Seth Kenlon, CC BY-SA 4.0)
After your key's been uploaded, click the Send confirmation email button next to your email address so you can confirm that you own the email your key claims it belongs to. It can take 15 minutes or so, but when you receive an email from Openpgp.org, click the confirmation link to verify your email.
5. Add your key to Mastodon
Now that everything's set up, you can use Keyoxide as your verification link for Mastodon. Go to your Mastodon profile page and click the Edit profile link.
On the Edit profile page, scroll down to the Profile Metadata section. Type PGP (or anything you want) into the Label field. In the Content field, type https://keyoxide.org/hkp/ and then your key fingerprint. For me, in this example, the full URL is https://keyoxide.org/hkp/22420E443871CF4313B9E90D50C9169F563E50CF.
Click the Save button and then return to your profile page.
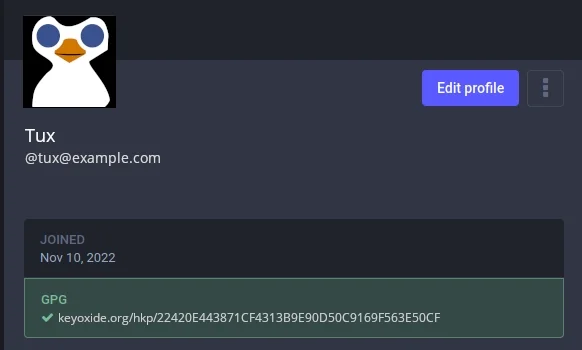
(Seth Kenlon, CC BY-SA 4.0)
You can click the Keyoxide link in your profile to see your Keyoxide "profile" page. This page is actually just a rendering of the GPG key you created. Keyoxide's job is to parse your key, and to be a valid destination when you need to link to it (from Mastodon, or any other online service.)
6. Build trust
The old Twitter verification method was opaque and exclusive. Somebody somewhere claimed that somebody else somewhere else was really who they said they were. It proved nothing, unless you agree to accept that somewhere there's a reliable network of trust. Most people choose to believe that, because Twitter was a big corporation with lots at stake, and relatively few people (of the relative few who were granted it) complained about the accuracy of the Twitter blue checkmark.
Open source verification is different. It's available to everyone, and proves as much as Twitter verification did. But you can do even better. When you use encrypted keys for verification, you grant yourself the ability to have your peers review your identity and to digitally sign your PGP key as a testament that you are who you claim you are. It's a method of building a web of trust, so that when you link from Mastodon to your PGP key through Keyoxide, people can trust that you're really the owner of that digital key. I also means that several community members have met you in person and signed your key.
Help build human-centric trust online, and use PGP and Keyoxide to verify your identity. And if you see me at a tech conference, let's sign keys!


Comments are closed.