

Over the years, several friends have asked me for tips on managing their home networks. In most cases, they are setting up home automation and want to access their services from the outside.
Every time I helped them, each made the same comment: "Are you kidding? It cannot be so complicated to publish one simple application!"
Publishing applications that don't put your network or cluster at risk can indeed be quite complicated. When we started working on Traefik Hub—the latest product by Traefik Labs—I knew it would be a game-changer for publishing applications.
This article demonstrates the complexity of publishing services and how Traefik Hub makes your life a lot easier. I use the example of setting up a server to control your home automation remotely with Traefik Hub running on a Raspberry Pi.
The challenge
Setting up a server to manage your home automation is nice, but being able to control it remotely from anywhere in the world using only your mobile phone—that's even nicer!
However, with great power comes great responsibility. If you want access to your local network from the outside, you'd better ensure it's resilient and that you are the only one with access.
First, I'll look at the steps you would normally take to achieve that.
Reach your Home Assistant remotely any time
Home Assistant is a well-known solution to manage home automation devices. It's an open source project written in Python. It allows you to have Home Automation with a local installation: No data on the cloud and everything is kept private. I recommend this excellent article to help you install Home Assistant on your Raspberry Pi using Docker.
To reach your Home Assistant from the outside, you must expose your Raspberry Pi to the internet. To do so, you have to:
- Know the public IP of your router.
- Redirect the traffic from your router to your Raspberry Pi.
Note: Most internet providers assign dynamic public IPs—each time your router restarts, your IP will probably change. To build a resilient system, you would also need a dynamic domain.
Encryption matters
When you communicate with your server, you send sensitive data, such as your username and password. You must verify and encrypt communication using a TLS certificate to avoid this data being stolen.
This requires:
- A reverse proxy to do the TLS termination.
- A piece of infrastructure to generate and renew your Let's Encrypt certificates.
TL;DR
To sum it up, after installing Home Assistant on your Raspberry Pi, you need to:
- Get your router public IP.
- Create a port forward to your Raspberry Pi.
- Buy a domain name.
- Create a dynamic domain.
- Install a reverse proxy and configure it for encrypted access using a TLS certificate.
Now, imagine if you could skip all of the steps above and publish your services in a few clicks!
Traefik Hub to the rescue
Traefik Hub is a cloud-native networking SaaS platform that allows users to publish their services at the edge quickly. Using Traefik Hub, you can publish your Home Assistant application in a few clicks.
Remember the challenges I mentioned earlier? Scratch that. Once you have Home Assistant installed on your Raspberry Pi, all you have to do is connect your Raspberry Pi to Traefik Hub. Traefik Hub handles everything for you, including:
- Making your service reachable from the internet.
- Providing a dynamic domain (for free).
- Encrypting communication with a TLS certificate and an Access Control Policy.
And now that I have introduced Traefik Hub, I'll get down to the business of configuring it.
Step 1: Connect your Raspberry Pi to Traefik Hub
First, head over to Traefik Hub and sign up for a free account. You can sign up via Google or GitHub.
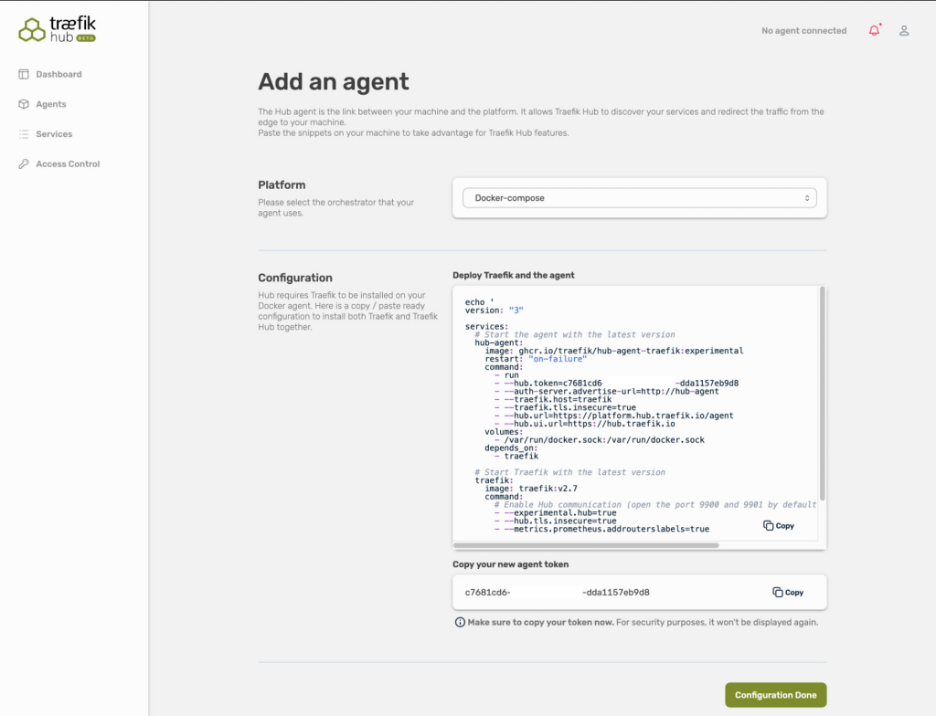
You need to add a new agent to connect your Raspberry Pi to Traefik Hub.
(Nicolas Mengin, CC BY-SA 4.0)
Traefik Hub provides several snippets that allow you to start from scratch.
Since the Home Assistant setup is a bit complex, you can get your token from the Hub UI and use the script below for this example. The token allows you to connect your agent to Traefik Hub. Traefik Hub then attaches this agent to your account, and you can start publishing your services.
Here's the script:
version: '3'

networks:
  traefik: {}

services:
  homeassistant:
    container_name: homeassistant
    image: "ghcr.io/home-assistant/home-assistant:stable"
    volumes:
		  # /!\\ Mount the custom configuration file described below /!\\
      - ./configuration.yaml:/config/configuration.yaml
      - /etc/localtime:/etc/localtime:ro
    restart: unless-stopped
    privileged: true
		networks:
      - traefik
		ports:
			- 8123

	# Start the agent with the latest version
  hub-agent:
    image: ghcr.io/traefik/hub-agent-traefik:v0.7.2
    restart: "on-failure"
    container_name: hub-agent
    networks:
      - traefik
		command:
      - run
      - --hub.token=<YOUR_TOKEN> # Set your token here
      - --auth-server.advertise-url=http://hub-agent
      - --traefik.host=traefik
      - --traefik.tls.insecure=true
      - --hub.url=https://platform.hub.traefik.io/agent
      - --hub.ui.url=https://hub.traefik.io
    volumes:
      - /var/run/docker.sock:/var/run/docker.sock
    depends_on:
      - traefik

  # Start Traefik with the latest version
  traefik:
    image: traefik:v2.8
    container_name: traefik
    networks:
      - traefik
    command:
      # Enable Hub communication (open the port 9900 and 9901 by default)
      - --experimental.hub=true
      - --hub.tls.insecure=true
      - --metrics.prometheus.addrouterslabels=true
# ./configuration.yaml to mount on your home assistant container
# in /config/configuration.yaml

# These modifications are required by home assistant to be exposed using
# a third party software such as the Traefik Hub agent

# Loads default set of integrations. Do not remove.
default_config:

http:
  ip_ban_enabled: true
  login_attempts_threshold: 5
  use_x_forwarded_for: true
  trusted_proxies:
    - 192.168.1.0/24
    - 172.18.0.0/24
    - 127.0.0.1
    - ::1
    - fe80::/64
    - fe00::/64
    - fd00::/64

# Text to speech
tts:
  - platform: google_translate
Step 2: Publish your service
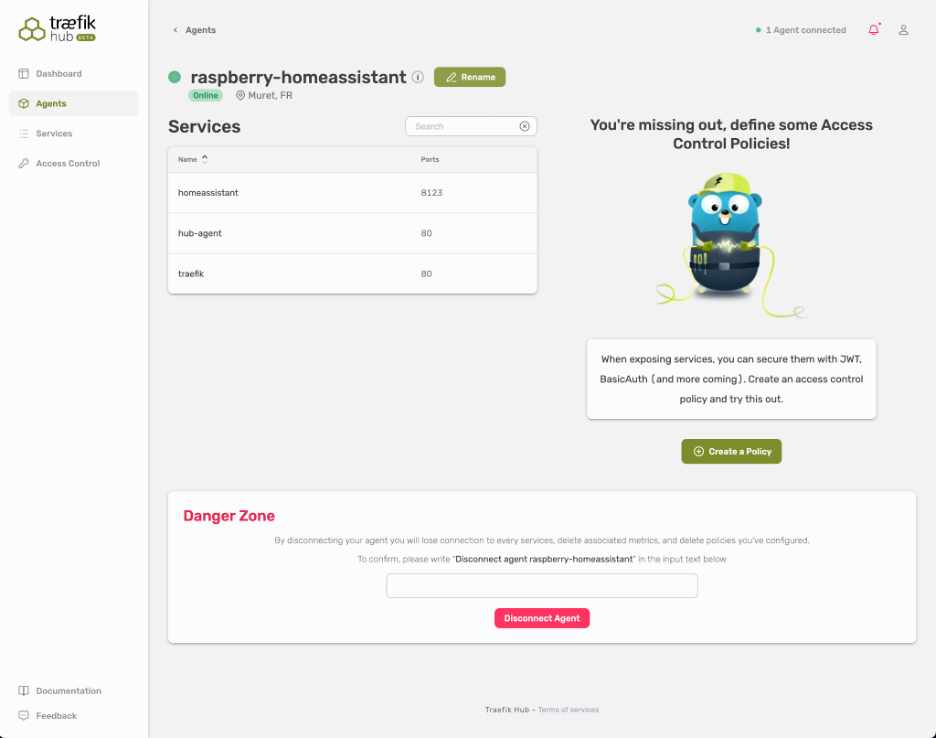
Once you have installed the agent on your Raspberry Pi, Traefik Hub discovers every service running on your cluster so you can publish them without digging into your configuration files.
(Nicolas Mengin, CC BY-SA 4.0)
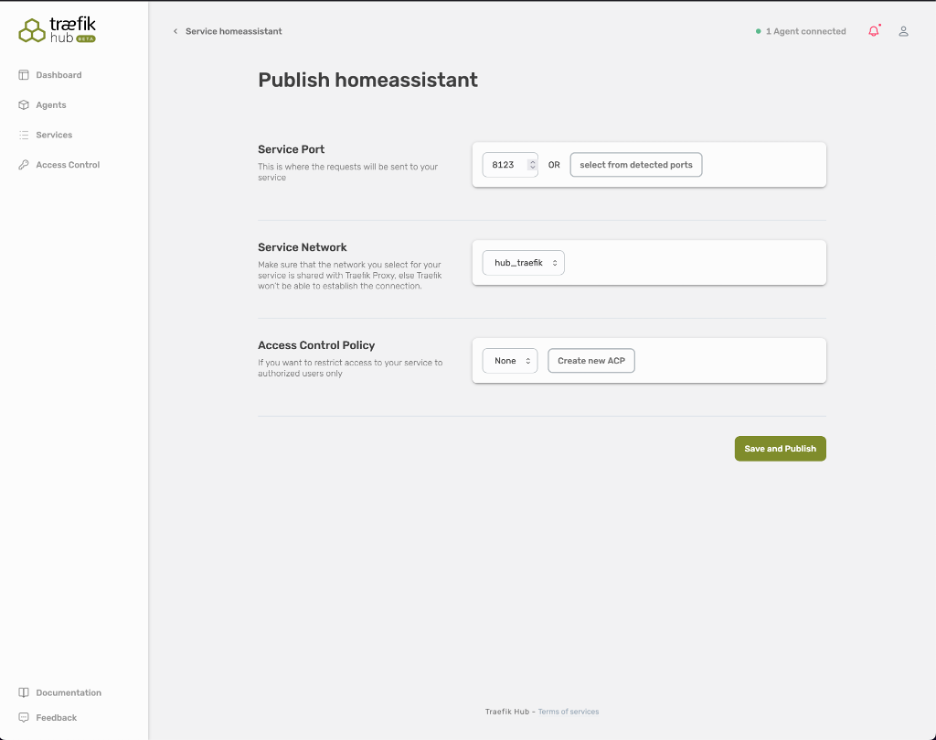
Select your Home Assistant service, and click the Save and Publish button to publish it.
(Nicolas Mengin, CC BY-SA 4.0)
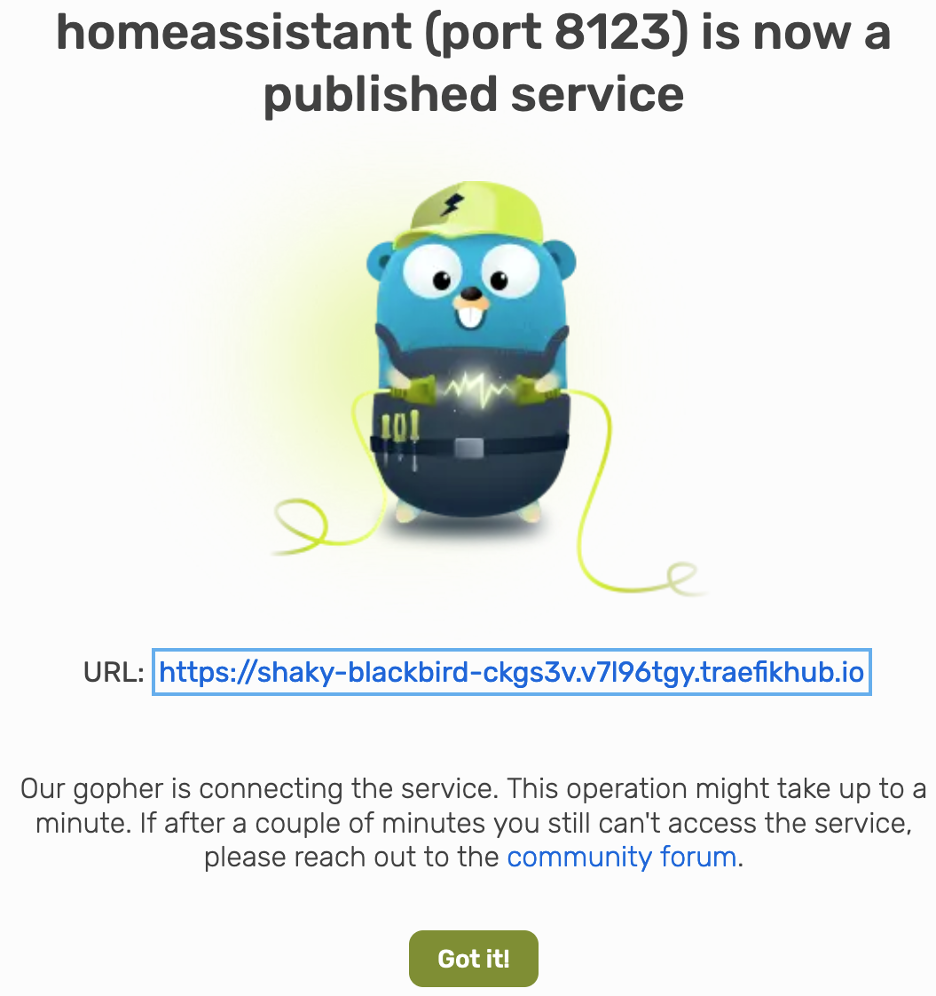
And now let the magic happen!
(Nicolas Mengin, CC BY-SA 4.0)
Once Hub notifies you that your service has been published, you can reach it from the internet using the domain Traefik Hub has generated. The connection is verifiable and encrypted, and your Home Assistant remains reachable even if your public IP changes.
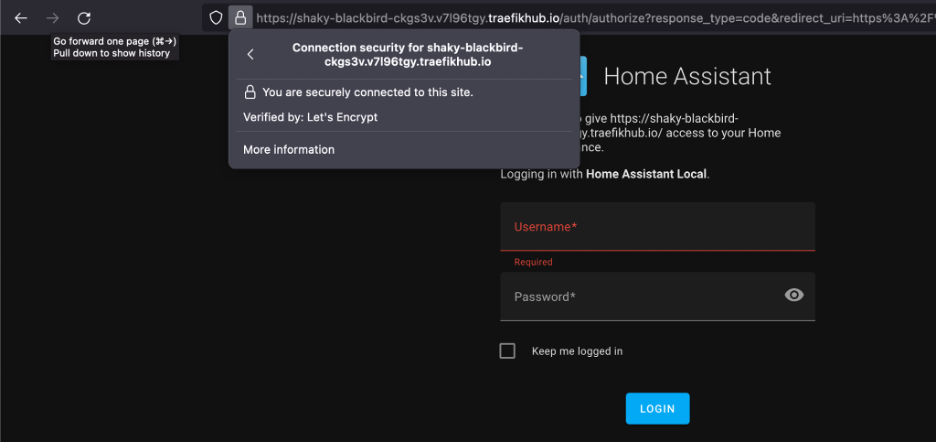
(Nicolas Mengin, CC BY-SA 4.0)
Behind the scenes
Your application is published. Next, I'll discuss a few things Traefik Hub takes care of behind the scenes to offer a seamless experience and some handy configuration options.
Traefik instance
When you installed the Traefik Hub Agent, you certainly noticed that it comes with a Traefik Proxy instance.
Traefik Hub creates a tunnel between its platform and the agent you installed on your Raspberry Pi to publish your service on the internet. The agent passes through the requests to open source Traefik Proxy, which is used as an Ingress Controller. Traefik Hub manages both the domain and the TLS certificate, and it shares the certificate with your Traefik instance to allow it to do the TLS termination.

(Nicolas Mengin, CC BY-SA 4.0)
Access Control Policy
Another point to remember is that a deployed Home Assistant application comes with its own login system. However, when you publish a service using Traefik Hub, you can restrict access further by using an Access Control Policy such as JWT and Basic Auth.
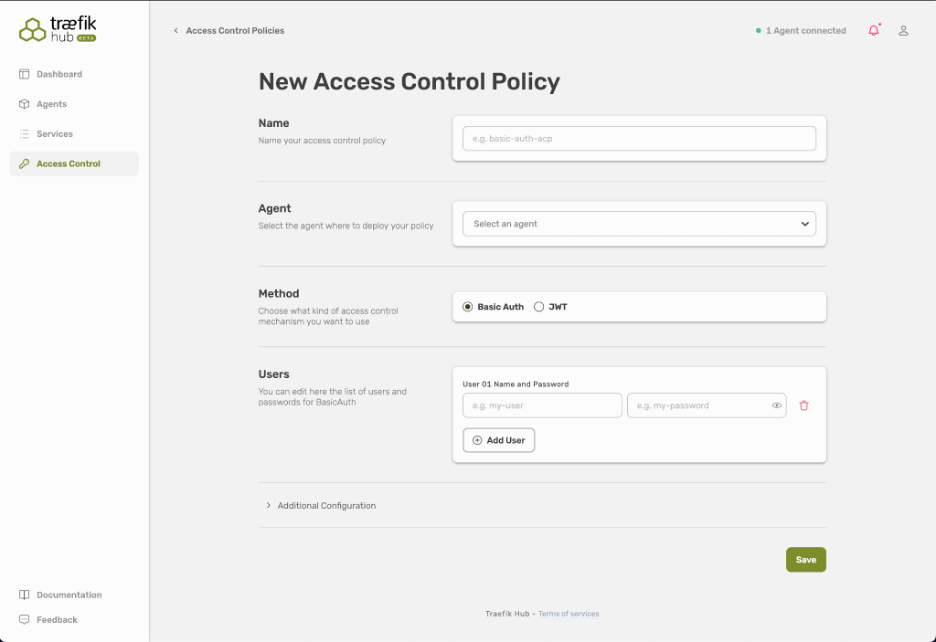
(Nicolas Mengin, CC BY-SA 4.0)
Kubernetes
If you are a Kubernetes user, you can also publish your Kubernetes Services. Traefik Hub can manage Kubernetes Services through the UI or a dedicated CRD.
Manage and monitor
Traefik Hub also provides a web UI that allows you to manage and monitor the exposition of services.
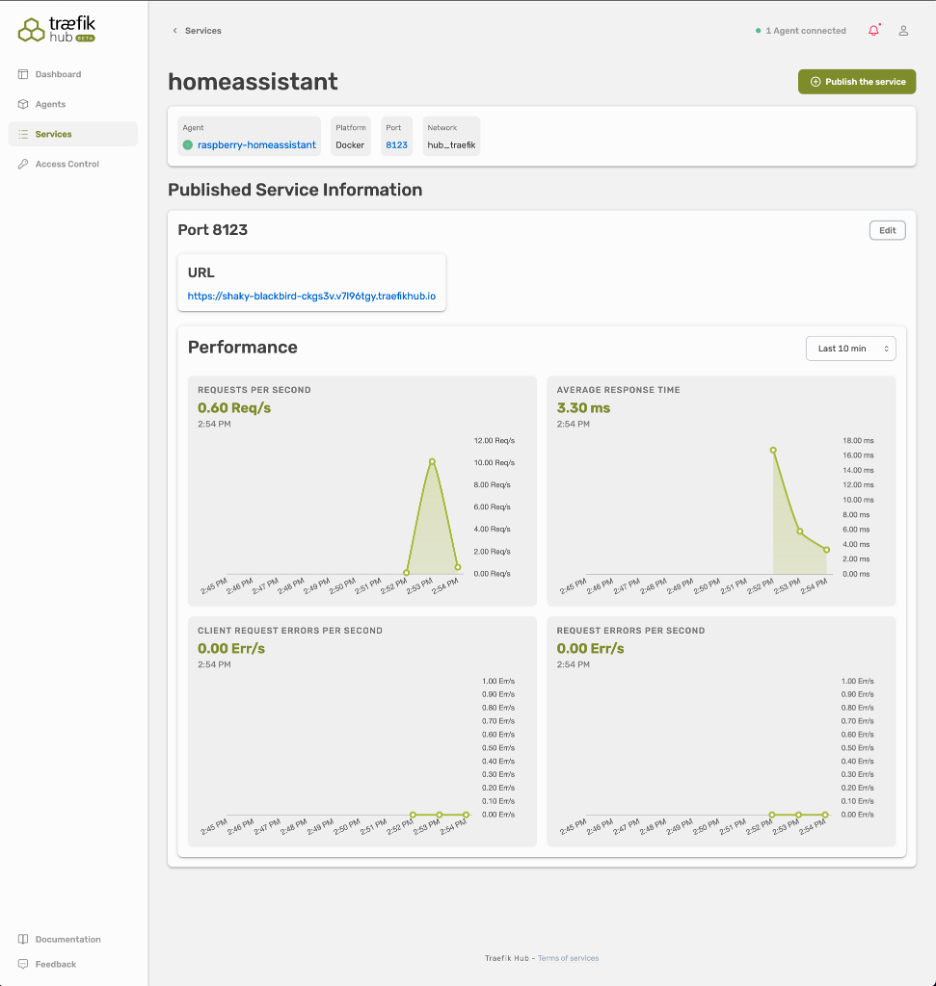
(Nicolas Mengin, CC BY-SA 4.0)
Wrap up
This article started by going through a long and complicated list of tasks that come with publishing an application over an encrypted and verifiable connection. Setting up home automation is an excellent example of that level of complexity. But when things seem impossibly hard, there's always an easier alternative! Traefik Hub makes your life simpler by taking over most of the mundane operations tasks, saving time, and allowing developers to focus on building applications.
Now you can turn the lights on in your house, even if you're on the other side of the world!
If you're interested in learning more about Traefik Hub, check out this getting started article. Traefik Hub is currently in Beta, so please don't hesitate to give it a try and provide feedback—you can do so directly in the UI.
I hope you found this article helpful, and thank you for reading!


1 Comment