Flashing pins are spinning tens of feet into the air on a pitch dark stage. It's a juggling performance. All of the pins are perfectly synchronized to flash different colors in time to the music. It's part of the magic of theater and a special night out with friends to enjoy a distraction from daily life. Part of the magic—and why it's called magic—is that the audience doesn't know how these secrets are made backstage.
They also don’t know the magic’s open source lineage.
On April 21, I got an email from my former boss, Ian Charnas, whom I worked under helping people to use the machines at Case Western ThinkBox last summer. He wrote to tell me that a juggler named Charles Peachock needed help setting up a new system of synchronizing his pins for a routine. Charles has appeared on America’s Got Talent six times and tours regularly around the country. His juggling equipment had gotten too clunky and was proving hard to prepare for backstage. He wanted needed something less cumbersome.
And, he wanted to us to consider if a Raspberry Pi could help. I took the job and met Charles in person get my research started.

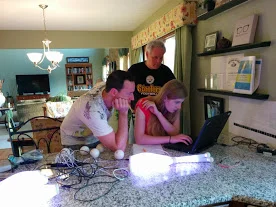
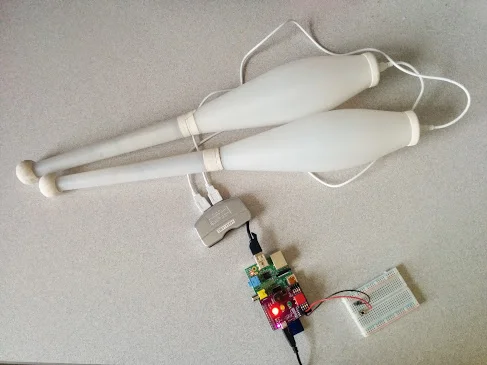
A phone call later, Charles and I decided to meet up at my house that night. I panicked slightly, as I had a Biology test the next day, but fortunately everything went well. I found out that size would be key to a solution to Charles’ problem, so I started with a Raspberry Pi. It is small and compatible with the Pibrella shield. I got two juggling pins from Charles to use for testing purposes and grabbed my spare Pi. A few weeks in and I was knee-deep in Google searches searching for my next starting point. Then, I struck gold on GitHub with AeroUp code written by a French circus, on how to run juggling pins.
The Pibrella shield slips on top and gives the user access to LEDS, a button, I/O pins, and a speaker. And, the Pibrella library is a GitHub repository of prewritten code that gives a user access to these features.
I loaded the AeroUp code on the Raspberry Pi and eventually got the juggling pins to light up at the same time, in the same color, by sshing into the Pi through a wireless connection. This achievement was a milestone in my process for a solution because I managed to show that my idea worked. However, it was no where near a final deliverable.
I needed to figure out a way Charles could launch the pins without a laptop or network connection.
First, I used a USB hub to connect the pins to the Pi and an Ethernet cable. I plugged an SD card into a reader USB, and from there, into my computer. I loaded ArchLinux onto my computer, unzipped it, and copied it over to the SD card using the dd command. Once I safely removed the USB, I plugged the SD card into the Pi.
That’s when the real work started.

I created a user Pi and resized the partitions on the SD card. Next, I created a swap file so that gcc didn’t get zapped by oomkiller. It is possible to configure wireless with a wireless adaptor, but I didn’t do this because I had an ethernet cable. I set the correct time zone, date, and time. Then, I updated ArchLinux and installed seven packages to make sure that the system would work. Then came more installing, this time of the Python and Pibrella libraries. I had to use the pre flag for the Pibrella library since it is currently prerelease software. After I did that, I built AeroUp as the Pi user.
I was ready to start coding. I wrote a program to send a signal to the pins to start them all at the same time. This was relatively simple and done in Bash. The main portion of the first program is a loop that checks to see how many devices are being used and start them with a predetermined program (that could be changed later). The first program was used as a part of the second program. The second program consists of two main loops and was written in Python. The first loop reads the button state and calculates the time that the button was pressed. If the button is pressed for less then three seconds, a green light turns on and the Bash program is called and processed. If the button is pressed for more than three seconds, a yellow light turns on and the system shuts down. The second loop deals with the transition between the lights. It also checks the button state and the length of the button press. It changes the colors of the lights based on the amount of time the button was pressed.
Once I had written these programs, I made them executable in the user Pi’s home directory. Finally, I set up a system entitled juggling_app.py to start at boot. When I enabled juggling_app.py the system ran perfectly. I made some attempts to break it, all of which failed or were so inconsistent as to be null, so I began to set up the hardware.
I made a trip to Microcenter, my local computing supply store and bought a Pi and SD card for Charles. I assembled everything and placed my Pibrella on to the new Pi. Then, I put the SD card in and tested it several more times. When I was sure it was working properly, I was really happy! Then, I set up a meeting with Charles to see what he thought of it. He thought it was awesome… and wanted me to add another feature. In his business, redundancy is important, so he requested that I add another button to the setup using a breadboard. A breadboard is a small plastic sheet that has connection points for wires. This allows a user to connect items such as buttons to the breadboard and use it in conjunction with the Raspberry Pi. To be perfectly honest, I wasn’t entirely sure I could do it. Visions of rewriting entire programs spun through my head, but I agreed to try. Fortunately, my fears turned out to be only that; I thought it might take hours to add the extra button and feature, but it only took ten minutes!
One new line of code and a modified line one later, I was the proud creator of a Raspberry Pi Juggling Pin Management system. (With two functional buttons!)
The final part of this journey, this project, was making the whole system look professional. I started from the beginning, writing down each step with relevant commands and links. This became the manual: the Run Book contains three instructions to run the system, the Build Book contains instructions to build the system from scratch, and the programs are included as well.
Today, you can watch Charles’ tour Impossible Deceptions knowing that my system runs backstage.


4 Comments