digiKam bills itself as a digital photo management application. Suffice it to say that digiKam is a humble application, because "digital photo management" barely touches on the feature set.
digiKam basics
If you don't have digiKam installed, you can either grab it for Linux, Windows, or, with a little bit of work, on OS X from the digiKam download page or, on Linux, from your distribution's software repository. Your distribution may or may not have the latest version, but don't get overly concerned about that; digiKam is in the enviable position of having been essentially a complete and stable application for years now, so unless you're looking for a specific feature that only exists in the latest version, it's going to be a good experience, at least just getting started.
Upon first launch, you must step through a brief setup wizard. Some choices affect performance and file size, so read the screen carefully to decide what you really want, but all of the decisions can be changed later, so accepting the defaults is safe if you're not sure.
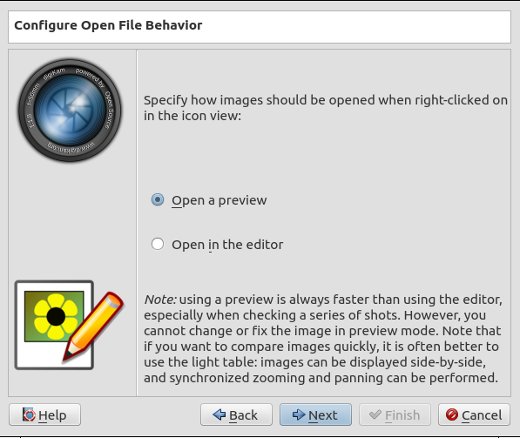
Decisions, decisions.
The initial launch will be slower than usual because digiKam must analyse the photographs in your collection and record information about each one. Depending on how many photos you have and how large they are, you might want to let it run over night.
Interface
The layout of digiKam is fairly intuitive, especially if you're a KDE user. The basics are pretty simple: On the left are panels that control how you view photos, in the middle are the photos themselves, and on the left are effects and filters.
The initial default view is a filesytem view, starting from whatever directory you defined as your image folder during digiKam setup. DigiKam refers to whatever directories it finds within your image directory as an Album, and it parses each image file, along with its native metadata plus metadata digiKam allows you to add, into a thumbnail view.
When you select a directory (or an album, if you prefer), the photos within are displayed as an array in the right panel. There are lots of other ways to view your photos, though, and they're all accessible as verticle tabs (a time-honored KDE interface tradition) along the left edge of the main window. In addition to the Album view, there are:
- Tags filters the photos in your collection by arbitrary metadata tags. There probably won't be tags at first (unless you've created or imported some), but you can create tags in the Tag Manager interface and assign them to pictures. Clicking on any tag (or control-clicking on several tags) in the Tag panel filters the thumbnail view to show photos with that tag assigned.

The tag manager.
- Labels filters your photos according to how many stars you've assigned to a photograph. There are other forms of labels, such as color labels and flags, all user-assignable from the thumbnail view.
- Dates, Timeline, and Map let you view photos by relevant data contained in the photo's EXIF information.
- People scans your photo collection for faces. DigiKam recognises faces as faces, and can even take guesses as to their identities (an "experimental" feature). Scanning your entire collection from the start can take a while, but once the initial scan is done, digiKam only scans photos upon import, so be patient on the first use and you won't even notice it happening from then on.
There are other filtration options, including fuzzy searches to find images similar to one another, a sketch search to try to match a photo with a rough drawing of what you're looking for, and more.
Thumbnail view
The thumbnail view is the central panel of digiKam, but its right-click menu provides a host of important features, such as switching to fullscreen mode, assigning tags, and assiging labels, but also file-management functions and access to digiKam's digital darkroom.
Aside from organizing your photos, the first thing you're likely to do once you have imported an SD card full of pictures is to figure out which of the group are the really good ones, and especially choose between several similar shots of the same subject. The method digiKam provides for this is its light table view, a separate window that helps you focus on just two or three photographs at a larger size than a little thumbnail.
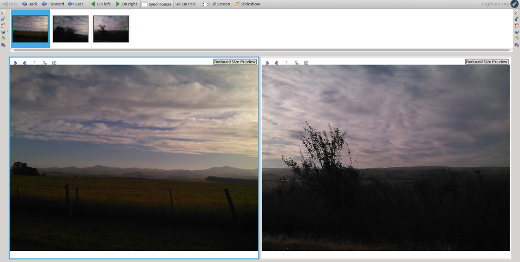
Comparing photos on the light table.
To add a photo to your light table, either right-click on it and select Add to Light Table, or select a photo and press Ctrl-L. Because it's often used for comparing photos, you can add several photos to the light table at once; to add more photos, either right-click and select Add to Light Table again, or press Ctrl-Shift-L.
The light table interface also has facial recognition overrides. If you've got a photo that digiKam hasn't identified faces in, or has mis-identified faces, then load it into the light table and right-click on the image. Select Add a Face Tag for the face tag editor. Draw a box around the face that you want to identify, and type the person's name into the text field.
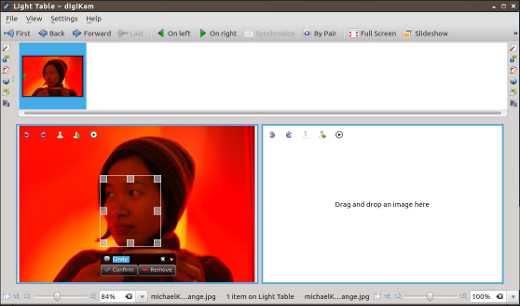
Photo by Michael Kordahi; CC BY-SA 2.0
The thumbnail view also can help manage your photos. Right-clicking enables common file management tasks, such as renaming photos, adding a photo to a specific album, or moving irreparable ones to the trash, and so on.
To see information about a photo, use the vertical tabs on the right edge of the digiKam window. These show metadata, color data, versioning data, and more. Also from the thumbnail view, you can edit photos using digiKam's robust effect plugins.
Editing and effects
DigiKam has an built-in editor for most common photo effects and touch-ups. To get there, select a photo and click the Image Editor button along the top toolbar. This opens a new window for dedicated editing.
The image editor interface has two entry points for nearly every function; you can select effects from the window menu or from the Select Tool button in the top toolbar.
All the usual effects are present: color balance, saturation, levels, red-eye removal, and so on. Special effects are included, too, such as textures, oil paint filters, borders, film grains, film emulation (profiled by popular film stocks), and much, much more. Feel free to try them all because none of them alter your original photo until you save the changes.
Filters and effects can be un-done from the Edit menu, but only in the order they were applied. The filters are linear (unlike in Darktable, where filters are truly filters that can be slotted in at different points in the filter stack), so if you apply a Color Balance filter and then a Vivid effect, if you undo the Color Balance then you also implicitly undo the Vivid effect that followed it.
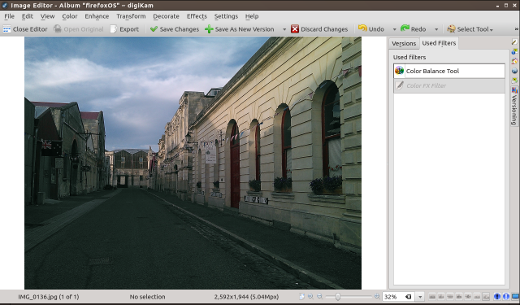
Make pictures better. Edit them.
To see the effects applied to a photograph, click the Versioning tab along the right side of the Image Editor window and select the Used Filters tab.
When you're finished, save your changes directly to your original photo, or save the changes as a new version. If you save a photo as a new version, then you'll see your new version in your thumbnail view, but you'll always have the option to view previous versions.
Exporting
Getting images out of digiKam, strictly speaking, is automatic, because photos are never "in" digiKam. DigiKam reads images straight from your file system, so to get an image from digiKam, all you have to do is look in the place you last left it. It'll still be there.
In fact, not just the photo will be there; saved versions of the photo will also be there, named as you'd expect (the first new version of "IMG_050.jpg" becomes "IMG_050_v1.jpg", and so on).
DigiKam also has convenient export options, though, depending on how you installed it. (Certain export options require additional libraries that you may or may not ever need.) Export targets include Piwigo, email, Flickr, Google Photos, Google Drive, Facebook, Debian Screenshots, MediaWiki, SmugMug, raw HTML, any remote computer you have an account on, and, believe it or not, many more.
But wait, there's more!
DigiKam is an easy but powerful photo management and re-touching application. It's got lots of great features, and this article has only touched on the basics. There's so much more to explore in digiKam, including features—such as the easiest Batch Queue processing system I've ever seen in a GUI photo application—that still elude other editors. DigiKam isn't just efficient, it's fun to use, brings your photos to life, makes rummaging through directories and directories of pictures to find the really good ones fun, and gives you the freedom and courage to make them better.
If you're not using digiKam, and you also find yourself ignoring your photos, you owe it to yourself to give digiKam a go. If you're looking for a good photo manager with facial recognition, photo effects, and all the export options you could ever want, then get digiKam. In short, if you take photographs, you should treat yourself to digiKam.




1 Comment