To get started with IoT (the Internet of Things), your device needs, well, an Internet connection. Base Arduino microcontrollers don't have Internet connectivity by default, so you either need to add Ethernet, Wi-Fi shields, or adapters to them, or buy an Arduino that has built-in Internet connectivity. In addition to complexity, both approaches add cost and consume the already-precious Arduino flash RAM for program space, which limits what you can do.
Another approach is to use a Raspberry Pi or similar single-board computer that runs a full-blown operating system like Linux. The Raspberry Pi is a solid choice in many IoT use cases, but it is often overkill when all you really want to do is read a sensor and send the reading up to a server in the cloud. Not only does the Raspberry Pi potentially drive up the costs, complexity, and power consumption of your project, but it is running a full operating system that needs to be patched, and it has a much larger attack surface than a simple microcontroller. When it comes to IoT devices and security, simpler is better, so you can spend more time making and less time patching what you already made.
When the ESP8266 Wi-Fi chip came onto the market in 2014 with almost no English-language documentation, the maker community was intrigued but didn't completely understand its full potential. Thanks to its low cost ($2) and a vibrant community that loves a good challenge, makers quickly figured out how to use the ESP8266 to Wi-Fi-enable their Arduinos. As they collaborated more and more, they realized that the ESP8266 could serve as a standalone microcontroller, without the need of an Arduino fast forward every couple of months. The community soon added ESP8266 support to the Arduino IDE, making the ESP8266 as easy to program as an Arduino. Being a low-cost Wi-Fi-enabler of microcontrollers and a microcontroller itself, the ESP8266 quickly became the floor wax and dessert topping of those makers in the know.
What is the ESP8266 exactly? The ESP8266 is a 32-bit RISC CPU made by Espressif Systems. Its clock runs by default at 80MHz, and it has 64KB of instruction RAM, 96KB of data RAM, and supports up to 16MB of external flash. These specifications are quite impressive when compared to an Arduino UNO, which runs at 16MHz, only has 2KB of SRAM, 32KB of flash, 1KB of EEPROM, and is several times more expensive. Another big difference is that the ESP8266 has an operating voltage of 3.3 volts while most Arduinos have an operating voltage of 5 volts. Keep this voltage difference in mind when extending your existing Arduino knowledge and projects to the ESP8266 to prevent magic smoke.
Although the chip is the same, many open hardware manufacturers have developed a dizzying array of modules and boards with unique features, so choose wisely. The biggest differences are the number of pins exposed, flash RAM sizes for program storage, and form factors.
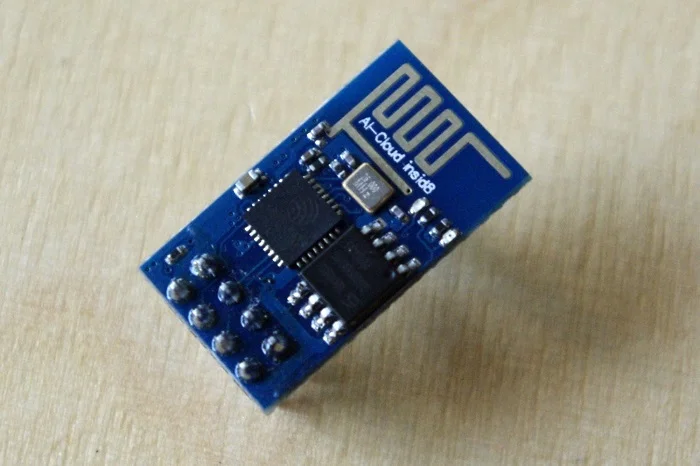
The module that put the ESP8266 on the map in 2014 is the ESP-01, pictured next, where you can see the ESP8266 chip, flash RAM chip, and built-in Wi-Fi antenna.

The top side of the ESP-01 module hosting an ESP8266 Wi-Fi chip. This photo is licensed under CC-BY-SA 4.0.
At $2 and only slightly larger than your thumbnail, the ESP-01 seems like the perfect choice to get started in the world of ESP8266 and IoT, but it does come with some limitations. First, you need a USB-to-serial converter to program it. Next, you need a 3.3-volt power supply to power it. It's also not breadboard friendly, so you need to use jumper wires or an adapter. Last, only two GPIO pins are exposed, which makes the device useful, but not as useful as an Arduino, which has many more available. Overall, the ESP-01 is a wonderfully compact device for finished projects, but there are better boards for getting started and prototyping.
For getting started and prototyping, I recommend the NodeMCU or WeMos D1 series. These sub-$6 devices make up for the limitations of the ESP-01 by providing built-in USB-to-serial connectivity, being (mostly) breadboard-friendly, and exposing most if not all of the available ESP8266 GPIO pins.
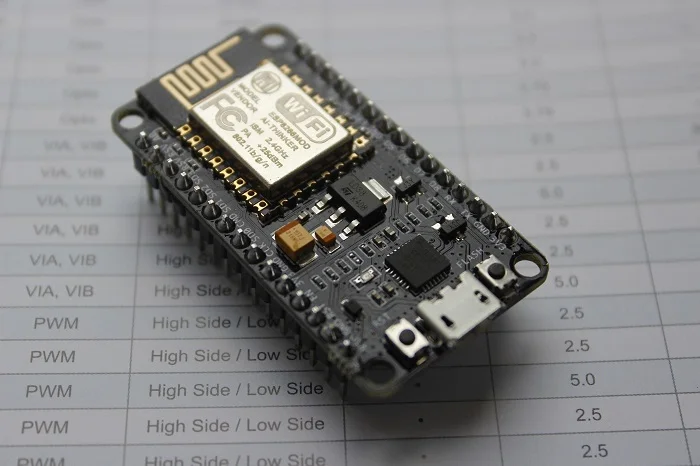
The NodeMCU was originally compelling because it came with specialized firmware that lets you program it using the Lua scripting language. For diehard Arduino aficionados like myself, you can also use the Arduino IDE and its C-like programming language. In terms of being (mostly) breadboard friendly, the NodeMCU has several versions with slightly different form factors. Personally, I like the NodeMCU v2 because it's narrow enough to fit in a breadboard where you can use a row of breadboard pins along each side. The v1 and v3 versions are wider where the NodeMCU would need to straddle two breadboards side by side. An easy way to tell if a NodeMCU is a v2 is to confirm that the USB-to-serial chip is the square-shaped CP2102 (pictured next), whereas the wider versions often use the rectangular-shaped CH340G.

NodeMCU development board, which is based on the ESP8266 Wi-Fi chip. This photo is licensed under CC-BY-SA 4.0.
WeMos makes several ESP8266-based boards as well. The D1 replicates the Arduino Uno form factor, which allows you to reuse many of the Arduino shields that you already have. The D1 mini and D1 mini pro are breadboard-friendly like the NodeMCU, but both are smaller than the NodeMCU. The more compact size exposes fewer GPIO pins than the NodeMCU, but these models come with a rich assortment of shields in their own right.
What can you do with the ESP8266? In short, a lot. You can attach sensors to it and present the data on a web server running on the ESP8266 itself, or log the data in the cloud or to an MQTT message broker. Going the other way, you can attach a display to the ESP8266 to track the weather, airplanes, or anything else you want. Other examples include home automation with Amazon Alexa and broadcasting to your TV. For more ideas, check out Hackaday and YouTube.
Overall, I've found the ESP8266 to be a perfect complement to my maker toolkit, alongside my Raspberry Pis and Arduinos. Given its low cost and vibrant user community, you'll see new and exciting use cases coming out every day.
Have you tried out the ESP8266? I'd love to hear about your experience in the comments below.


9 Comments