While the Raspberry Pi is an excellent and affordable mini Linux computer with a stylish and functional desktop user interface, it has plenty of scope beyond that of a regular PC. Here's an overview of the physical computing capabilities of the Pi.
GPIO pins
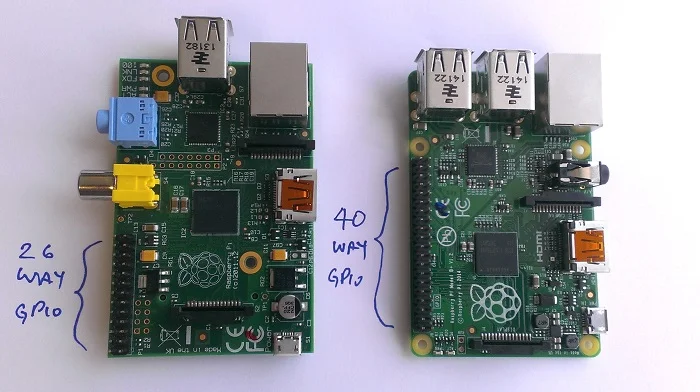
Since 2014, with the release of the Model B+, the Raspberry Pi's form factor has stayed the same, including the uniform 40-pin GPIO (General Purpose Input/Output) pin header.

CC BY-SA Raspberry Pi Foundation
These pins allow you to connect electronic components and program physical devices in the real world, such as inputs like sensors and outputs like lights. The pins include:
- 3V3 (a constant supply of 3.3 volts)
- 5V (a constant supply of 5 volts)
- GND (ground pins, 0 volts)
- GPIO (general purpose input/output pins—these are essentially variable 3V3 pins controlled by the user)
- SPI (Serial Peripheral Interface)
- I2C (Inter-integrated Circuit)
- UART (Universal Asynchronous Receiver/Transmitter)
The layout of the pins is the same on all models since the B+, which includes the Pi 2, Pi 3, and Pi Zero.

Courtesy of pinout.xyz. Used with permission.
Read more about the function of the pins at pinout.xyz
Add-on boards / HATs
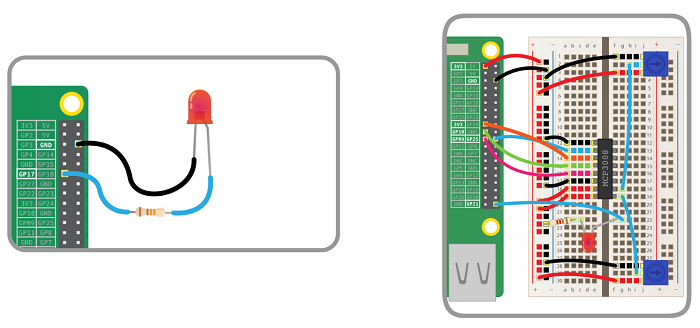
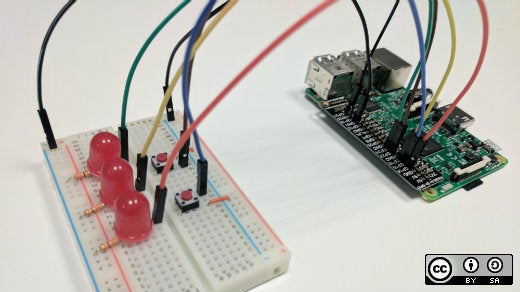
You can connect simple components directly to the pins using jumper wires, or you can use a breadboard to hold everything in place and allow components to share use of some pins.

CC BY-SA Raspberry Pi Foundation
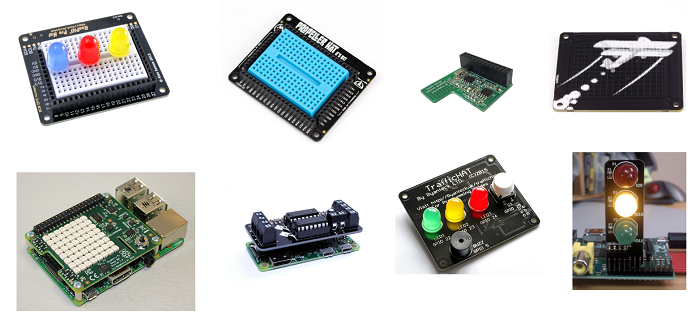
Alternatively, you can use add-on boards that provide embedded components on a PCB (printed circuit board), which sits on top of the Pi's GPIO pins. Soon after the B+ launch, the Raspberry Pi Foundation published the specification for a HAT (Hardware Attached on Top) standard, which determines the dimensions and other requirements for what can be considered a HAT. HATs are add-on boards that fit neatly on top of the Pi with aligned mounting holes, and some have slots for the camera and display cables. The community of Raspberry Pi accessory retailers have produced a wide range of HATs.

CC BY-SA Raspberry Pi Foundation
The Raspberry Pi Foundation has produced one official HAT of its own named the Sense HAT, which was made especially for the Astro Pi space mission aboard the International Space Station. It is also available for purchase. It encompasses a LED grid, a mini joystick, and a series of sensors. Read more about programming the Sense HAT.
HATs are a great way of extending the capabilities of your Raspberry Pi to use in a project without having to wire up or solder components. See my Top 10 Raspberry Pi Add-on Boards.
GPIO with Python
It's possible to control the GPIO pins from a wide range of programming languages, but the simplest and most popular way is to use Python. The GPIO Zero library provides a simple interface to GPIO devices and includes support for a range of components and add-on boards. With just a few lines of code you can flash an LED:
from gpiozero import LED
from time import sleep

led = LED(17)

while True:

    led.on()
    sleep(1)
    led.off()
    sleep(1)
See my article on GPIO Zero and Raspberry Pi programming starter projects, and see the GPIO Zero documentation for more information.
Camera module
The camera module is an official Raspberry Pi accessory and it comes in two variations, a visible light camera and an infrared camera. The current version of the camera (V2) has an 8-megapixel resolution, whereas the original camera was 5 megapixels.

CC BY-SA Raspberry Pi Foundation
You can control the camera module with the command-line tools raspistill and raspivid or with the Python library picamera:
from picamera import PiCamera
from time import sleep

camera = PiCamera()

camera.start_preview()
sleep(10)
camera.capture('/home/pi/image.jpg')
camera.stop_preview()
See my article on getting started with the Raspberry Pi camera module.
Physical computing projects at home
Once you've learned how to get started with Raspberry Pi, and tried some simple GPIO examples, it's easy to move on to some hobby projects of your own, perhaps in home automation or IoT. What do you want to make?


1 Comment