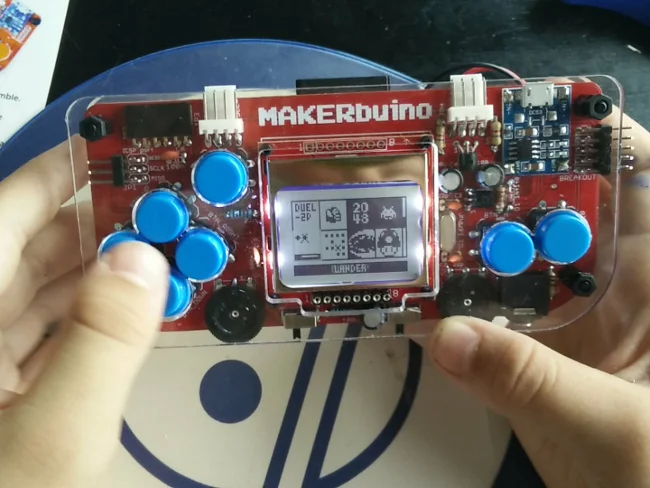
Retro game consoles that are easy to program are a great way to introduce anyone—and especially kids—to video game development. One of these is Gamebuino, a preassembled, handheld retro game console. It's kind of an Arduino on steroids, with a Nokia 5110 mobile phone display (84x48 pixels), LiPo charger and LiPo battery, an SD card reader, and an SD card with a bunch of games. MAKERbuino, which is basically a Gamebuino kit that you get to assemble and solder together, seemed more interesting to me.

opensource.com
MAKERbuino's creator, Albert Gajsak, worked with Aurélien Rodot, the creator of Gamebuino, to ensure that the devices are compatible and that the MAKERbuino can run the Gamebuino's games. MAKERbuino even uses the bootloader from the Gamebuino, which is available on GitHub.
Albert also made the schematic public and the PCB design is also available. With these resources, in theory, you could even start one level earlier and create your own printed circuit board (PCB) or even a device with a different physical layout.
Assembling the MAKERbuino
My 10-year-old daughter likes programming and games and already had some soldering experience, so I got a MAKERbuino kit for her to assemble. MAKERbuino's website has a very extensive assembly manual online and all the parts were included, so it took her only four hours to fully assemble it into working state.

opensource.com
After the fun of building the device and playing the included games, we wanted to program our own games. Since MAKERbuino is compatible with the Gamebuino, we were able to use its game library to create our own games.
Programming the *buino
The MAKERbuino is programmed the same way as the Gamebuino (and every other Arduino) with the Arduino IDE in C++. First, install the game library into the Arduino IDE and then you can start hacking.
The Arduino IDE and libraries present a massive hurdle for non-native English speakers, like my daughter, who speaks German (and is learning French in school). While the IDE itself is localized, all of the language constructs, libraries, and documentation are in English. This hurdle quickly stopped her enthusiasm for the project.
There is a Scratch-like environment to program Arduino with Ardublocks, but it doesn't yet support the Gamebuino library. (In addition, this project looks pretty abandoned.) I have been looking into adding the Gamebuino library to Ardublocks, but this is not something that can be done in a weekend.
Nevertheless, programming the MAKERbuino is relatively straightforward if you know Arduino programming (and English).
For example, here is some code to fire a laser and check if it hit an alien ship.
#include <Gamebuino.h>
Gamebuino gb;
[..]
void setup() {
  gb.begin();    // Initialize the *buino
  gb.titleScreen();
}

void loop() {
  if (gb.update()) { // update screen etc
    [...]
    gb.display.setColor(GRAY);

    if (gb.buttons.pressed(BTN_UP)) {
      gb.display.drawLine(x+4,y-1,x+4,0);
      // check if the laser hit the alien ship
      hit = gb.collideRectRect(x+4,0,1,y-1, alienX,alienY,8,8);
    }

    if (hit) {
      gb.sound.playNote(40, 20, 0);
      gb.sound.playNote(10, 20, 0);
      gb.sound.playNote(30, 20, 0);
    }
  }
}
The code is compiled in the ArduinoIDE, just like as any other Arduino program.
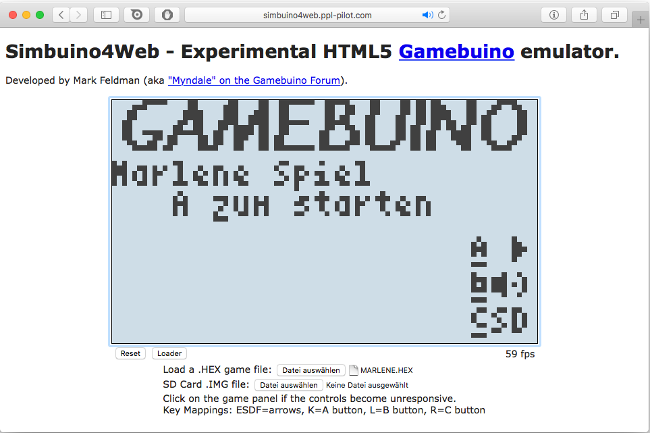
To test the code, you can use an emulator that allows a lot of interactions. I have been using the one at Simbuino4Web. It works pretty well, but it sometimes needs a full-page refresh when it gets stuck after uploading.

opensource.com
To test your code on the real device, you can either connect a serial-to-USB adapter on the MAKERbuino and upload it via USB, or you can create a binary HEX file and put it on the SD card. To create the HEX file on the SD card, use Sketch->Export compiled binary (not upload) in the Arduino-IDE.
A great DIY experience
The MAKERbuino and Gamebuino are great retro game consoles, but the process of assembly and self-soldering makes MAKERbuino more of "your own device." And, as our experience shows, even in the age of 70 fps games on 4K TVs, the retro handheld games experience is still great.


2 Comments