For science fiction fans, it feels like video chat was a long time coming, but now it's safe to say that a video call is indeed a great way to communicate remotely. Just as advertised by Star Trek and countless Philip K. Dick novels, the human face conveys a lot of information that the human voice doesn't. There's a human connection established through a video call that doesn't quite happen with text or even voice chats. It's a triumph of modern technology.
However, the cost of video is that it requires a lot more bandwidth than a voice call. It also requires a greater degree of preparation. You have to dress for the occasion, you have to tidy up your backdrop, you have to clear your "set" so that there aren't children or cats running through your shot, and so on. What seems like it should be a simple phone call becomes a small-scale television production.
For my online D&D games, I find that video adds an overhead with no benefit. Switching to voice-only leaves more bandwidth for more call participants and for running map software. For business meetings, the same can be true. A voice chat can simplify the setup required for a meeting, and it can conserve bandwidth for helpful applications like Drawpile.
Mumble
Since 2005, the Mumble project has provided easy voice chat over a cross-platform application. It uses notoriously lightweight open source compression, including CELT, Speex, and Opus, and has a text-chat client built in. There's a whole network of available Mumble servers out there for you to use, or you can run your own because both the client and the server application are open source.
Install and set up Mumble
To install Mumble, download the Mumble desktop app from Mumble's website for Linux, macOS, or Windows. On Linux, you can also install Mumble as a Flatpak or Snap package. For Android, download the Plumble app from F-Droid or the Google Play store, and on iOS, try the Mumblefy app.
After installing, launch Mumble to step through the setup wizard. The wizard helps you configure your audio for optimal performance, both in terms of bandwidth and reducing noise-to-signal. If you're having trouble configuring your audio, remember these important audio troubleshooting steps, in this order:
- Check your cables. A microphone or headset not plugged into (or paired with) your computer is guaranteed to not be recognized.
- Check your computer sound settings. Your OS may have the wrong microphone set for input or the wrong set of speakers set for output. I've been guilty of telling someone they've got their sound misconfigured only to find later that I just hadn't selected the right output in my system settings.
- Check Mumble's settings. A computer usually gives sound devices relatively cryptic names. For instance, could that Built-in mic you see in a Mumble selection menu actually be your Line-in jack in disguise?
Use push-to-talk
Your worst enemy during Mumble chats is feedback, but how bad that gets will vary from computer to computer. For instance, if your computer happens to have a microphone situated to pick up sound from your computer speakers, then you're more likely to cause (and hear) an echo. There are three effective ways to combat this: you can use a headset, you can use push-to-talk, or you can do both.
A headset with an audio jack, a USB cable, or a Bluetooth connection can be used as input for Mumble. Headsets are good because they isolate Mumble's output, so there's basically no chance of your microphone picking it up and rebroadcasting it. Keep in mind that any time you change input and output sources (such as plugging in or pairing a headset), you may have to adjust your computer and Mumble settings so that they both are configured to bypass the obvious defaults (usually the built-in microphone and speaker).
Push-to-talk requires you to press a key while talking, like a CB radio or walkie-talkie. I find this to be the most reliable way to keep your signal clean and clear. To set it up, you can opt-in during the setup wizard.

I use the gravé (~) symbol or the right Alt key on my keyboard, but you can use any key that suits you. If you're using Mumble while working with other applications, choose a key that has little or no meaning to the other applications you plan on using, such as the Super (Windows logo or Command). If you don't want to use a key at all, you can enable a push-to-talk window, which you can use as an onscreen clickable button.
After you're all configured, it's time to join a server.
Mumble servers
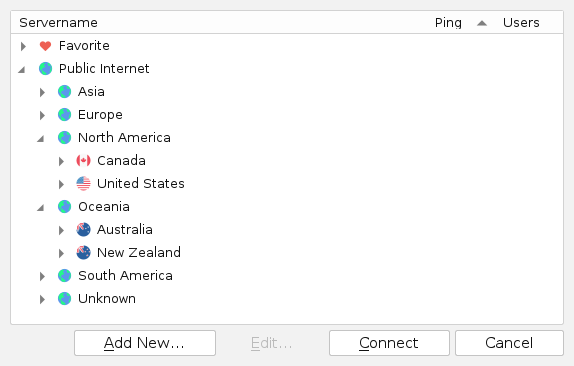
Just as there are hundreds of independent websites in the world, there are dozens of mumble servers online. To connect to one, go to the Server menu in Mumble's main menu and select Connect. In the Mumble Server Connect dialog window that appears, browse through the Public Internet category to find a server near you. These are all public servers, and some of them are managed better than others. Some allow you to add your own channel, while others already have channels and expect you to use them. You're free to use these for voice chats, and I've used public servers with great success.

For serious chats, though, I use a private server. Because Mumble is such a lightweight application, you don't need a server farm or even a traditional server to run it. You can install a Mumble server (called Murmur) on a Raspberry Pi and expect good performance as a private chat server. If you don't consider yourself a sysadmin, you can usually find a public server that offers private accounts if you demonstrate goodwill (such as sending a respectful email request for a private channel).
The process isn't quite as direct and robotic as it is with big internet chat conglomerates, but I've found that the Mumble experience is superior. You get to know the admin of your server, you get admin privileges over your channel, and you maintain autonomy from faceless service providers.
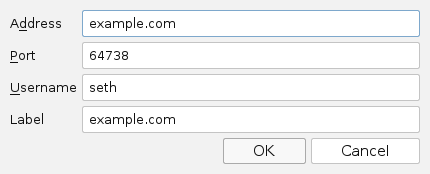
To add a custom server, click the Add New button in the Mumble Server Connect window. In the Add Server window, enter values for:
- Server address: The server you're adding. This might be provided to you by a server admin if you're adding a private server.
- Port: Usually, the default is acceptable unless your server admin tells you otherwise.
- Username: You can invent whatever username you want. If you're joining a private server, the server authenticates against a certificate your server admin gives you, not your username.

Once the server's added, you can join it by selecting it in the Favorite category.
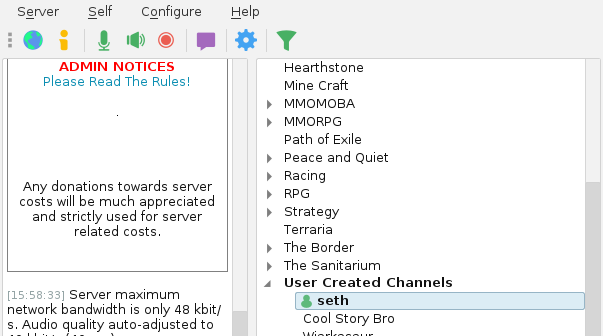
A Mumble server is structured almost like a directory tree. When you first sign into a server, usually you're either in a "lounge" area or you're on the server but not in a channel. To enter a channel, drag your username into a channel.

People you want to chat with do the same thing: they add a server to their Mumble client, connect, and then drag their username into your channel.
Give Mumble a try
Mumble is a small, efficient, low-latency chat application with many more features than I covered in this brief introduction. It's a fun and simple application, and best of all, it's open source. Give it a try the next time you need to avoid a video chat.


2 Comments