When I recently read Alan Formy-Duval's article Manage your Raspberry Pi with Cockpit, I thought it would be a good idea to have an image with Cockpit already preinstalled. Luckily there are at least two ways to accomplish this task:
- Adapt the sources of the Raspberry Pi OS image building toolchain pi-gen which enables you to build a Raspberry Pi image from scratch
- Convert your running, modified Raspberry Pi OS back to an image others can use
This article covers both methods. I'll highlight the pros and cons of each technique.
Pi-gen
Let's begin with pi-gen. Before we start, there are a few prerequisites you'll need to consider.
Prerequisites
To successfully run the build process, it is recommended to use a 32bit version of Debian Buster or Ubuntu Xenial. It may work on other systems as well but to avoid unnecessary complications, I recommend to setup a virtual machine with one of the recommended systems. If you are not familiar with virtual machines, take a look at my article Try Linux on any operating system with VirtualBox. When you have everything up and running, also install the dependencies mentioned in the repository description. Also consider that you need internet access in the virtual machine and enough free disk space. I set up my virtual machine with a 40GB hard drive which seemed to be enough.
In order to follow the instructions in this article, make a clone of the pi-gen repository or fork it if you want to start developing you own image.
Repository Overview
The overall build process is separated into stages. Each stage is represented as an ordinary folder and represents a logical intermediate with regards to a full Raspberry Pi OS image.
- Stage 0: Bootstrap—Creates a usable filesystem
- Stage 1: Minimal system—Creates an absolute minimal system
- Stage 2: Lite system—Corresponds to Raspberry Pi OS Lite
- Stage 3: Desktop system—Installs X11, LXDE, web browsers, and so on
- Stage 4: Corresponds to an ordinary Raspberry Pi OS
- Stage 5: Corresponds to Raspberry Pi OS Full
The stages build upon each other: It is not possible to build a higher stage without building the lower stages. You can't leave out a stage in the middle either. For example, to build a Raspberry Pi OS Lite, you have to build stages 0, 1, and 2. To build a Raspberry Pi OS with a desktop, you have to build stages 0, 1, 2, 3, 4, and 5.
Build process
The build process is controlled by the build.sh, which can be found in the root repository. If you already know how to read and write bash scripts, it won't be a hurdle to understand the process defined there. If not, reading the build.sh and trying to understand what is going on is a really good practice. But even without bash scripting skills, you will be able to create your own image with Cockpit preinstalled.
In general, the build process consists of several nested for-loops.
- stage-loop: Loop through all stage directories in ascending order
- Skip further processing if a file named SKIP is found
- Run the script
prerun.sh - sub-loop: Loop through each subdirectory in ascending order and process the following files if they are present:
-
00-run-sh: Arbitrary instructions to run in advance00-run-chroot.sh: Run this script in the chroot directory of the image00-debconfs: Variables for thedebconf-set-selection00-packages: A list of packages to install00-packages-nr: Similar to the 00-packages, except that this will cause the installation with --no-install-recommends -y parameter to apt-get
00-patches: A directory containing patch files to be applied, using quilt- Back in the stage-loop, if a file named
EXPORT_IMAGEis found, generate an image for this stage - If a file named
SKIP_IMAGEis found, skip creating the image
-
The build.sh also requires a file named config containing some specification which is read on startup.
Hands-On
First, we will create a basic Raspberry Pi OS Lite image. The Raspberry Pi OS Lite image will act as a base for our custom image. Create an empty file named config and add the following two lines:
IMG_NAME='Cockpit'
ENABLE_SSH=1
Create an empty file named SKIP in the directories stage3, stage4, and stage5. Stages 4 and 5 emit an image by default, therefore add an empty file named SKIP_IMAGE in stage4 and stage5.
Now open a terminal and switch to the root user by typing su. Navigate to the root directory of the repository and start the build script by typing ./build.sh.
The build process will take some time.
After the build process has finished, you will find two more directories in the root of the repository: work and deploy. The work folder contains some intermediate output. In the deploy folder you should find the zipped image file, ready for deployment.
If the overall build process was successful, we now can modify the process so that it installs Cockpit additionally.
Extending the build process
The Raspberry Pi OS Lite image acts as the base for our Cockpit installation. As the Raspberry Pi OS Lite image is complete with stage2, we will create our own stage3 which will handle the Cockpit installation.
We remove the original stage3 completely and create a new, empty stage3:
rm -rf stage3 && mkdir stage3Inside stage3, we create a substage for installing cockpit:
mkdir stage3/00-cockpitTo install cockpit on the image, we simply need to add it to the package list:
echo "cockpit" >> stage3/00-cockpit/00-packagesWe also want to configure our new stage3 to output an image, therefore we simply add this file in the stage3 directory:
touch stage3/EXPORT_IMAGEAs there are already intermediate images from the previous build process, we can prevent that the stages are built again by adding skip-files in the related directories:
Skip the build process for stage0 and stage1:
touch stage0/SKIP && touch stage1/SKIPSkip the build process for stage2 and also skip the image creation:
touch stage2/SKIP && touch stage2/SKIP_IMAGENow run the build script again:
./build.shIn the folder deployment you now should find a zipped image <date>-Cockpit-lite.zip, which is ready for deployment.
Troubleshooting
If you try to apply more complex modifications, there is a lot of trial and error involved in building your own Raspberry Pi image with pi-gen. You will certainly face that the build process will stop in between for some reason. As there is no exception handling in the build process, we do have some cleanup manually in case the process stopped.
It is likely that the chroot file system is still mounted after the process stopped. You won't be able to start a new build process without unmounting it. In the case it is still mounted, unmount it manually by typing:
umount work/<Build-date-&-image-name>/tmpimage/Another issue I determined was that the script stopped when the chroot filesystem was about to be unmounted. In the file scripts/qcow2_handling, you can see that directly before the attempt to unmount sync is called. Sync forces the system to flush the write buffer. Running the build system as a virtual machine, the write process was not ready when unmount was called so the script stopped here.
To solve this, I just inserted a sleep between sync and unmount which solved the issue:

(I know that 30 seconds are overkill but as the whole build process takes > 20 minutes, 30 seconds are just a drop in the ocean)
Modify existing image
In contrast to building an image with pi-gen, you could also directly apply the modification on a running Raspberry Pi OS. In our scenario, simply log in and install Cockpit with the following command:
sudo apt install cockpitNow shut down your Raspberry Pi, take out the SD card, and connect it to your PC. Check if your system has automatically mounted the partitions on the SD card by typing lsblk -p:
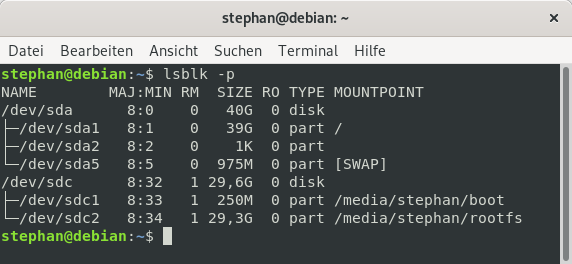
In the screenshot above, the SD card is the device /dev/sdc and the boot- and rootfs-partitions were automatically mounted at the mentioned mount points. Before you proceed, unmount them with :
umount /dev/sdc1 && umount /dev/sdc2Now we copy the contents of the SD card to our file system. Make sure you have enough disk space available as the image will have the same size as the SD card. Start the copy process with the following command:
dd if=/dev/sdc of=~/MyImage.img bs=32M

Once the copy process is finished, we can shrink the image with the PiShrink. Follow the installation instructions mentioned in the repository which are:
wget https://raw.githubusercontent.com/Drewsif/PiShrink/master/pishrink.sh
chmod +x pishrink.sh
sudo mv pishrink.sh /usr/local/bin
Now invoke the script by typing:
sudo pishrink.sh ~/MyImage.img
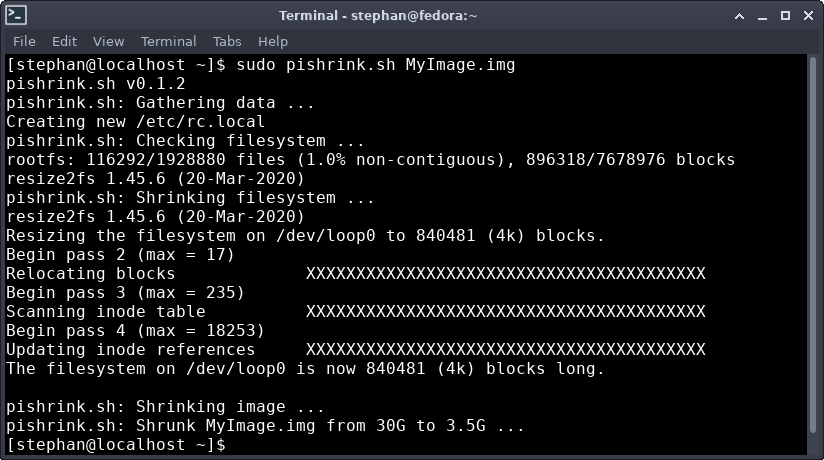
PiShrink reduced the image size by almost a factor of ten: From the former 30GB to 3.5GB. You can still optimize the size by zipping it before you upload or share it.
That's it, you are now able to share and flash this image.
Flashing the image
If you want to flash your own custom Raspberry Pi image back to the SD card using Linux, follow the steps below.
Put the SD card into your PC. Your system will likely automatically mount the filesystem on the SD card if there is already a previous installation. You can check this by opening a command line and typing lsblk -p:
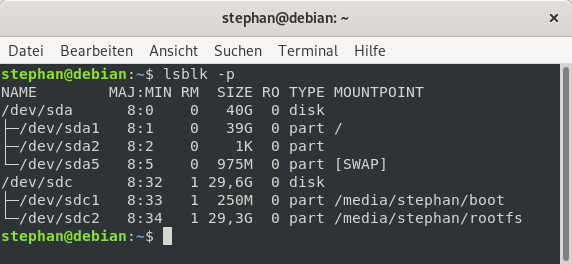
As you can see in the screenshot above, my system automatically mounted two filesystems, boot and rootfs as this SD card already contained a Raspberry Pi OS. Before we start flashing the SD card we have to unmount the file systems first by typing:
umount /dev/sdc1 && umount /dev/sdc2The output of lsblk -p should look like this in order to proceed:
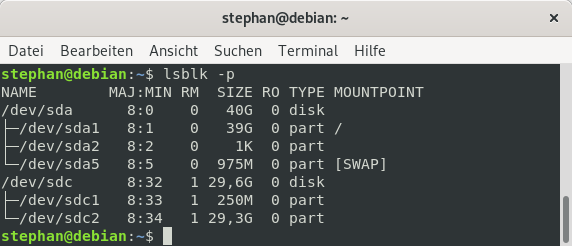
Now you can flash the image to the SD card: Open a command line and type:
dd if=/path/to/image.img of=/dev/sdc bs=32M, conv=fsyncWith bs=32M, you specify that the SD card is written in 32-megabyte blocks, conv=fsync forces the process to physically write each block.
If successful, you should see this output:

Done! You can now put the SD card back into the Raspberry Pi and boot it.
Summary
Both of the techniques presented in this article have their advantages and disadvantages. Whereas using pi-gen to create your own custom Raspberry Pi images is more error-prone than simply modifying an existing image, it is the method of choice if you plan to set up a CICD pipeline. My personal favorite is clearly to modify an existing image as you are directly able to make sure that the changes you applied are working.






Comments are closed.