An important aspect of open source community shepherding is providing on ramps to your project's software, making it as easy as possible for new users to find your software, understand it, and apply it to their own use cases.
One of the methods many community leads are attracted to is the creation of online videos that highlight such use cases in clear, easy-to-follow narratives. Recording screencasts like this is actually a pretty straightforward operation. In this article, I will outline the basic steps needed to record a screencast presentation on a Fedora or other Enterprise Linux 6/7 machine. I will also provide instructions on how to edit a raw screencast into a final, polished video. (See sample screencast video at the end of this article.)
Record your desktop
The first step in making your screencast video will be to actually record your video of the activity on your screen. On Fedora, for example, you need to have gtk-recordmydesktop and recordMyDesktop installed. (You will need to install gtk-recordMyDesktop first, which will in turn install the CLI app recordMyDesktop.)
Hot key help
The recordMyDesktop hot keys are good to know in case you are recording your desktop and the Stop button is not visible:
- Pause: Ctrl + Left-Alt + p
- Stop: Ctrl + Left-Alt + s
Equipment needed
To record sound, you will need a decent microphone with which to record. There are many good models available. One currently recommended is the Samson Go Mic Portable USB Condenser Microphone. You can use your own, just ensure that the quality is good enough upon playback.
Steps
- Launch gtk-recordmydesktop.
- To record sound, ensure that the checkbox beside Sound Quality is checked.
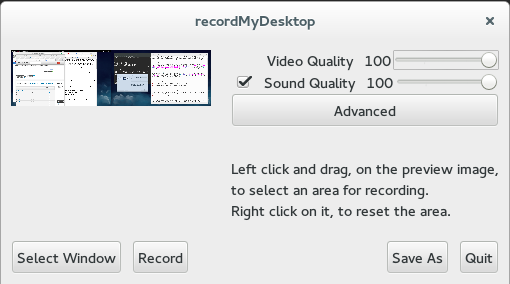
-
Click the button to see the advanced options.
- Click the Advanced button to see the advanced options.
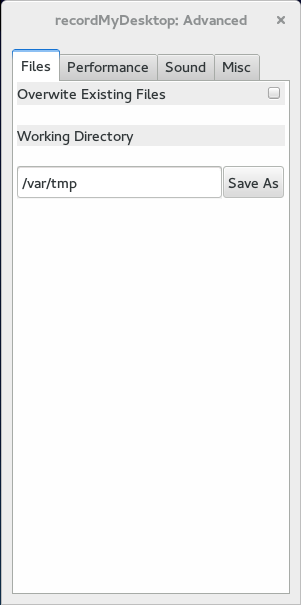
- Click the Performance tab to open the performance window.
- Set the frame rate to 30 Frames Per Second.
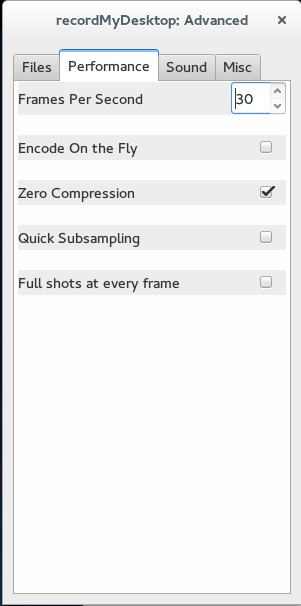
- Click the Sound tab to open the sound window.
- Make sure your sound recording device is displayed on the sound page. If not, plug the device in, make sure it is on, and click the Refresh button.
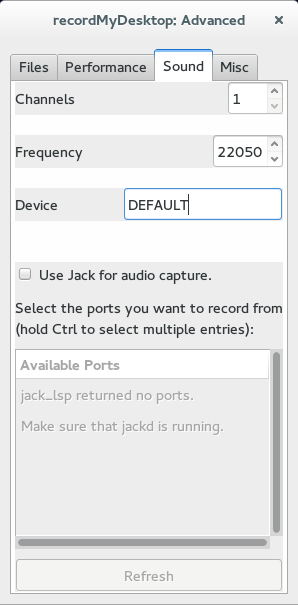
- Close the Advanced dialog box.
Record your entire desktop
By default, RecordMyDesktop will capture everything that happens on your screen. This is a valid option, but you should be aware that the more screen real estate you record, the larger your video file size will be.
- Click the Record button in the main window or the red Record icon in the system tray at the bottom of the screen. The red Record icon will change to a gray Stop icon.
- When you are finished recording your video, click on the Stop button in the system tray.
By default, videos will be stored in your home directory, under the name out.ogv. If the file already exists, RecordMyDesktop will not overwrite it, but instead create a new file with a number at the end to differentiate it. To save the new video with a new name, click the Save As button and save the file under the desired name.
Record a portion of your desktop
In some cases, you will want to record a smaller portion of your desktop. There are two ways to accomplish this:
- In the main window, click and drag within the preview image to select the area you want to record.
- For finer control, right-click on the red Record icon in the system tray and click Select Area On Screen. The cursor changes into a crosshair.
Then click and drag the cursor to select an area to capture. A red rectangle marks the area to record. Release the mouse button and the selected area will be outlined with a black rectangle. Click the red Record icon in the system tray at the bottom of the screen, and the icon will change to a gray Stop icon. When you are finished recording your video, click on the Stop button in the system tray, then the video will be saved under the file name you specified.
Record a program window
In most cases when you want to record a portion of the screen, you actually want to record a particular application's window.
- In the main window, click on the Select Window button. The cursor changes to a crosshair.
- Click a window to select it for recording. The window will be highlighted in the Preview pane.
- Click the red Record icon in the system tray at the bottom of the screen, which will change to a gray Stop icon.
- When you are finished recording your video, click on the Stop button in the system tray, and the video will be saved under the file name you specified.
Create your video
When the raw video is completed, you can use a non-linear video editor, such as Pitivi, to add elements such as title cards, end credits, and even music.
Using Pitivi
If you are recording a brand-new video for YouTube, follow these steps:
- Click on the menu button in the upper right of Pitivi, and then New Project. The Project Settings dialog box will open.
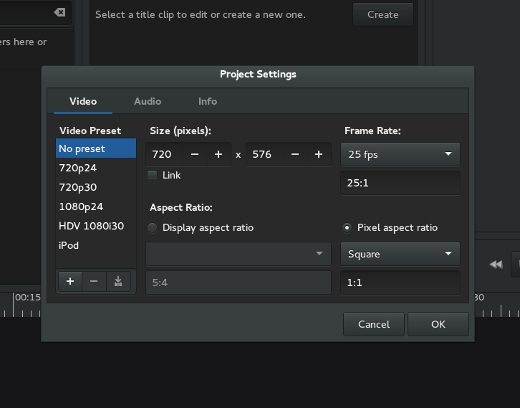
- In the Video tab, select the 1080p24 Video Preset option.
- Click the Info tab to open the Info pane.
- Type a new name for the project in the Project title field.
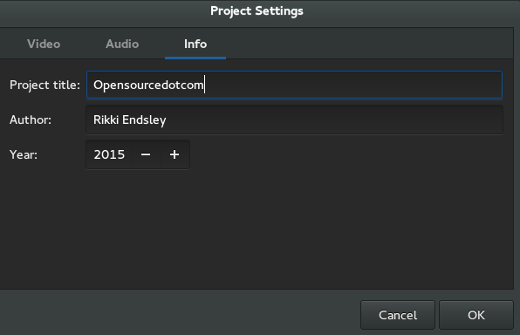
- Click OK to close the Project Settings dialog box, and the new project will be opened.
- When you've finished working, click Save and the Save As dialog box will open.
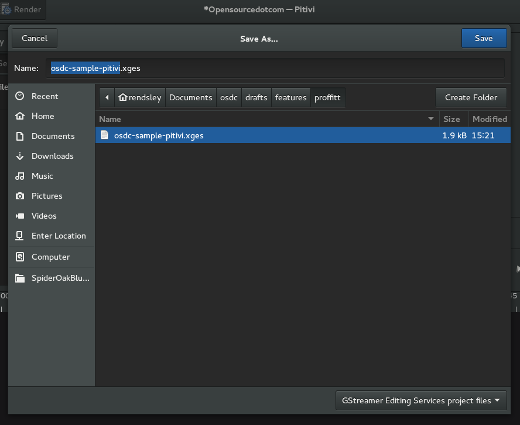
- Save the project under a new file name in a preferred location and click OK.
Open an existing project
To open a project that is in-progress, click on the menu button in the upper right of Pitivi, and then Open Project. Navigate to the project file you want to open, select the file, and click Open.
Import files
To begin a project:
- Click the + Import button in the Media Library. The Select One or More Files dialog box will open.
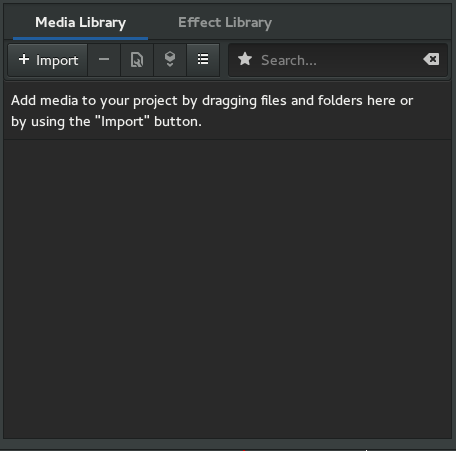
- Navigate to the files you want to add, select them, and click Add, and the files will be added to the project.
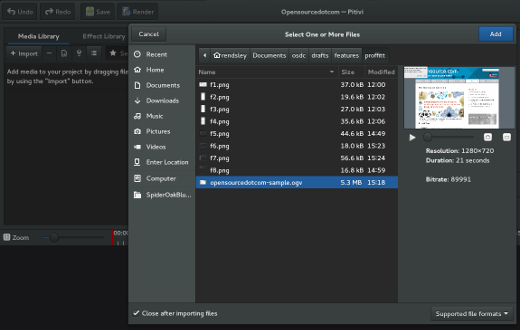
- Repeat Step 2 until all the desired files are added. The files will appear in the Media Library section of the main Pitivi window.
Working with clips
Clips are a visual representation of your files on the timeline. They represent the period of time consumed on the timeline and can be edited independently. Each time you drag a file from the Media Library to the timeline, a new clip is created. Thus, a file can be reused as much as you want to create any amount of different clips. To insert a clip into the editing timeline:
- Drag and drop a file to clip onto a place in the timeline from the Media Library.
- Select a file to clip and click the Insert button to insert the selected clips at the end of the timeline in the Media library.
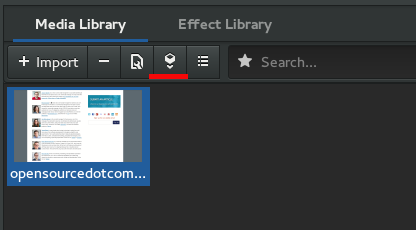
You can move a clip within a layer or move it to a different layer. There are various ways to move clips in the timeline:
- Click and drag a single clip to move it, and release the mouse button to place it. Dragging horizontally keeps the clip on the same layer, but dragging it vertically moves the clip to a different layer (see Understanding layers for more information).
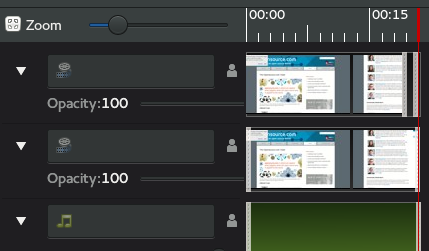
- To move a clip to an existing layer, drag it on the layer and release it when a gray shadow (representing the space the clip would occupy) appears.
- To move a clip to a new layer, drag it to the middle space between two existing layers. Once the gray shadow (now a thin rectangle) appears between the layers, release it.
- To move multiple clips at the same time, use the Ctrl or Shift keys to select multiple clips.
Selected clips do not need to be on the same layer. Drag the clips just as you would do for a single clip; their position relative to each other will be preserved.
While dragging clips around in the timeline, you can use the ripple technique to move the subsequent clips to fill the gap.
During the drag operation, if you changed your mind and only want to drag one clip at a time, release the Shift key before you release the mouse button.
Basic editing in the timeline
There are many useful tools within Pitivi's timeline, which is where much of the editing will take place. If you are familiar with non-linear video editing tools, the interface in Pitivi will be familiar. If this is a new area for you, refer to Pitivi's excellent documentation:
- Moving around the timeline: Moving the playhead, using the zoom feature, scrolling, and scrubbing.
- Keyframe curves: Change the properties of a clip over time.
- Selection and grouping: Making selections and grouping clips in the timeline.
- Splitting: Dividing clips into two parts.
- Trimming: Shortening clips by changing the beginning and ending points. Also covers ripple and roll editing.
- Understanding layers: Explaining how layers work within the timeline.
- Using Effects: Configuring effects and using Effect Library
- Transitions: Applying crossfades, fade-ins, fade-outs, and other types of transitions.
Finishing your movie
Rendering is the process of exporting your project into a new, finalized media file that can be shared or uploaded to a site like YouTube. Rendering only creates a new "rendered" video file, and does not affect the project itself; you can still make edits to your project and render a new version of a video as many times as needed.
- Click the Render button at the top of Pitivi. The rendering dialog box will open.
- Adjust the various encoding settings, if needed, to use settings different from the project settings. If you specified the encoding settings at the start of the project, these should be all set. For more information, see Pitivi's Understanding codecs and containers documentation.
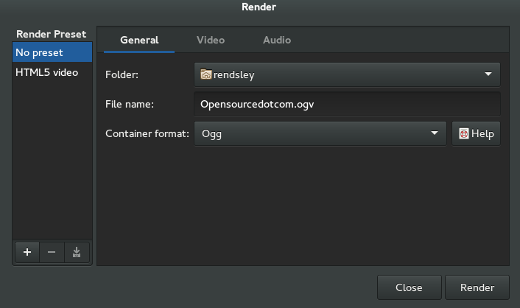
- Click the Render button.
While the file is rendering, you can pause the process by clicking the Pause button and unpause it by clicking it again. You can also stop rendering either by clicking the Cancel button or by pressing Esc. If you stop the rendering process, the already-rendered part of the video will be saved into the specified folder and Pitivi will offer you the rendering dialog box again.
Screencasts are an important tool for community members who want to share technical understanding of their project with new and experienced users. Open source software tools have made creating screencasts easier than ever. Do you have favorite screencasts tools or tips? Let us know about them in the comments.


5 Comments