

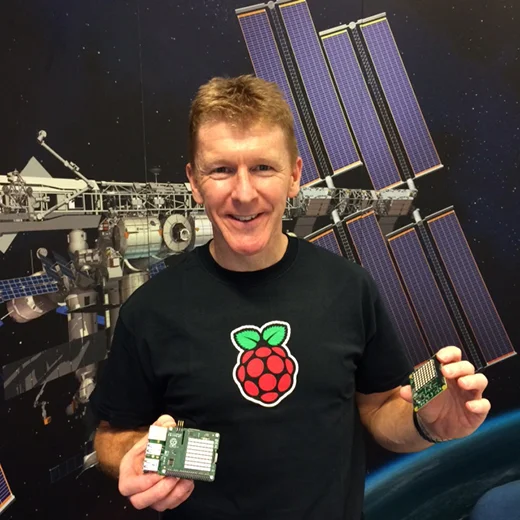
In my first article in my series, I wrote about the Astro Pi competition, an opportunity for UK school students to have their coded experiments run in space. We're getting closer and closer to the launch date of December 15, when British European Space Agency (ESA) Astronaut Tim Peake will embark on his six-month mission, Principia. He'll be conducting scientific experiments and engaging with young people in educational outreach activities. As part of this, he's taking up two Raspberry Pi computers in purpose-built flight cases, each with camera modules and sensor boards attached. These will be running Python programs written by the Astro Pi competition winners.
The flight case
The Raspberry Pis must be mounted using a Bogen arm on the space station, like the ones used to dock crew laptops. They also must be certified as completely safe for the Soyuz rocket, which will take it to the ISS, and then for continued use in space. The Raspberry Pi team has been working closely with the ESA and the UK Space Agency to get the flight safety certificate.

In addition to lots of testing, our work included building a bespoke case made of aerospace-grade aluminum designed with thermal considerations (convection doesn't occur in space) and practicality in mind, and the ability for the board's sensors to work effectively in the atmosphere. Because the case is expensive to manufacture, it won't be available to buy, but we plan to release the 3D print files from the prototype so people can make their own. One school even built a model out of Lego.
We've built a Lego version of the @astro_pi flight case to make sweaty-astronaut testing as realistic as possible. pic.twitter.com/pYETedeWgn
— Richard Hayler ☀ (@rdhayler) July 9, 2015
The hardware
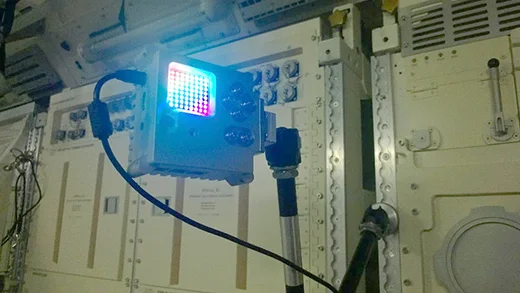
The flight cases will each contain a Raspberry Pi, a Sense HAT, a real-time clock, and a camera module. The Sense HAT is an add-on board for the Pi created especially for the Astro Pi mission by the Foundation's engineering team. It packs an 8x8 full-color LED display; a mini joystick; a set of sensors for temperature, humidity, and pressure; an accelerometer; a gyroscope; and a magnetometer.
The Sense HAT is now available to buy, and it's bound to be used in a number of amazing projects and experiments here on Earth.You can buy from the Raspberry Pi Swag Store in the UK, from Adafruit in the US, or from any other Pi accessory retailer around the world.
Sense HAT software
The Raspberry Pi Foundation provides a Python programming interface to the Sense HAT that comes bundled with the latest Raspbian image based on Debian Jessie. The interface provides easy access to the LED display and the sensors, enabling users to build their own applications and projects around the hardware. In just a few lines you can show the current temperature sensor value on the display:
from sense_hat import SenseHat
sense = SenseHat()
 temperature = sense.temperature
 sense.show_message("Temperature is %d" % temperature)
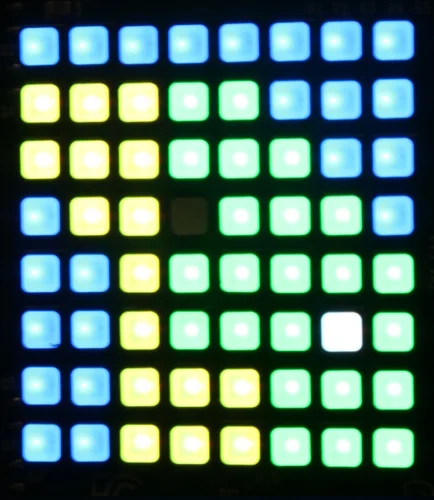
A similar example takes the humidity value and displays a visualization of the humidity percentage by filling the LED grid with green pixels accordingly:
 green = (0, 255, 0)
 white = (255, 255, 255)

 while True:
 humidity = sense.humidity
 humidity_value = 64 * humidity / 100
 print(humidity)

 pixels = [green if i < humidity_value else white for i in range(64)]
sense.set_pixels(pixels)
When you breathe on the board, you'll see the number of green pixels grow, then slowly drop back down. This gets more interesting when you place the board inside a sealed sandwich bag and blow air into it using a straw. With some huffing and puffing, you should be able to get it to reach 100%!
.@JarJarGeek tries my humidity test with the Sense HAT. Managed to get it to 100% by putting it in a sandwich bag. pic.twitter.com/qfUZGTXdYw
— Ben Nuttall (@ben_nuttall) September 12, 2015
Build up your own image of color tuples in a 64-length list and pass that directly to the Sense HAT to display the image:
 X = (255, 0, 0)
 O = (255, 255, 255)

 question_mark = [
 O, O, O, X, X, O, O, O,
 O, O, X, O, O, X, O, O,
 O, O, O, O, O, X, O, O,
 O, O, O, O, X, O, O, O,
 O, O, O, X, O, O, O, O,
 O, O, O, X, O, O, O, O,
 O, O, O, O, O, O, O, O,
 O, O, O, X, O, O, O, O
 ]
sense.set_pixels(question_mark)
You can provide a list of such images to animate:
 animation = [image_1, image_2, image_3, image_4]

 while True:
 for image in animation:
  sense.set_pixels(image)
  sleep(0.5)
...like this video of a set of retro game characters displayed on the Sense HAT:
You can even load 8x8 pixel image files into the library:
sense.load_image("space_invader.png")
Use PyGame to capture joystick events, which are mapped to keyboard keys:
if event.key == pygame.K_DOWN:
sense.set_pixels(down_image) elif event.key == pygame.K_UP:
sense.set_pixels(up_image) elif event.key == pygame.K_LEFT:
sense.set_pixels(left_image)
elif event.key == pygame.K_RIGHT:
sense.set_pixels(right_image)
elif event.key == pygame.K_RETURN:
sense.set_pixels(enter_image)
Make your Sense HAT show jokes:
jokes = [
 "What happens to a frog's car when it breaks down? It gets toad away",
 "Why was six scared of seven? Because seven eight nine",
]
joke = random.choice(jokes)
sense.show_message(joke)
Or, if you're so-inclined, geeky jokes from pyjokes:
 joke = pyjokes.get_joke()

 sense.show_message(joke)
Use the accelerometer to make a Magic 8 Ball:
replies = [
 "Signs point to yes",
 "Without a doubt",
 "Don't count on it",
 "It is decidedly so",
]
while True:
 x, y, z = sense.accelerometer.values()

 if x > 2 or y > 2 or z > 2:
  reply = random.choice(replies)
  sense.show_message()

 else:
  sense.clear()
Learn about the Minecraft API and how to use it to turn the Sense HAT display into a map of your Minecraft world:
Try these examples and more:
- Sense HAT Python documentation
- Getting Started with the Sense HAT, Astro Pi Guide and more on the Raspberry Pi Learning Resources
- Dave Honess's Sense HAT Examples
- My Sense HAT examples
- Martin O'Hanlon's Sense HAT examples
- Richard Hayler's PyGame application for creating 8x8 images
column
This article is part of Ben Nuttall's Raspberry Pi column, where he shares news and stories from the world of tiny computing.


5 Comments