Last year, around Pi Day, I authored an article here on Opensource.com on how to set up a music light show with your Raspberry Pi. Before creating the light show, I encouraged the reader to learn about breadboards and the CanaKit as a way to do some prototyping controls with the Raspberry Pi and LEDs.
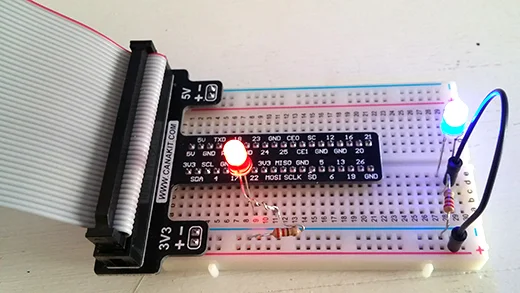
I will be the first one to admit that plugging in all the wires, resistors, and LEDs that come with the kit can be a bit intimidating and potentially harmful to your hardware if you set it up improperly.
In an effort to simplify your exposure to the Raspberry Pi, LEDs, and writing the code that controls them, I decided to write about a little gizmo called the Pi Traffic Light. It has just about everything you need to start controlling LEDs with your Pi.
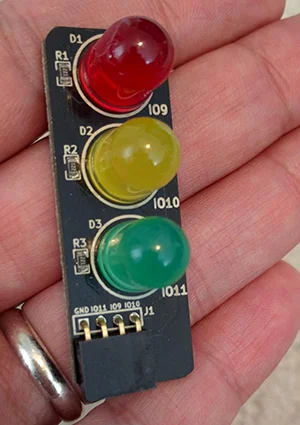
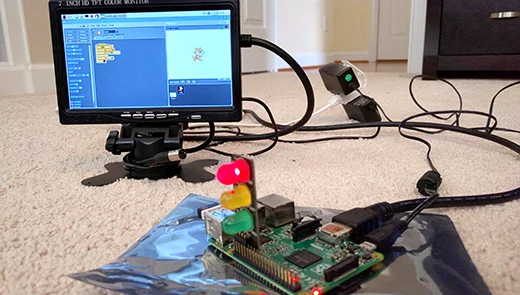
A close-up of the Pi Traffic Light.
With the Pi Traffic Light, all you need to do is plug in the little device directly into the GPIO pins on your Raspberry Pi. You don't need to worry about connecting wires properly on a breadboard, finding the right resistor for your LED, or figuring out which wire goes in the negative or positive end of your breadboard.
By default, the Pi Traffic Light is labeled to be plugged into GPIO pins 10, 9, 11, and ground (GND), which are set next to each other on the Pi. In the later versions of the Raspberry Pi, these pins are in the middle of the GPIO area and can be a little tricky to count to (especially if you have poor eyesight or lighting). I prefer to plug in my Pi Traffic Light device on GPIO pins 13, 19, 26, and GND because they are much easier to spot on the board.
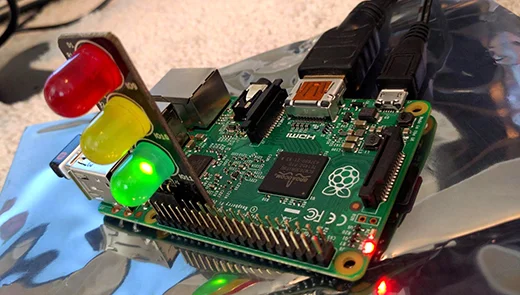
Once you are plugged in, start your Raspberry Pi and write up some code to control the LEDs. For this article, I wrote a couple of examples. In the first one, I used Python to read the CPU utilization level of my Raspberry Pi using the psutil library and control the red, yellow, green light with the RPi.GPIO library.
If the CPU load is under 50%, show green. If CPU load is between 50% and 90%, show yellow. If the CPU load is over 90%, then red. There is also an exception handler, so when someone hits Ctrl+C to quit the program, all lights are turned off. For all intents and purposes, this code makes your Pi Traffic Light into a CPU utilization dashboard for your Raspberry Pi.
#!/usr/bin/env python
# to use with Pi Traffic Light

import RPi.GPIO as GPIO
import psutil

GREEN = 26
YELLOW = 13
RED = 19

# Pin Setup:
GPIO.setmode(GPIO.BCM)   # Broadcom pin-numbering scheme.
GPIO.setwarnings(False)
GPIO.setup(GREEN, GPIO.OUT)
GPIO.setup(YELLOW, GPIO.OUT)
GPIO.setup(RED, GPIO.OUT)

try:
   while (1):
      cpu_pc = psutil.cpu_percent(interval=2)
      print 'CPU: %d%%' % (cpu_pc)
      if cpu_pc = 50:
         GPIO.output(RED, False)
         GPIO.output(YELLOW, False)
         GPIO.output(GREEN, True)
      if 50  cpu_pc  90:
         GPIO.output(GREEN, False)
         GPIO.output(RED, False)
         GPIO.output(YELLOW, True)
      if cpu_pc >=90 :
         GPIO.output(GREEN, False)
         GPIO.output(YELLOW, False)
         GPIO.output(RED, True)
except KeyboardInterrupt:
    print "Good bye"
    GPIO.output(GREEN, False)
    GPIO.output(YELLOW, False)
    GPIO.output(RED, False)
The second example is much simpler—but in a way, a bit more interesting—because I used Scratch to control the LED. Scratch is a free visual programming language that allows the programmer to create interactive games, stories, and animations. It was originally developed at MIT and has had great success around the world as a way to introduce kids to concepts of programming.
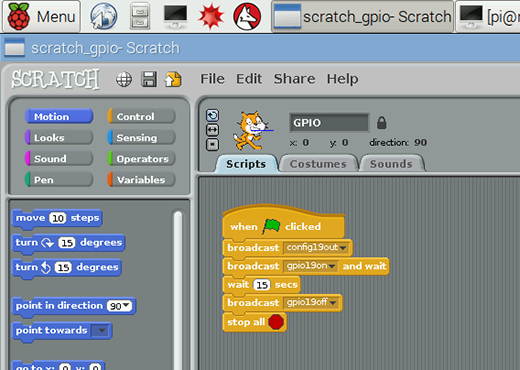
The first thing you have to do to allow Scratch to interact with the Raspberry Pi's GPIO pin is open up the program, go to Edit, and select Start GPIO server. Then you can use the broadcast blocks to identify which GPIO pin you want to use. In the screenshot above, the two broadcast blocks refer to config19out and gpio19on. And guess what? GPIO 19 maps to the red LED.
For more information on how to interact with the GPIO pins using Scratch, check out this Raspberry Pi Foundation resource.
In closing, if you are intimidated by the electronics, I hope this quick introduction to the Pi Traffic Light will help you become more curious and interested in what the Raspberry Pi has to offer. And if you or someone you know is trying to learn how to code, my hope is that using Scratch will keep things fun and interesting as you control LEDs with it.





3 Comments