So you have a Raspberry Pi, or you’re thinking of getting one, and you want to know how to get started and how to become a master user of one.
The Raspberry Pi is a single board computer, meaning that in many ways it's a regular PC, except that everything that makes up the computer is on a single board rather than a traditional PC, which has a motherboard and requires a number of additional daughterboards to make a whole unit.
Models
There are a number of different Raspberry Pi models. If you're buying now, the best one for general use is the Pi 3 Model B. It's the latest and greatest all-round. Other models, like the Pi Zero, are better for embedded projects, but if you know how to get going on a Pi 3, you are making a great start. For a comparison of the different models, see my previous article Which Raspberry Pi should you choose for your project?
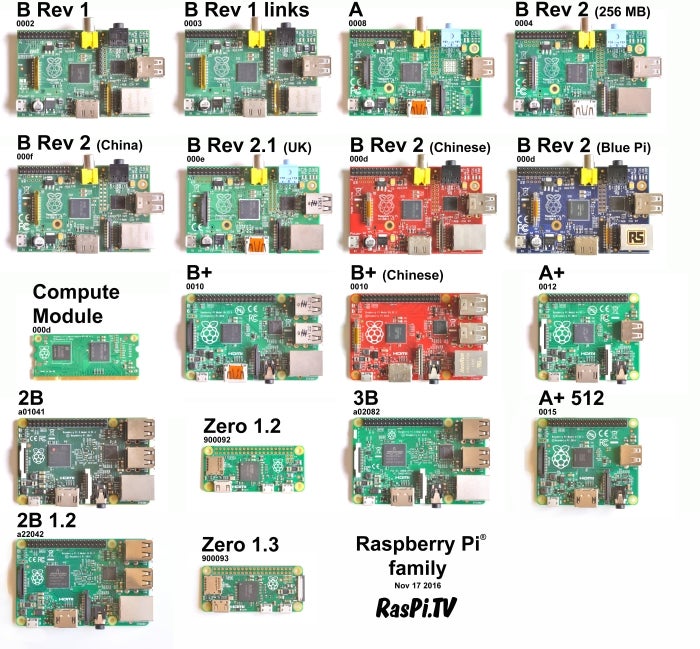
Image by Alex Eames, CC BY-SA
Hardware: What do you need?
For everyday use, you’ll need to connect a mouse, keyboard, and display, as well as power. Specifically, you’ll need:
- USB mouse
- USB keyboard
- TV or monitor
- HDMI cable
- Micro USB power cable
- Micro SD card
If your monitor is DVI or VGA, you’ll need an adapter. Any old Micro USB cable will power a Pi 1, but the hungrier Pi 2 or 3 require a 2A and 2.5A power supply, respectively.
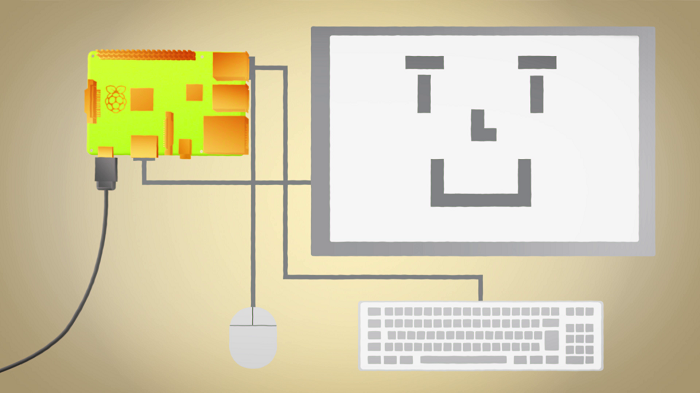
Image by Raspberry Pi Foundation, CC BY-SA
You may use an Ethernet cable for a more reliable network connection or use a USB dongle to add Wi-Fi or Bluetooth, or connect up another USB device.
Optional extras:
- Ethernet cable
- USB Wi-Fi dongle
- USB Bluetooth dongle
- Headphones or speakers
Note that the Pi 3 has built-in Wi-Fi and Bluetooth, so dongles for these are unnecessary. You can even use Bluetooth for audio if you have a Bluetooth speaker or headphones, but don't worry, the Pi still has a 3.5mm headphone jack.
Software: Installing an operating system
The Raspberry Pi boots from a Micro SD card. The card holds the Pi's operating system and files the way a hard drive would in a PC. Many operating systems are available for the Pi and most are distributions of Linux. The operating system maintained and officially supported by the Raspberry Pi Foundation is Raspbian, which is based on Debian, optimized for the Raspberry Pi, and includes lots of useful software.
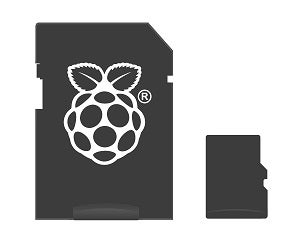
Image by Raspberry Pi Foundation, CC BY-SA
Advanced users will be familiar with installing an image to an SD card, but for beginners an operating system installer called NOOBS (New Out Of the Box Software) was created to make the process easier.
The easiest way to get started is to buy a Micro SD card pre-installed with NOOBS. You can often buy a Raspberry Pi with the SD card included or you can buy the pre-installed SD card alone.
If you have a Micro SD card lying around and would like to use that, you can easily download and install Raspbian yourself.
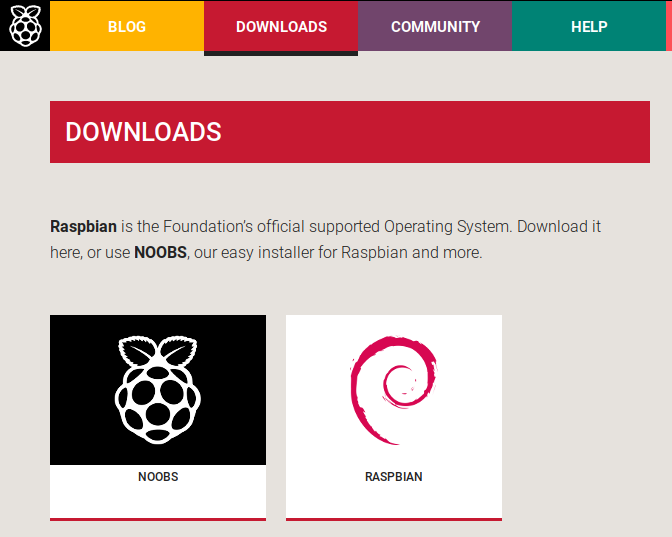
Image by Raspberry Pi Foundation, CC BY-SA
Beginners: NOOBS
The easiest way to get started is by tackling NOOBS. You just have to download NOOBS from the Raspberry Pi website, extract the files from the ZIP, format the SD card, then drag-and-drop the files onto the SD card. That's it—you’ve installed NOOBS and you’re ready to go. See the Raspberry Pi quick start guide for more information.
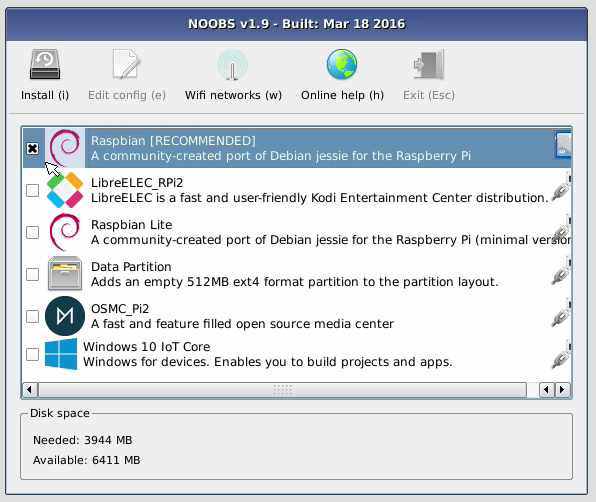
Image by Raspberry Pi Foundation, CC BY-SA
Another easy option: Etcher
Another easy option is to download the Raspbian image from the Raspberry Pi website, and download Etcher from etcher.io. Launch Etcher, choose your Raspbian .img file, choose your SD card drive, and hit Flash.

Image by Raspberry Pi Foundation, CC BY-SA
Advanced: dd
Advanced users, particularly those using Linux or Mac who are familiar with the terminal, will find this method the easiest. Just download the Raspbian image, unzip it so you have a .img file, then follow these steps:
1. Look up your SD card device using df -h. (Try before and after inserting the SD card into your computer to see which device it is. It will be something like /dev/sdb)
2. Unmount all partitions; for example:
sudo umount /dev/sdb1
sudo umount /dev/sdb2
3. Copy the image to the SD card device using dd:
sudo dd bs=4M if=raspbian.img of=/dev/sdb
4. When this is complete, type sudo sync and you can remove the SD card.

Image by Raspberry Pi Foundation, CC BY-SA
Powering up
Make sure you have everything you need connected:
- Mouse
- Keyboard
- Monitor
- Micro SD card
Finally, connect the power. The Pi will start to boot. If you’re booting NOOBS for the first time, you’ll be given a menu. Choose Raspbian, and leave it to run the installer. If you've successfully installed Raspbian (either using NOOBS or directly), then the Pi will boot to Raspbian’s PIXEL desktop environment:
![]()
Image by Raspberry Pi Foundation, CC BY-SA
Raspbian: A look around
Now you're looking at the Raspbian Jessie PIXEL desktop. It should look and feel familiar to desktop and laptop computers you’ve used before, whether Windows, Mac, Linux, or Chrome OS. There's a menu in the top bar: Click it to reveal the programs available. Raspbian comes with a great suite of applications including a web browser (Chromium), an office suite (LibreOffice), programming environments (Scratch, Python, Sonic Pi, Java, and Mathematica), games (Minecraft and Python Games), and general utilities (Archiver, Terminal, and Leafpad text editor).
Installing additional software
As well as the selection of software pre-installed with Raspbian, you have whole host of other software you can install, too. If you're familiar with Linux, particularly Debian or Ubuntu, you'll know that you can easily install software from the distribution’s repository using sudo apt-get install. For example, to install the Gnome Scheduler, simply open a Terminal and type:
sudo apt-get update
...to update your package list, and then type:
sudo apt-get install gnome-schedule
...to install the package.
Next steps
All I've shown you so far has been using the Raspberry Pi as a desktop PC, but as well as being a very small and affordable computer, it also has much more interesting capabilities you won’t find on your average PC or laptop.

Image by Raspberry Pi Foundation, CC BY-SA
GPIO
The Pi has a set of 40 pins, which are GPIO (General Purpose Input Output) pins that you can use to connect electronic components like lights, buzzers, motors, and sensors, and write programs that interact with them—read sensor values and control lights, buzzers, and motors.
The easiest way to use GPIO is through a Python library called GPIO Zero.
Add-ons
As well as connecting up electronic components, there is also a community ecosystem of add-on boards with all the components built-in to a single board, such as the Sense HAT, which adds an LED matrix, a bunch of sensors, and a mini joystick to your Pi. This is perfect for science experiments, games, and more. The Pi also has an emulator for the Sense HAT, so you can try it out without buying additional hardware.
See my article on my top 10 add-on boards.
IoT
The Internet of Things (IoT) is all about connecting ordinary devices together in your home or anywhere. Because the Raspberry Pi is so small, cheap, and easy to connect to the internet or a local network, and program in any language, it's a popular tool for hobbyists making their own IoT devices. Check out IoT related posts on the Raspberry Pi blog.
Community
The Raspberry Pi community is a friendly and welcoming one, both online and offline. Read the Raspberry Pi blog, join the Raspberry Pi forums, peruse the Stack exchange, or follow Raspberry Pi on Twitter, Facebook, or Google+. You also have available a brilliant network of family-friendly Raspberry Pi events called Raspberry Jam. Be sure to take a look at the map and see if there is one near you.



Comments are closed.