

Security is one of the most important considerations for running in any environment, and using open source software is a great way to handle security without going over budget in your corporate environment or for your home setup. It is easy to talk about the concepts of security, but it's another thing to understand the tools that will get you there. This tutorial explains how to set up security using Jenkins with Anchore.
There are many ways to run Kubernetes. Using Minikube, a prepackaged virtual machine (VM) environment designed for local testing, reduces the complexity of running an environment.
| Technology | What is it? |
|---|---|
| Jenkins | An open source automation server |
| Anchore | A centralized service for inspection, analysis, and certification of container images |
| Minikube | A single-node Kubernetes cluster inside a VM |
In this tutorial, you'll learn how to add Jenkins and Anchore to Kubernetes and configure a scanning pipeline for new container images and registries.
Note: For best performance in this tutorial, Minikube requires at least four CPUs.
Basic requirements
Knowledge
- Docker (including a Docker Hub account)
- Minikube
- Jenkins
- Helm
- Kubectl
Software
- Minikube
- Helm
- Kubectl client
- Anchore CLI installed locally
Set up the environment
Install Minikube in whatever way that makes sense for your environment. If you have enough resources, I recommend giving a bit more than the default memory and CPU power to your VM:
$ minikube config set memory 8192
⚠️  These changes will take effect upon a minikube delete and then a minikube start
$ minikube config set cpus 4
⚠️  These changes will take effect upon a minikube delete and then a minikube start
If you are already running a Minikube instance, you must delete it using minikube delete before continuing.
Next, install Helm, the standard Kubernetes package manager, in whatever way makes sense for your operating system.
Now you're ready to install the applications.
Install and configure Anchore and Jenkins
To begin, start Minikube and its dashboard.
$ minikube start
?  minikube v1.1.0 on darwin (amd64)
?  Tip: Use 'minikube start -p <name>' to create a new cluster, or 'minikube delete' to delete this one.
?  Restarting existing virtualbox VM for "minikube" ...
⌛  Waiting for SSH access ...
?  Configuring environment for Kubernetes v1.14.2 on Docker 18.09.6
?  Relaunching Kubernetes v1.14.2 using kubeadm ...
⌛  Verifying: apiserver proxy etcd scheduler controller dns
?  Done! kubectl is now configured to use "minikube"

$ minikube dashboard
?  Enabling dashboard ...
?  Verifying dashboard health ...
?  Launching proxy ...
?  Verifying proxy health ...
?  Opening https://127.0.0.1:52646/api/v1/namespaces/kube-system/services/http:kubernetes-dashboard:/proxy/ in your default browser...
As long as you stay connected to this terminal session, you will have access to a visual dashboard for Minikube at 127.0.0.1:52646.

Create namespace and install Jenkins
The next step is to get the Jenkins build environment up and running. To start, ensure your storage is configured for persistence so you can reuse it later. Set the storage class for Persistent Volumes before you install Helm, so its installation will be persistent across reboots.
Either exit the dashboard using CTRL+C or open a new terminal to run:
$ minikube addons enable default-storageclass
✅  default-storageclass was successfully enabled
Using namespaces
I test quite a few different applications, and I find it incredibly helpful to use namespaces in Kubernetes. Leaving everything in the default namespace can overcrowd it and make it challenging to uninstall a Helm-installed application. If you stick to this for Jenkins, you can remove it by running helm del --purge jenkins --namespace jenkins then kubectl delete ns jenkins. This is much easier than manually hunting and pecking through a long list of containers.
Install Helm
To use Helm, Kubernetes' default package manager, initialize an environment and install Jenkins.
$ kubectl create ns jenkins
namespace "jenkins" created
$ helm init
helm init
Creating /Users/alleycat/.helm
Creating /Users/alleycat/.helm/repository
Creating /Users/alleycat/.helm/repository/cache
Creating /Users/alleycat/.helm/repository/local
Creating /Users/alleycat/.helm/plugins
Creating /Users/alleycat/.helm/starters
Creating /Users/alleycat/.helm/cache/archive
Creating /Users/alleycat/.helm/repository/repositories.yaml
Adding stable repo with URL: https://kubernetes-charts.storage.googleapis.com
Adding local repo with URL: https://127.0.0.1:8879/charts
$HELM_HOME has been configured at /Users/alleycat/.helm.

Tiller (the Helm server-side component) has been installed into your Kubernetes Cluster.

Please note: by default, Tiller is deployed with an insecure 'allow unauthenticated users' policy.
To prevent this, run `helm init` with the --tiller-tls-verify flag.
For more information on securing your installation see: https://docs.helm.sh/using_helm/#securing-your-helm-installation
$ helm install --name jenkins stable/jenkins --namespace jenkins
NAME:   jenkins
LAST DEPLOYED: Tue May 28 11:12:39 2019
NAMESPACE: jenkins
STATUS: DEPLOYED

RESOURCES:
==> v1/ConfigMap
NAME           DATA  AGE
jenkins        5     0s
jenkins-tests  1     0s

==> v1/Deployment
NAME     READY  UP-TO-DATE  AVAILABLE  AGE
jenkins  0/1    1           0          0s

==> v1/PersistentVolumeClaim
NAME     STATUS   VOLUME    CAPACITY  ACCESS MODES  STORAGECLASS  AGE
jenkins  Pending  standard  0s

==> v1/Pod(related)
NAME                      READY  STATUS   RESTARTS  AGE
jenkins-7565554b8f-cvhbd  0/1    Pending  0         0s

==> v1/Role
NAME                     AGE
jenkins-schedule-agents  0s

==> v1/RoleBinding
NAME                     AGE
jenkins-schedule-agents  0s

==> v1/Secret
NAME     TYPE    DATA  AGE
jenkins  Opaque  2     0s

==> v1/Service
NAME           TYPE          CLUSTER-IP    EXTERNAL-IP  PORT(S)         AGE
jenkins        LoadBalancer  10.96.90.0    <pending>    8080:32015/TCP  0s
jenkins-agent  ClusterIP     10.103.85.49  <none>       50000/TCP       0s

==> v1/ServiceAccount
NAME     SECRETS  AGE
jenkins  1        0s


NOTES:
1. Get your 'admin' user password by running:
  printf $(kubectl get secret --namespace jenkins jenkins -o jsonpath="{.data.jenkins-admin-password}" | base64 --decode);echo
2. Get the Jenkins URL to visit by running these commands in the same shell:
  NOTE: It may take a few minutes for the LoadBalancer IP to be available.
        You can watch the status of by running 'kubectl get svc --namespace jenkins -w jenkins'
  export SERVICE_IP=$(kubectl get svc --namespace jenkins jenkins --template "{{ range (index .status.loadBalancer.ingress 0) }}{{ . }}{{ end }}")
  echo https://$SERVICE_IP:8080/login

3. Login with the password from step 1 and the username: admin


For more information on running Jenkins on Kubernetes, visit:
https://cloud.google.com/solutions/jenkins-on-container-engine
Note the Bash one-liner above that begins with printf; it allows you to query for the Jenkins password and it can be challenging to find your default Jenkins password without it. Take note of it and save it for later.
Set up port forwarding to log into the UI
Now that you've installed Minikube and Jenkins, log in to configure Jenkins. You'll need the Pod name for port forwarding:
$ kubectl get pods --namespace jenkins
NAME                       READY     STATUS    RESTARTS   AGE
jenkins-7565554b8f-cvhbd   1/1       Running   0          9m
Run the following to set up port forwarding (using your Jenkins pod name, which will be different from mine below):
# verify your pod name from the namespace named jenkins
kubectl get pods --namespace jenkins
NAME                       READY     STATUS    RESTARTS   AGE
jenkins-7565554b8f-cvhbd   1/1       Running   0          37m
# then forward it
$ kubectl port-forward jenkins-7565554b8f-cvhbd 8088:8080 -n jenkins
Forwarding from 127.0.0.1:8088 -> 8080
Forwarding from [::1]:8088 -> 8080
Note that you will need multiple tabs in your terminal once you run the port-forwarding command.
Leave this tab open going forward to maintain your port-forwarding session.
Navigate to Jenkins in your preferred browser by going to localhost:8088. The default username is admin and the password is stored in Kubernetes Secrets. Use the command at the end of the helm install jenkins step:
$ printf $(kubectl get secret --namespace jenkins jenkins -o jsonpath="{.data.jenkins-admin-password}" | base64 --decode);echo
Jfstacz2vy
After logging in, the UI will display Welcome to Jenkins!

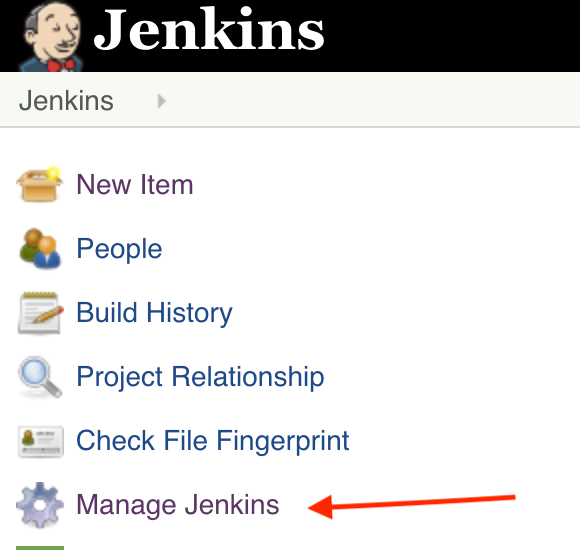
From here we'll have to install some plugins to Jenkins for our pipeline to work properly. From the main page choose Manage Jenkins on the left-hand side.
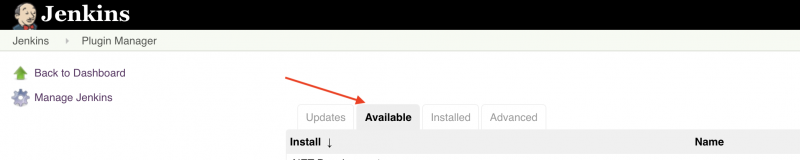
Then choose Manage Plugins

Then choose Available
Then choose the checkboxes beside these plugins shown below
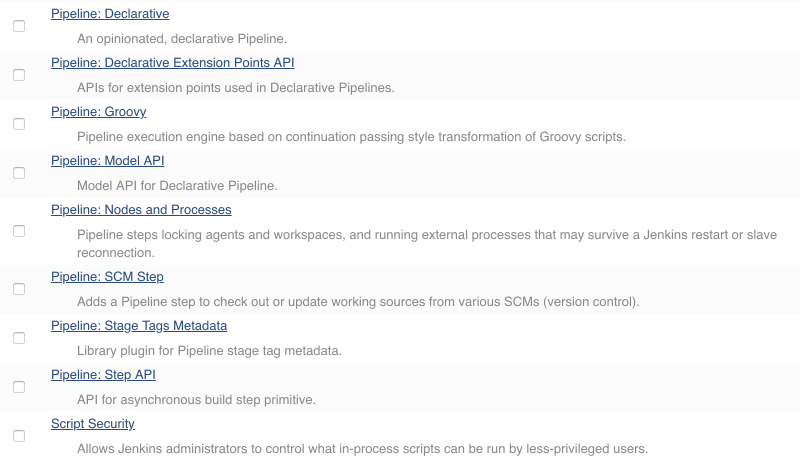
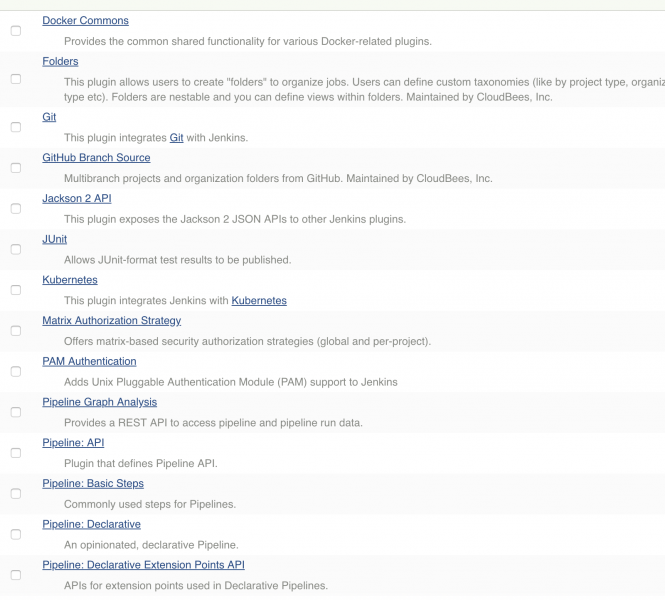
Once you have checked the boxes scroll to the bottom of the page and choose Install without Restart.

Deploy Anchore
Anchore Engine "is an open source project that provides a centralized service for inspection, analysis, and certification of container images." Deploy it within Minikube to do some security inspection on your Jenkins pipeline. Add a security namespace for the Helm install, then run an installation:
$ kubectl create ns security
namespace "security" created
$ helm install --name anchore-engine stable/anchore-engine --namespace security
NAME:   anchore-engine
LAST DEPLOYED: Wed May 29 12:22:25 2019
NAMESPACE: security
STATUS: DEPLOYED
## And a lot more output
Confirm that the service is up and running with this command:
kubectl run -i --tty anchore-cli --restart=Always --image anchore/engine-cli --env ANCHORE_CLI_USER=admin --env ANCHORE_CLI_PASS=${ANCHORE_CLI_PASS} --env ANCHORE_CLI_URL=https://anchore-engine-anchore-engine-api.security.svc.cluster.local:8228/v1/
If you don't see a command prompt, try pressing enter.
[anchore@anchore-cli-86d7fd9568-rmknw anchore-cli]$
If you are logged into an Anchore container (similar to above), then the system is online. The default password for Anchore is admin/foobar. Type exit to leave the terminal.
Use port forwarding again to access the Anchore Engine API from your host system:
$ kubectl get pods --namespace security
NAME                                                         READY     STATUS    RESTARTS   AGE
anchore-engine-anchore-engine-analyzer-7cf5958795-wtw69      1/1       Running   0          3m
anchore-engine-anchore-engine-api-5c4cdb5587-mxkd7           1/1       Running   0          3m
anchore-engine-anchore-engine-catalog-648fcf54fd-b8thl       1/1       Running   0          3m
anchore-engine-anchore-engine-policy-7b78dd57f4-5dwsx        1/1       Running   0          3m
anchore-engine-anchore-engine-simplequeue-859c989f99-5dwgf   1/1       Running   0          3m
anchore-engine-postgresql-844dfcc468-s92c5                   1/1       Running   0          3m
# Find the API pod name above and add it to the command below
$ kubectl port-forward anchore-engine-anchore-engine-api-5c4cdb5587-mxkd7 8228:8228 --namespace security
Join Anchore and Jenkins
Go back to the Jenkins UI at https://127.0.0.1:8088/. On the main menu, click Manage Jenkins > Manage Plugins. Choose the Available tab, then scroll down or search for the Anchore Container Image Scanner Plugin. Check the box next to the plugin and choose Install without restart.

Once the installation completes, go back to the main menu in Jenkins and choose Manage Jenkins, then Configure System. Scroll down to Anchore Configuration. Confirm Engine Mode is selected and a URL is entered, which is output from the Helm installation. Add the username and password (default admin/foobar). For debugging purposes, check Enable DEBUG logging.

Now that the plugin is configured, you can set up a Jenkins pipeline to scan your container builds.
Jenkins pipeline and Anchore scanning
The purpose of this setup is to be able to inspect container images on the fly to ensure they meet security requirements. To do so, use Anchore Engine and give it permission to access your images. In this example, they are on Docker Hub, but they could also be on Quay or any other container registry supported by Anchore.
In order to run the necessary commands on the command line, we need to find our Anchore pod name, then SSH into it using kubectl exec:
$ kubectl get all
NAME                               READY     STATUS    RESTARTS   AGE
pod/anchore-cli-86d7fd9568-rmknw   1/1       Running   2          2d

NAME                 TYPE        CLUSTER-IP   EXTERNAL-IP   PORT(S)   AGE
service/kubernetes   ClusterIP   10.96.0.1    <none>        443/TCP   7d

NAME                          DESIRED   CURRENT   UP-TO-DATE   AVAILABLE   AGE
deployment.apps/anchore-cli   1         1         1            1           2d

NAME                                     DESIRED   CURRENT   READY     AGE
replicaset.apps/anchore-cli-86d7fd9568   1         1         1         2d
# Let’s connect to our anchore-cli pod
$ kubectl exec -it anchore-cli-86d7fd9568-rmknw -i -t -- bash
[anchore@anchore-cli-86d7fd9568-rmknw anchore-cli]$ anchore-cli --u admin  --p foobar  registry add index.docker.io <username> <password>
Registry: index.docker.io
User: jrepka
Type: docker_v2
Verify TLS: True
Created: 2019-05-14T22:37:59Z
Updated: 2019-05-14T22:37:59Z
Anchore Engine is now ready to work with your registry. There are several ways it can do so, including:
- Analyzing images
- Inspecting image content
- Scanning repositories
- Viewing security vulnerabilities
Point Anchore Engine toward an image to analyze it against your policy. For our testing, we'll use the publicly available Cassandra image:
[anchore@anchore-cli-86d7fd9568-rmknw anchore-cli]$ anchore-cli --u admin  --p foobar   image add
docker.io/library/cassandra:latest

Image Digest: sha256:7f7afff84384e36593b085d62e087674029de9aced4482c7780f155d8ee55fad
Parent Digest: sha256:800084987d58c2a62daeea4662ecdd79fd4928d449279bd410ef7690ef482469
Analysis Status: not_analyzed
Image Type: docker
Analyzed At: None
Image ID: a34c036183d18527684cdb613fbb1c806c7e1bc26f6911dcc25e918aa7b093fc
Dockerfile Mode: None
Distro: None
Distro Version: None
Size: None
Architecture: None
Layer Count: None

Full Tag: docker.io/library/cassandra:latest
Tag Detected At: 2019-07-09T17:44:45Z
You will also need to grab a default policy ID to test against for your pipeline. (In a future article, I will go into customizing policy and whitelist rules.)
Run the following command to get the policy ID:
[anchore@anchore-cli-86d7fd9568-rmknw anchore-cli]$ anchore-cli --u admin  --p foobar policy list

Policy ID                                   Active        Created                     Updated
2c53a13c-1765-11e8-82ef-23527761d060        True          2019-05-14T22:12:05Z        2019-05-14T22:12:05Z
Now that you have added a registry and the image you want, you can build a pipeline to scan it continuously.
Scanning works in this order: Build, push, scan. To prevent images that do not meet security requirements from making it into production, I recommend a tiered approach to security scanning: promote a container image to a separate development environment and promote it to production only once it passes the Anchore Engine's scan.
We can't do anything too exciting until we configure our custom policy, so we will make sure a scan completes successfully by running a Hello World version of it. Below is an example workflow written in Groovy:
node {
   echo 'Hello World'
}
To run this code, log back into the Jenkins UI at localhost:8088, choose New Item, Pipeline, then place this code block into the Pipeline Script area.

It will take some time to complete since we're building the entire Cassandra image added above. You will see a blinking red icon in the meantime.

And it will eventually finish and pass. That means we have set everything up correctly.
That's a wrap
If you made it this far, you have a running Minikube configuration with Jenkins and Anchore Engine. You also have one or more images hosted on a container registry service and a way for Jenkins to show errors when images don't meet the default policy. In the next article, we will build a custom pipeline that verifies security policies set by Anchore Engine.
Anchore can also be used to scan large-scale Amazon Elastic Container Registries (ECRs), as long as the credentials are configured properly in Jenkins.
Other resources
This is a lot of information for one article. If you'd like more details, the following links (which include my GitHub for all the examples in this tutorial) may help:
Are there any specific pipelines you want me to build in the next tutorial? Let me know in the comments.


2 Comments