

After nearly six months of frequent video conferencing, I was tired of looking at my colleagues as tiny thumbnails on 13" and 15" laptop displays. However, I didn't want the clutter of a desktop or tower case and all the associated cabling.
I briefly considered a Mac Mini but didn't want to surrender to a proprietary interface. I really wanted a Linux desktop with power, portability, and a small footprint. I considered System76's Meerkat but instead opted to build my own computer using an Intel Next Unit of Computing (NUC).
Intel created the NUC as a very small, barebones computer system with a number of options. It's more powerful and more modular than something like a Raspberry Pi, but it's smaller than even a microATX sized PC tower.
In the early 1990s, it was easy to purchase a computer system without an operating system installed. Deciding what operating system you wanted to install on your computer—without having to pay the so-called "Windows tax"—is a freedom that I liked having. And there's another sense of freedom when you build your own computer—you get to choose the components that go into your computer system, rather than taking whatever a computer maker decides. There is also a measure of risk and adventure involved in a do-it-yourself PC project that makes it more fulfilling than just buying something.
What I didn't know was whether Linux would run well on a NUC. System76's Meerkat is based on the NUC platform, but I wasn't sure whether it had some "secret sauce" that made it work with Linux.
A lot of research for a little PC
I did quite a bit of research on the various NUC versions and finally settled on an Intel NUC8i5BEH kit.
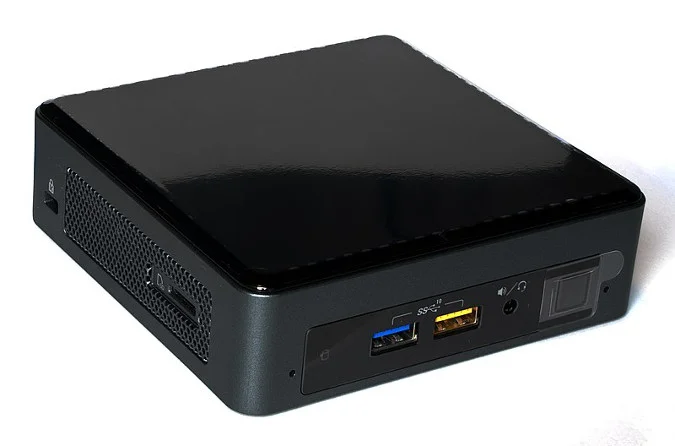
Intel NUC8i5BEK2 (Laserlicht, CC BY-SA 4.0)
Mine came with an Intel Core i5-8259U processor @ 8x 3.8GHz and I219-V Gigabit Ethernet. It also has Cannon Point-LP CNVi wireless, built-in support for Bluetooth, four USB ports, a Thunderbolt port, and HDMI. I added two 8GB RAM chips for 16GB of RAM (this NUC can support up to 32GB). I also added an SSD drive—a 250GB Samsung 970 EVO Plus M.2 NVMe SSD.
Here's a snapshot of the system I pulled from Phoronix Test Suite:
Intel Core i5-8259U @ 3.80GHz
    Core Count:       4            Thread Count:     8
 Extensions:       SSE 4.2 + AVX2 + AVX + RDRAND + FSGSBASE
    Cache Size:       6144 KB
    Microcode:        0xd6
    Scaling Driver:   intel_pstate powersave

  GRAPHICS:           Intel Iris Plus 655 3GB
    Frequency:        1050MHz
    OpenGL:           4.6 Mesa 20.0.8
    Display Driver:   modesetting 1.20.8
    Monitor:          Sceptre F27
    Screen:           1920x1080

  MOTHERBOARD:        Intel NUC8BEB
    BIOS Version:     BECFL357.86A.0073.2019.0618.1409
    Chipset:          Intel Cannon Point-LP
    Audio:            Realtek ALC233
    Network:          Intel I219-V + Intel Cannon Point-LP CNVi

  MEMORY:             16GB

  DISK:               Samsung SSD 970 EVO Plus 250GB
    File-System:      ext4
    Mount Options:    errors=remount-ro noatime rw
    Disk Scheduler:   NONE

  OPERATING SYSTEM:   Pop 20.04
    Kernel:           5.4.0-7642-generic (x86_64)
    Desktop:          GNOME Shell 3.36.4
    Display Server:   X Server 1.20.8
The NUC kit came with mounting hardware to attach it to the back of a monitor. I opted for a wireless keyboard and mouse and happened to have a Logitech C270 webcam lying around from a previous project.
Assembling the NUC
When the package came in the mail, I was eager to assemble my new computer. I took the NUC out of its box and looked at the directions. I learn best by watching, so I found a good video on YouTube that shows how to open the NUC and install RAM and an SSD drive. Following the video's instructions, I unscrewed the four screws at the bottom of the device, removed the cover, and easily snapped the two 8GB RAM chips in place.
Installing the SSD drive was a bit more difficult. I had to remove a tiny mounting screw before inserting the NVMe drive. After dropping the screw twice and losing it in the case once, I managed to install and secure the drive. Then, I reattached the cover and resecured the four screws at the bottom.
It was finally time to see the fruits of my labor. I connected the NUC to a monitor with an HDMI cable, attached the keyboard and mouse to the USB ports, and turned on the device. As the directions instructed, I pressed the F10 key at startup to enter the BIOS and selected the USB drive on which I had previously installed System 76's Pop_OS Linux operating system.
Booting Linux on a NUC
My first boot was unsuccessful, so I set the BIOS to Legacy mode, and on the second boot, Pop_OS came up! A quick check revealed that the wireless was fine, and the keyboard and mouse were both working. The installation took only about 10 minutes. I added my favorite applications, including the Chrome browser, and began to have some fun. At first, I tried a 32" LCD television as my monitor, but the display was too grainy, so I did some research online and ordered a Sceptre 27" display.
One of the best features of the NUC is that it comes without an operating system, so you get to choose your own. The NUC platform is certified on a number of Linux distributions, including Ubuntu, OpenSuse, and Clear Linux. I booted Fedora 32 on my NUC and it worked well.
I have been impressed with the system's speed. My boot time from start to login is 17 seconds. Here is a snapshot of the system I created using Neofetch.

(Don Watkins, CC BY-SA 4.0)
Give it a try
I use my system primarily for writing, coding, video conferencing, virtualizing other operating systems, and reading. I am interested in learning more about the NUC platform and how others are using it, so be sure to share your experience in the comments section.


6 Comments