Containers and Kubernetes are awesome technologies that enable applications to run without a heavy operating system (OS), as using a virtual machine (VM) would require. Container-first, cloud-native applications are the future, but not every application is suitable to be cloud-native.
Cloud-native apps stand on four pillars: containers, DevOps, continuous integration/continuous delivery (CI/CD), and microservices. Migrating a legacy, monolithic application to become cloud-native usually demands a significant refactoring effort. Sometimes a VM is better than a container, for example, with LDAP/Active Directory applications, tokenization applications, and applications requiring intensive GPU workloads.
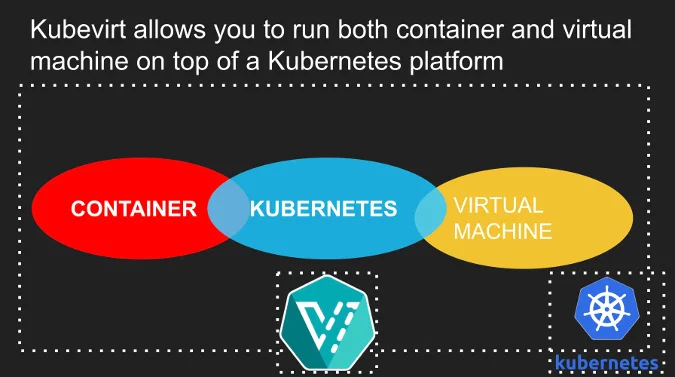
But it can get complicated when you have some cloud-native applications running on a Kubernetes platform and other applications running on non-Kubernetes platforms. What if you could run both containers and VMs on a Kubernetes platform? Wouldn't the world be beautiful?
Enter KubeVirt, an open source project distributed under an Apache 2.0 License. It was created by Red Hat engineers to enable Kubernetes to provision, manage, and control VMs alongside container resources. KubeVirt can make it easier for an enterprise to move from a VM-based infrastructure to a Kubernetes and container-based stack, one application at a time.

(Bryant Son, CC BY-SA 4.0)
In this article, I will show how to use KubeVirt through a locally runnable, open source Kubernetes platform called Minikube. If you prefer, you can watch this video that explains KubeVirt's use cases, how to install Minikube, and the rest of the tutorial.
Prerequisites
Before getting started, you need a Kubernetes platform deployed on a cloud environment, a bare-metal instance, or a local computer. In a production environment, it is best to deploy Kubernetes on a bare-metal instance. However, in this demo, I will use Minikube, an open source platform, to run Kubernetes on a local computer. If you don't already have it, download and install Minikube.
Before booting Minikube, it's a good idea to boost its memory to 4GB:
minikube config -p kubevirt set memory 4096Then start Minikube:
minikube startStep 1: Download and install KubeVirt Operator
Take note of the latest KubeVirt release version from its GitHub repository. You don't need to download anything yet, just get the number and then set the environment variable in your command-line interface (CLI):
export KUBEVIRT_VERSION="v0.32.0"Replace v0.32.0 in the above with the latest release version (found in the link above).
KubeVirt uses an Operator to manage the application's lifecycle so that any configuration or service change will update that specific component without requiring a new deployment. You can download the KubeVirt Operator definition with wget:
wget https://github.com/kubevirt/kubevirt/releases/download/${KUBEVIRT_VERSION}/kubevirt-operator.yamlWhen you download a file, it's a good idea to explore its file structure to understand what it does, so feel free to do that now.
Next, apply the KubeVirt Operator to the running Minikube:
kubectl apply -f kubevirt-operator.yamlStep 2: Enable software emulation
This step is not necessary if you're using a bare-metal instance, but you will want to turn on software emulation for this tutorial. This is pretty easy to do by creating a ConfigMap that has the debug.useEmulation property set to true:
kubectl create configmap kubevirt-config -n kubevirt --from-literal debug-useEmulation=trueStep 3: Download and install KubeVirt
The next step is to install KubeVirt with its custom resource definition (CRD) file. Download the file:
wget https://github.com/kubevirt/kubevirt/releases/download/${KUBEVIRT_VERSION}/kubevirt-cr.yaml
After opening the file and exploring its contents, apply the definition file:
kubectl apply -f kubevirt-cr.yamlThis installs KubeVirt in a project/namespace called kubevirt.
After a while, check that all the pods are up and running:
kubectl get pods -n kubevirtStep 4: Download and set virtctl
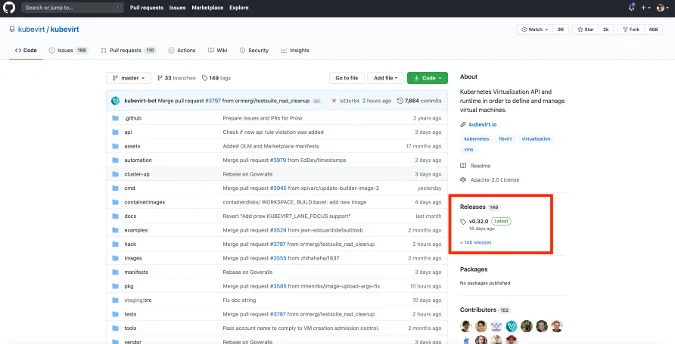
Before trying your VM, you need to have virtctl, a CLI to interact with VMs. To download virtctl, go to the KubeVirt repository and click Releases on the right-hand side of the page.

(Bryant Son, CC BY-SA 4.0)
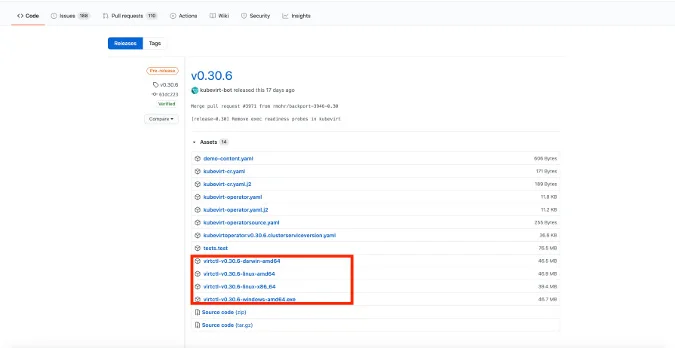
This opens a page with all of KubeVirt's releases. Click Assets at the bottom of the latest version; this will expand to reveal files you can download. Find the appropriate version of virtctl for your operating system and download it.

(Bryant Son, CC BY-SA 4.0)
How you install virtctl will vary depending on your operating system. For a Linux or macOS environment, add the path to your .bashrc file. Edit the .bashrc file in Vim with:
vim ~/.bashrcAnd add the following lines:
export VIRTCTL_PATH=DOWNLOADED-PATH-TO-YOUR-VIRTCTLWhere DOWNLOADED-PATH-TO-YOUR-VIRTCTL is the directory path where you downloaded virtctl.
Export PATH:
export PATH="$PATH:$VIRTCTL_PATH"Save the file and exit out of it. Then enter:
source ~/.bashrcThis makes the virtctl path a part of your environment. Enter virtctl on the command line to verify that the installation worked.
Step 5: Download a sample VM definition and explore the YAML file
Next, download a sample VM definition and try to run it. The VM I'll use in this tutorial is a lightweight Linux distribution called Cirros. Download it with wget:
wget https://raw.githubusercontent.com/kubevirt/kubevirt.github.io/master/labs/manifests/vm.yamlOnce again, open the file and explore how it is structured.
Step 6: Deploy a VM and test it
Finally, provision a VM with the file you just downloaded. Enter the following command to deploy a VM:
kubectl apply -f vm.yamlNext, see the deployed VM resource:
kubectl get vmThis VM you see is not running yet. To start it, leverage virtctl:
virtctl start NAME-VMWhere NAME-VM is the name of the VM shown by typing kubectl get vm command. See the running VM instance:
kubectl get vmiConnect to the VM with:
virtctl console NAME-VMOnce you are connected, log in and take a test drive with your deployed VM.
That's it! I hope this helps you understand how to use KubeVirt to run a VM alongside your containers on a Kubernetes platform. Be sure to check out the other articles about Kubernetes, containers, and other cool subjects on Opensource.com. And feel free to share your thoughts and opinions by leaving a comment below.


1 Comment